Creating New Client Types
A client type classifies the clients of your business services. It also declares which elements of a call identify those clients, so that each client only has to give its own values.
Opening the Dialog
1. Open the Template Editor from the Template Tree
In the Template tab of the Profile dialog, find the template version in the tree and click its Edit (pencil) icon.
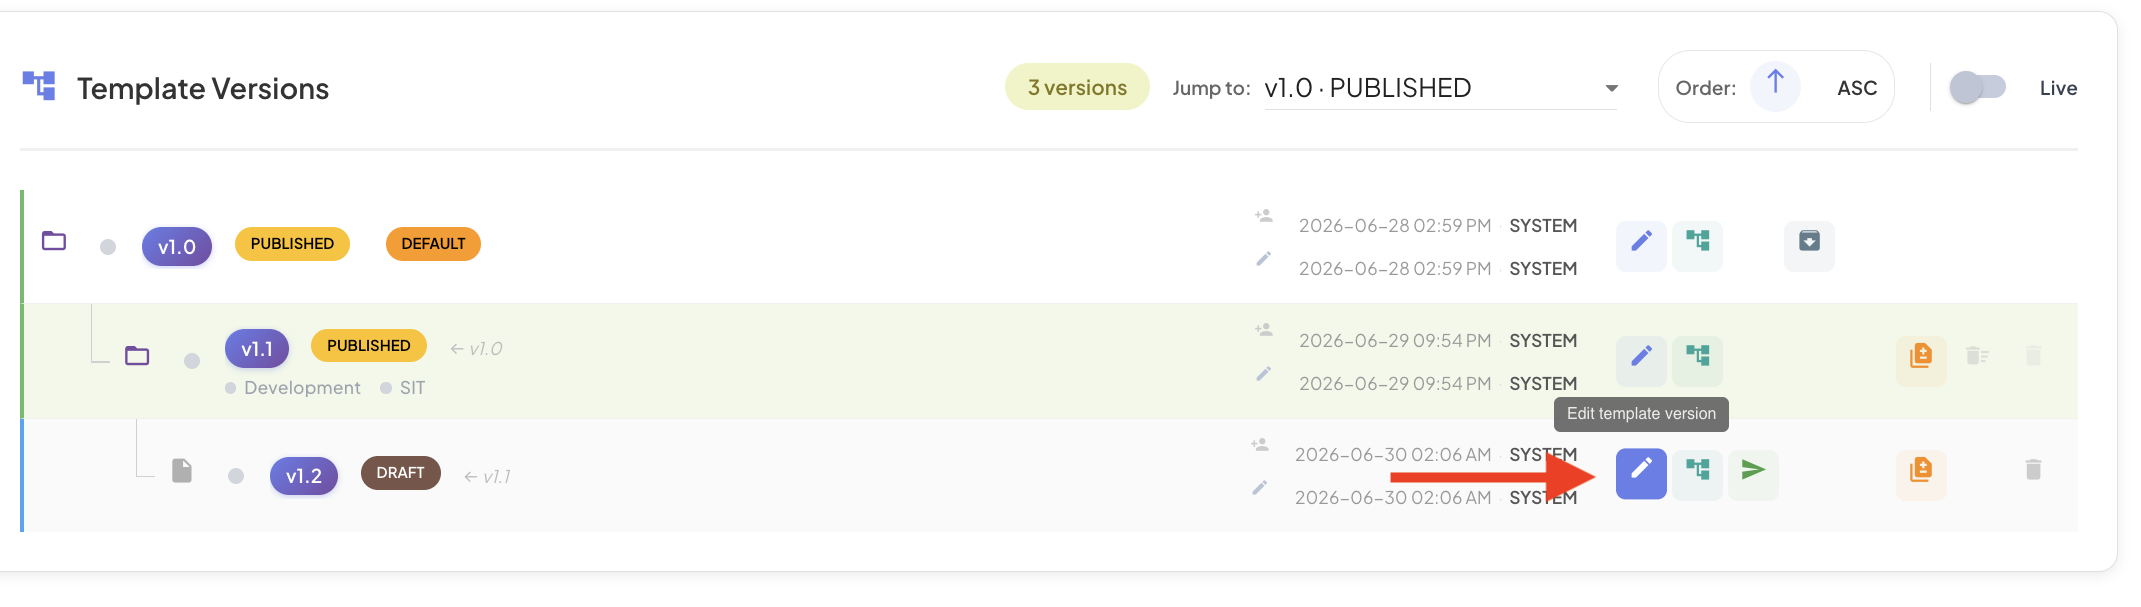
This opens the Edit Template Instance dialog, with the template name and the version being edited in its header.
2. Go to the Client Types Tab
The dialog lands on the Client Types tab, which lists the client types of the version. If you moved to another tab, click Client Types to return.
3. Click + Add Client Type
Click the + Add Client Type button below the table.
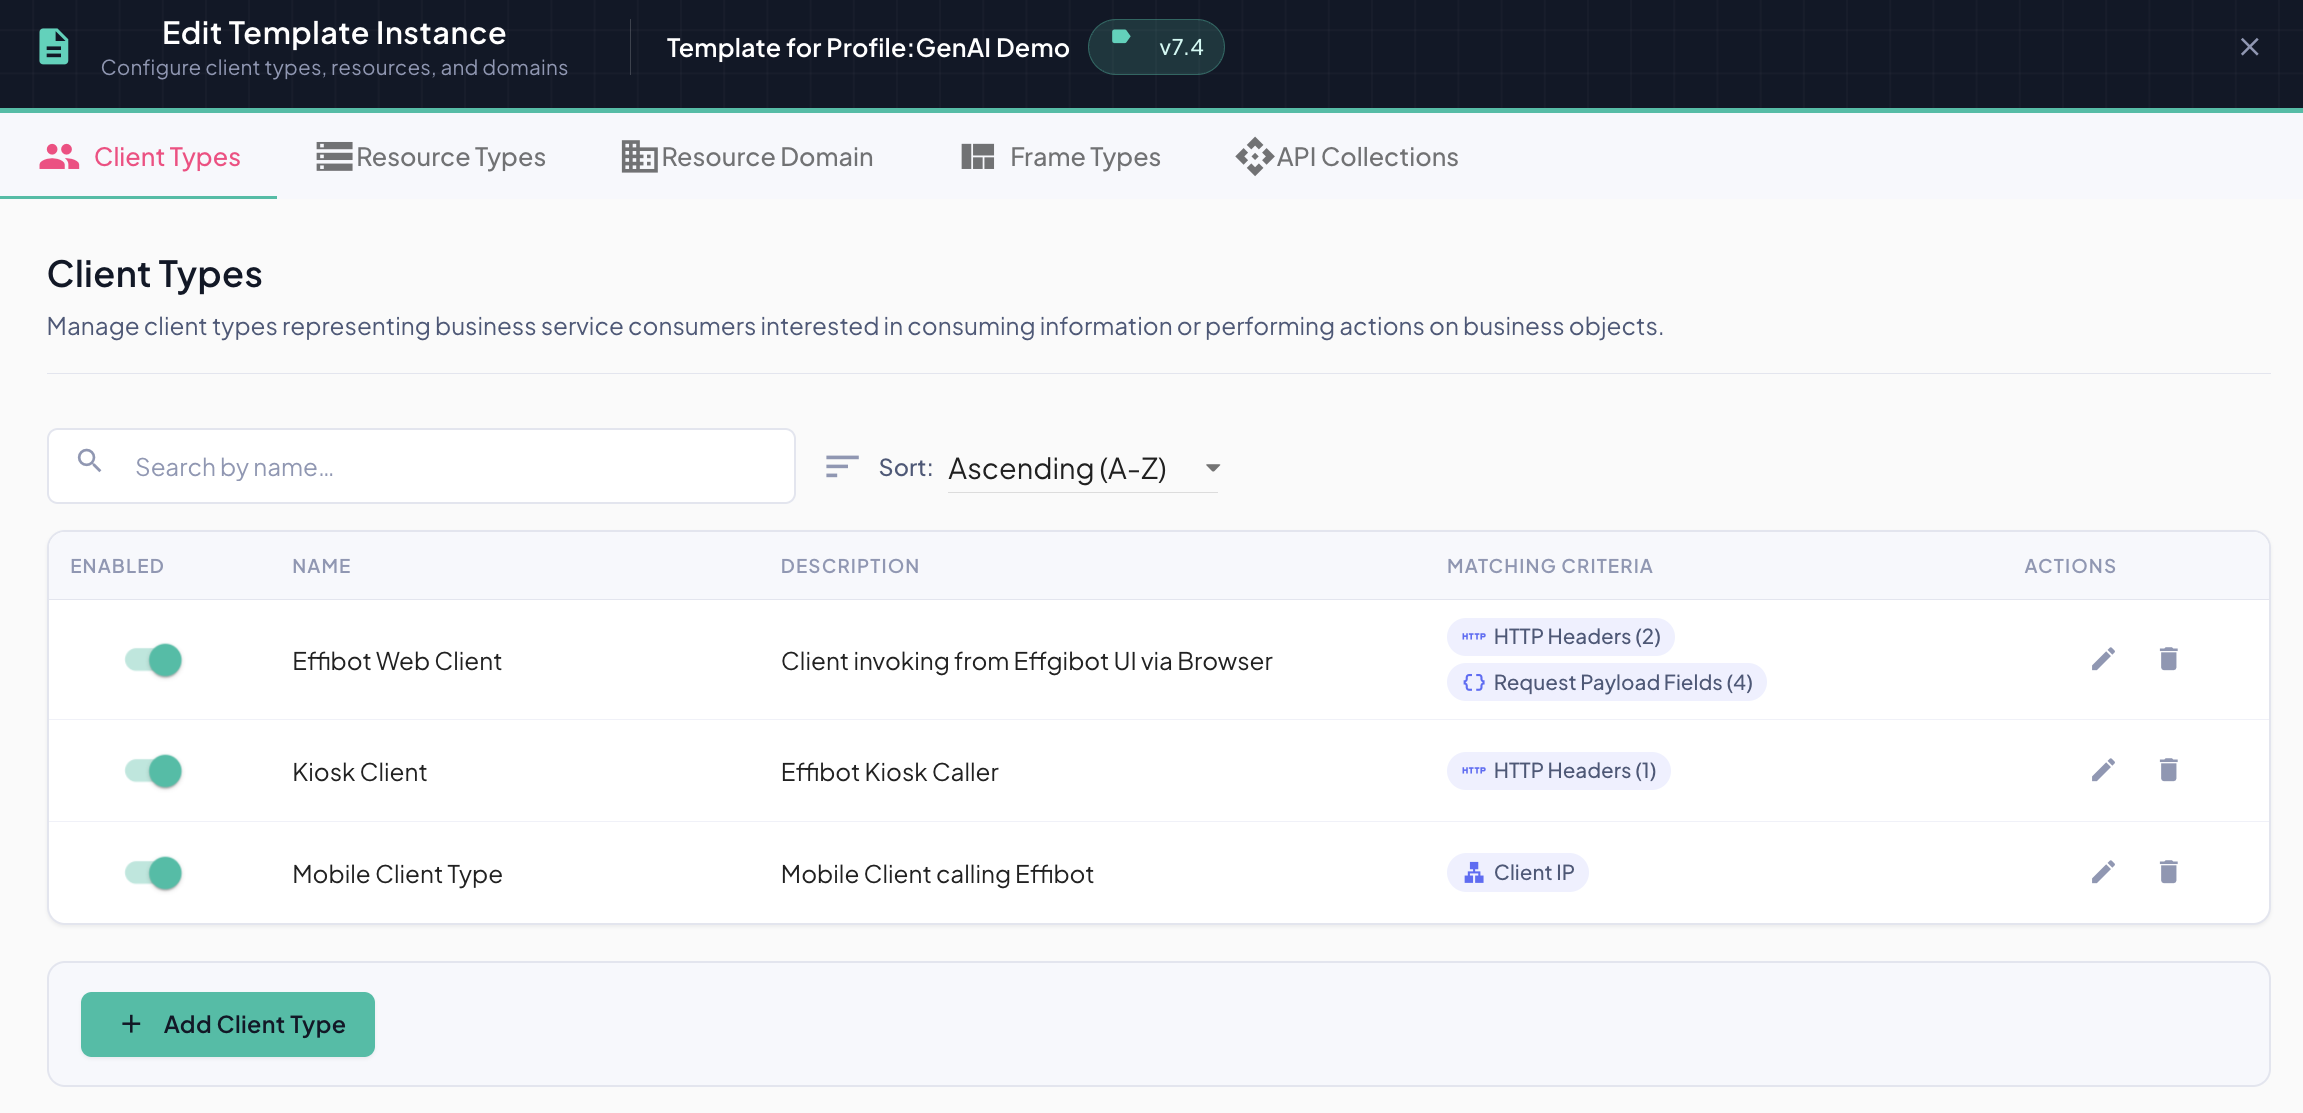
4. Fill in the Dialog
The New Client Type dialog opens:
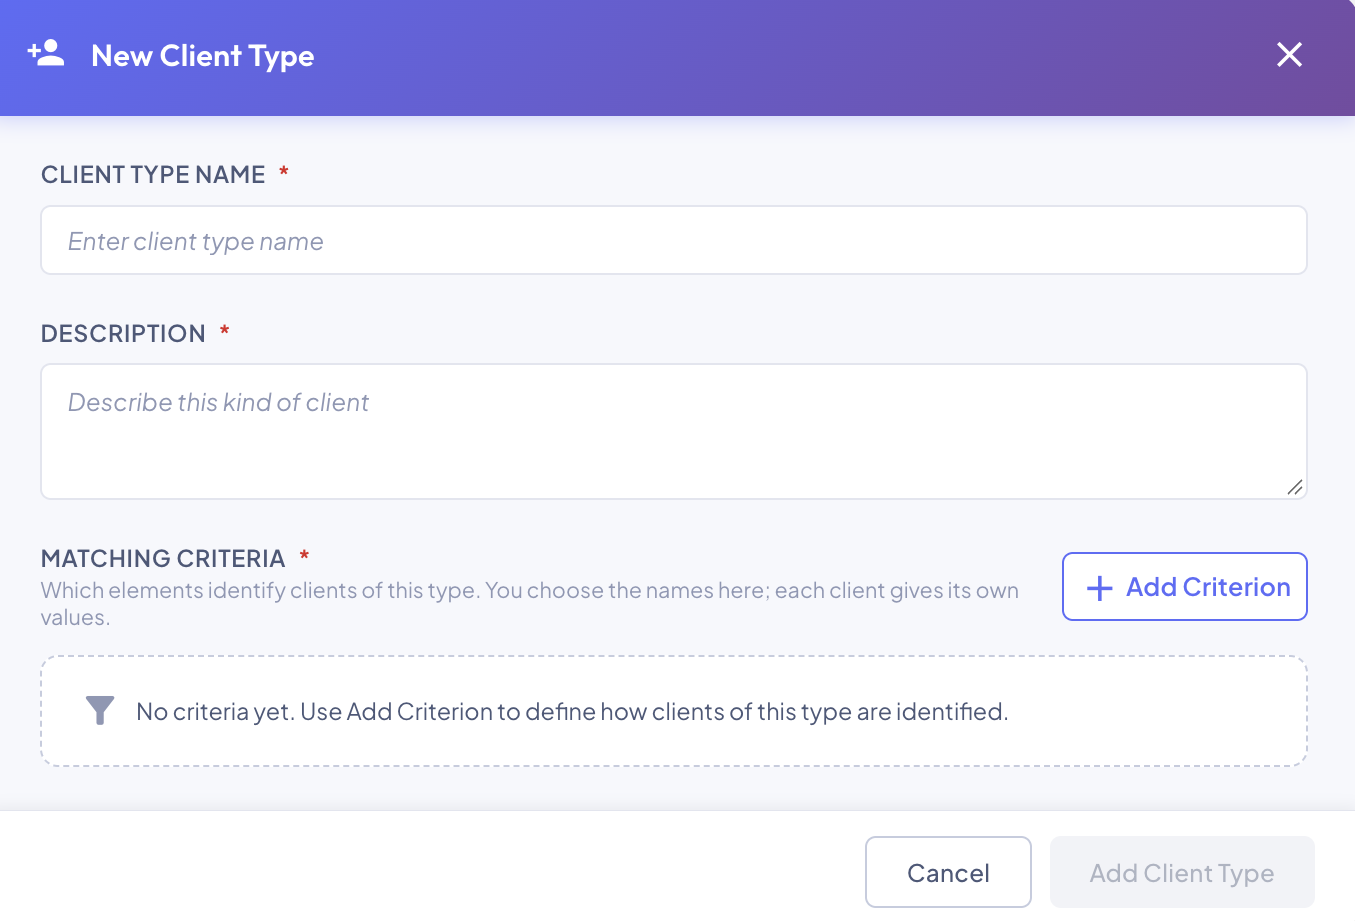
| Field | Description |
|---|---|
| Client Type Name | Required, and unique within the template version. |
| Description | Required. |
| Matching Criteria | Required: at least one. |
Add Client Type adds it to the template being edited. It is persisted when you click Save Changes in the template editor.
Matching Criteria
A client type declares which elements identify its clients. It never holds the values: each client gives its own values for those elements, per environment.
Click + Add Criterion and choose its kind. Each kind can be added once.
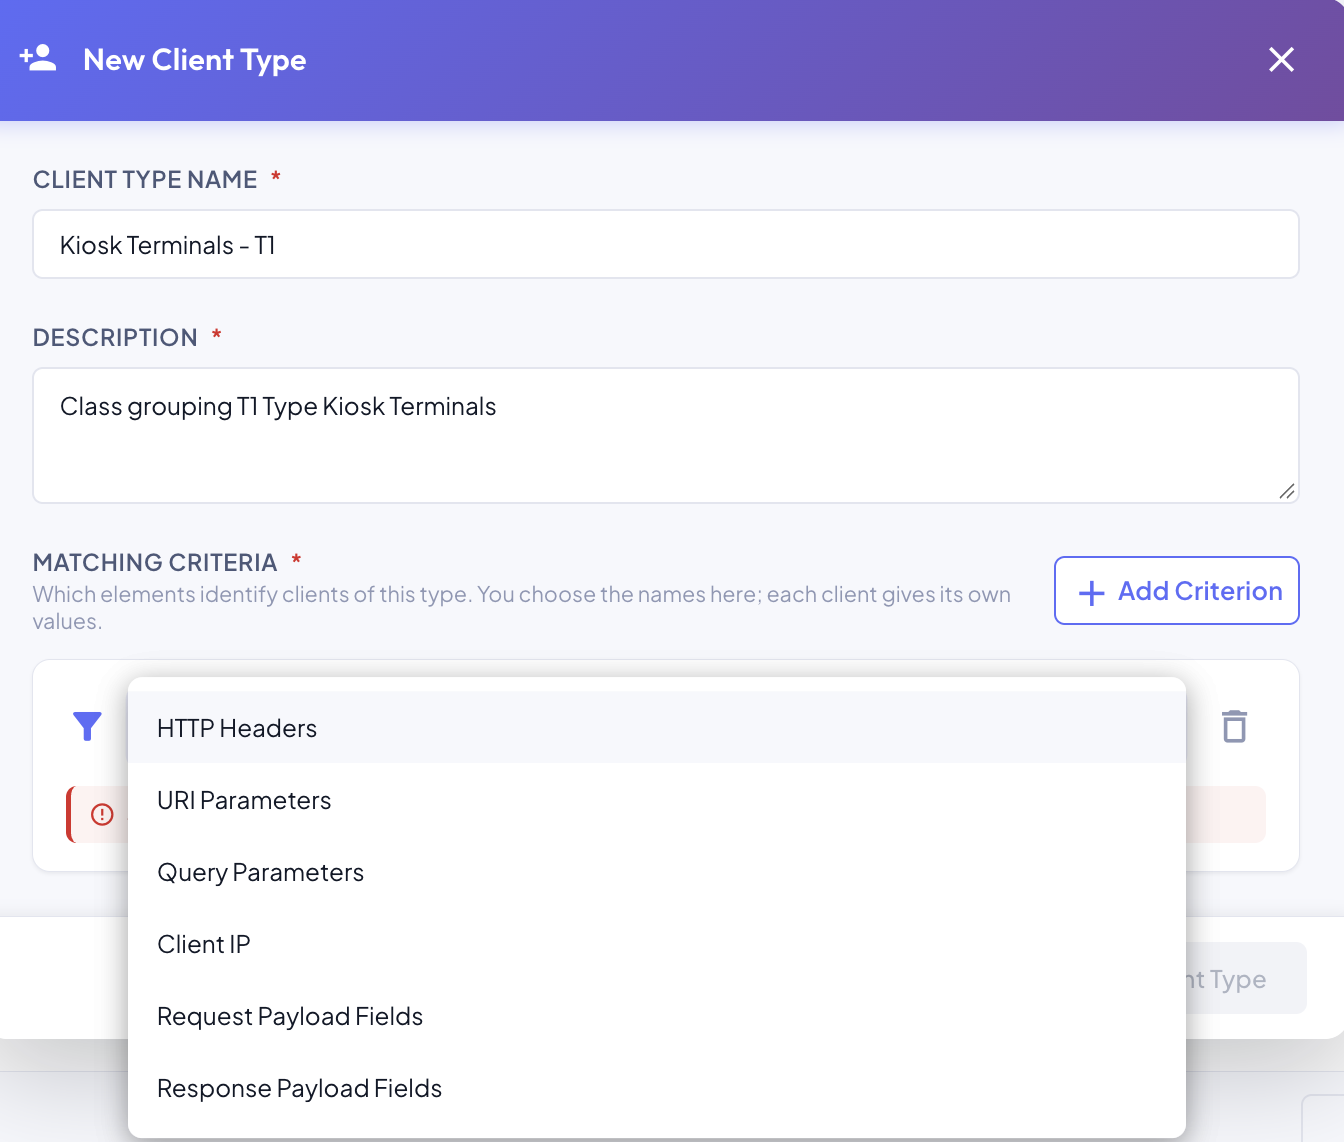
| Criterion | What you choose | Details |
|---|---|---|
| HTTP Headers | One or more headers from the standard catalog | HTTP Headers and Client IP |
| Client IP | Nothing else | HTTP Headers and Client IP |
| URI Parameters | Parameters of the template's API collections | URI and Query Parameters |
| Query Parameters | Parameters of the template's API collections | URI and Query Parameters |
| Request Payload Fields | Request body fields of the template's API collections | Payload Fields |
| Response Payload Fields | Response body fields of the template's API collections | Payload Fields |
After Creating It
- Criteria picked from an API collection follow that collection: see How API Collection Changes Affect Client Types.
- Clients adopt the criteria of the template active in each environment: see How Clients Are Reconciled.