Anchoring an ASBO to a Database Table
Overview
Anchoring is the process through which an Application Specific Business Object (ASBO) is linked to a datasource and table, enabling the mapping of physical database columns to the logical attributes of the ASBO.
Anchoring establishes the foundation for resource management by:
- Connecting logical and physical layers: Links abstract business concepts to concrete database structures
- Enabling attribute-level configuration: Allows definition of Resource Name (RN) and Resource Description (RD) at the attribute level
- Facilitating automatic imports: Enables automatic resource importation directly from the anchored table
- Creating environment mappings: Establishes the relationship between business objects and physical data sources
Anchoring vs. Environment Mapping
Anchoring is the initial linking of an ASBO to a table, which creates the master environment mapping. After anchoring, you can create additional environment mappings to link the same ASBO structure to tables in different environments.
Master Environment Mapping
When an ASBO is anchored to a table for the first time, BizMetry automatically creates a master environment mapping. This mapping serves as the source of truth for the ASBO's structure and configuration.
Master Mapping Characteristics
- Automatically created: Generated during the initial anchoring operation
- Associated with origin: Tied to the datasource and environment used during the first anchoring
- Defines structure: Establishes the canonical structure that all other environment mappings must match
- Cannot be edited: The master mapping is immutable to preserve structural integrity
- Can be deleted: Deletion breaks the anchoring relationship
Deleting the Master Environment Mapping
If the master environment mapping is deleted, the anchoring relationship is permanently broken and the ASBO returns to its previous unlinked state.
Consequences of deletion:
- ✗ The ASBO becomes unanchored
- ✗ No further resources can be imported from the database
- ✓ Previously imported resources remain intact
- ✓ The ASBO can be re-anchored to a table (creating a new master mapping)
When to Anchor an ASBO
You should anchor an ASBO in the following scenarios:
Newly Created ASBO
If you manually created an ASBO through the template editor:
- The ASBO exists as a logical definition only
- No connection to physical data exists
- Anchoring links it to a database table
- Resources can then be imported automatically
Imported but Unanchored ASBO
If you imported an ASBO definition from a template file:
- The ASBO has logical structure but no physical mapping
- Anchoring connects it to your database
- Enables resource import and management
Previously Anchored ASBO
If a previously anchored ASBO had its master mapping deleted:
- The ASBO reverted to unanchored state
- Re-anchoring establishes a new master mapping
- New structure definition is created based on the newly selected table
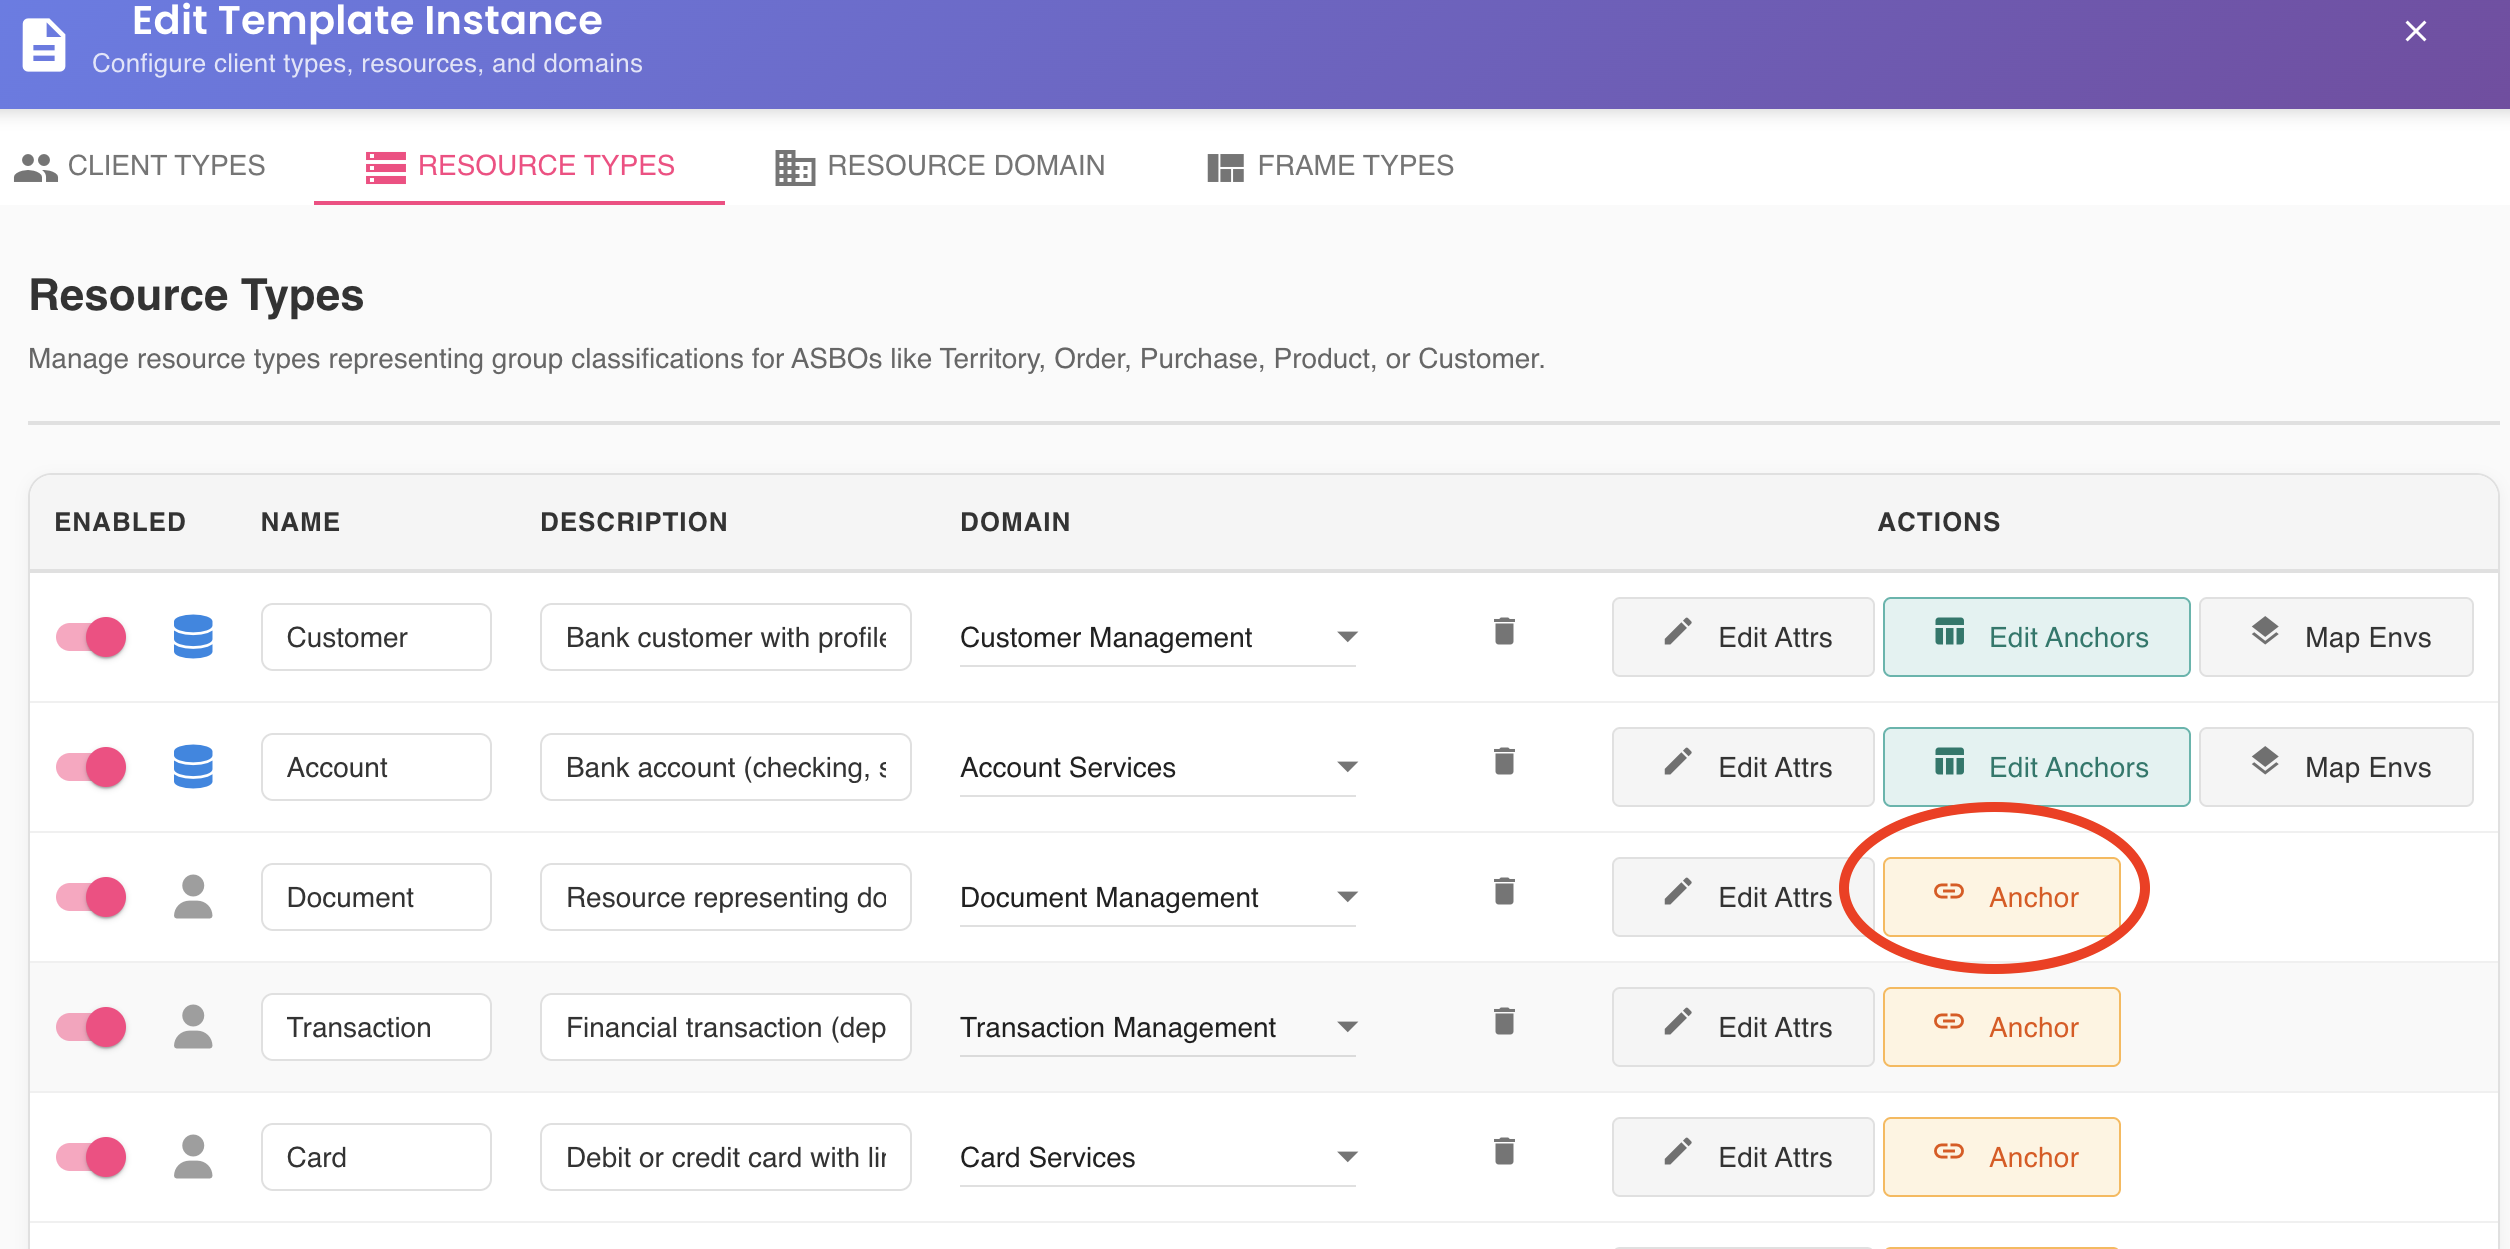
Accessing the Anchor Function
To begin the anchoring process:
- Navigate to the Resource Types tab within the template editing dialog
- Locate the ASBO you wish to anchor
- Click the "Anchor" button for that resource type
Visual Indicator
Unanchored ASBOs typically display a distinctive icon or badge indicating they are not yet linked to a database table. This helps identify which resource types need anchoring.
Datasource Prerequisites
Before you can anchor an ASBO, certain prerequisites must be met.
Required Datasource Configuration
At least one datasource must be:
- Configured: Properly set up in BizMetry with valid connection parameters
- Active: Enabled and not in a disabled or maintenance state
- Online: Successfully connected to the database server
No Available Datasources
If no datasources meet these requirements, BizMetry displays an error message when you attempt to anchor:
Error Message:
"No active datasources are available. Please configure at least one datasource before anchoring an ASBO."
Resolution:
- Navigate to the datasources configuration section
- Create a new datasource or activate an existing one
- Verify the datasource can connect successfully
- Return to anchor the ASBO
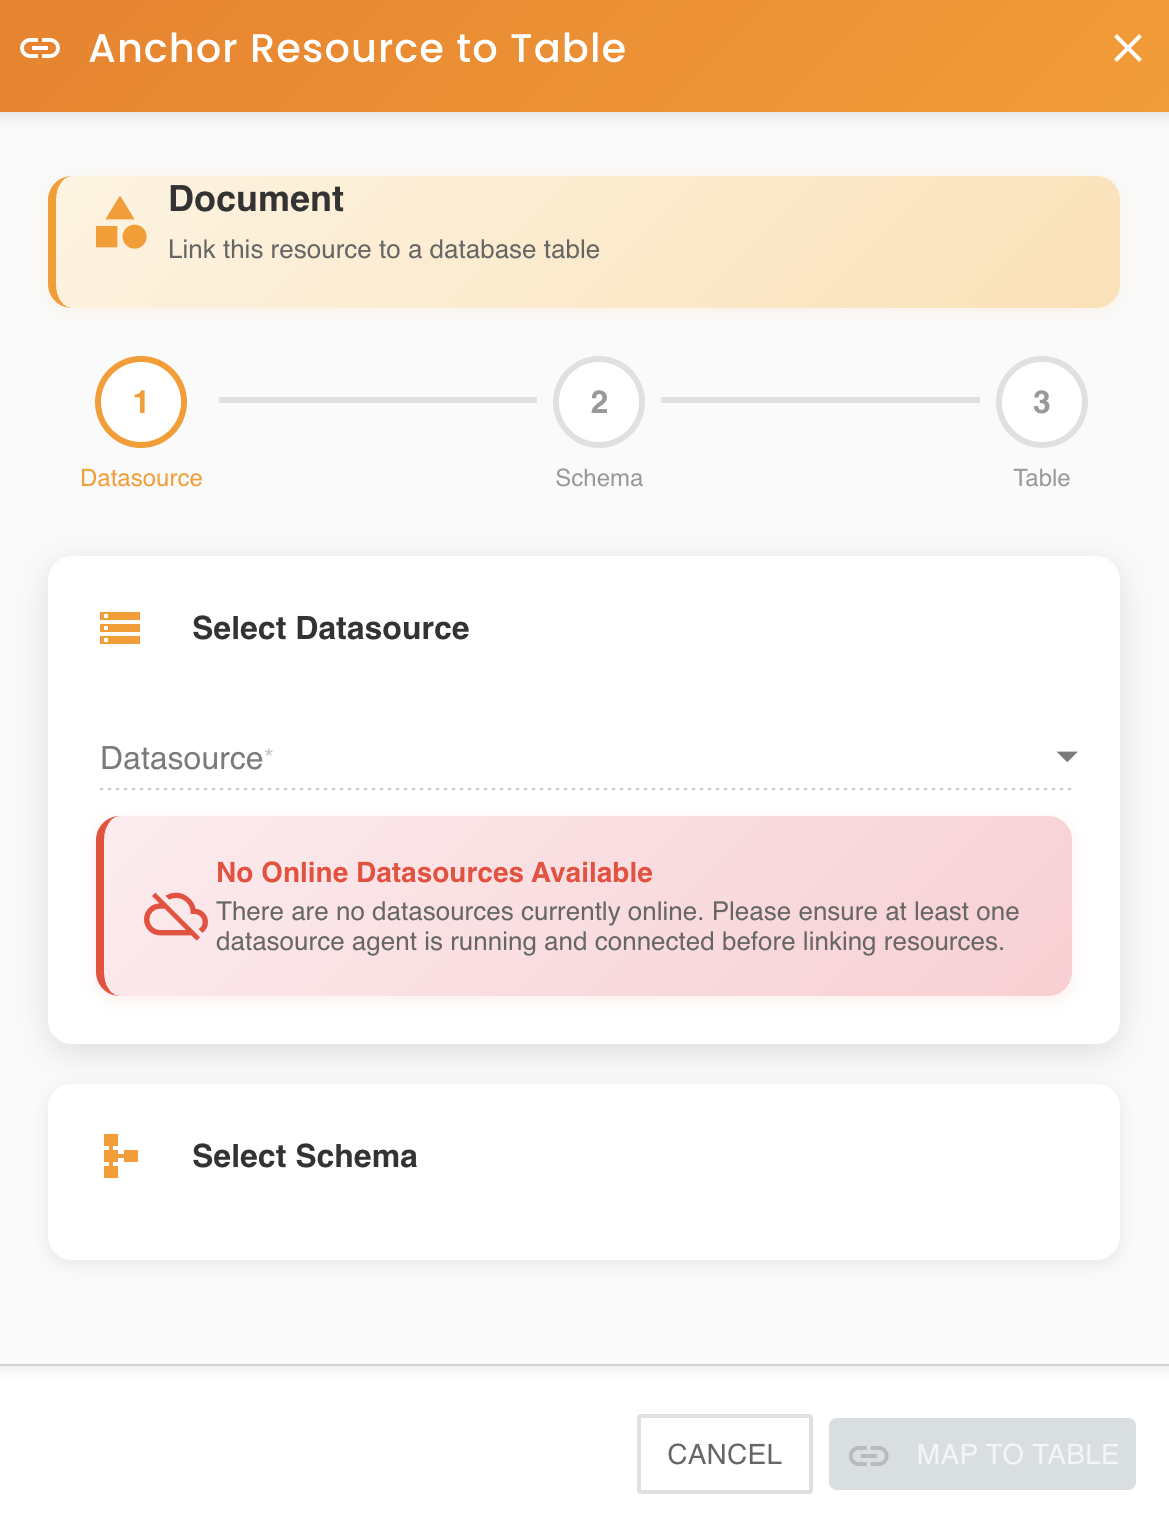
Table Selection Wizard
Once you click the "Anchor" button, the Table Selection Wizard opens, guiding you through the process of selecting the appropriate table.
Wizard Steps
The wizard presents a hierarchical selection interface:
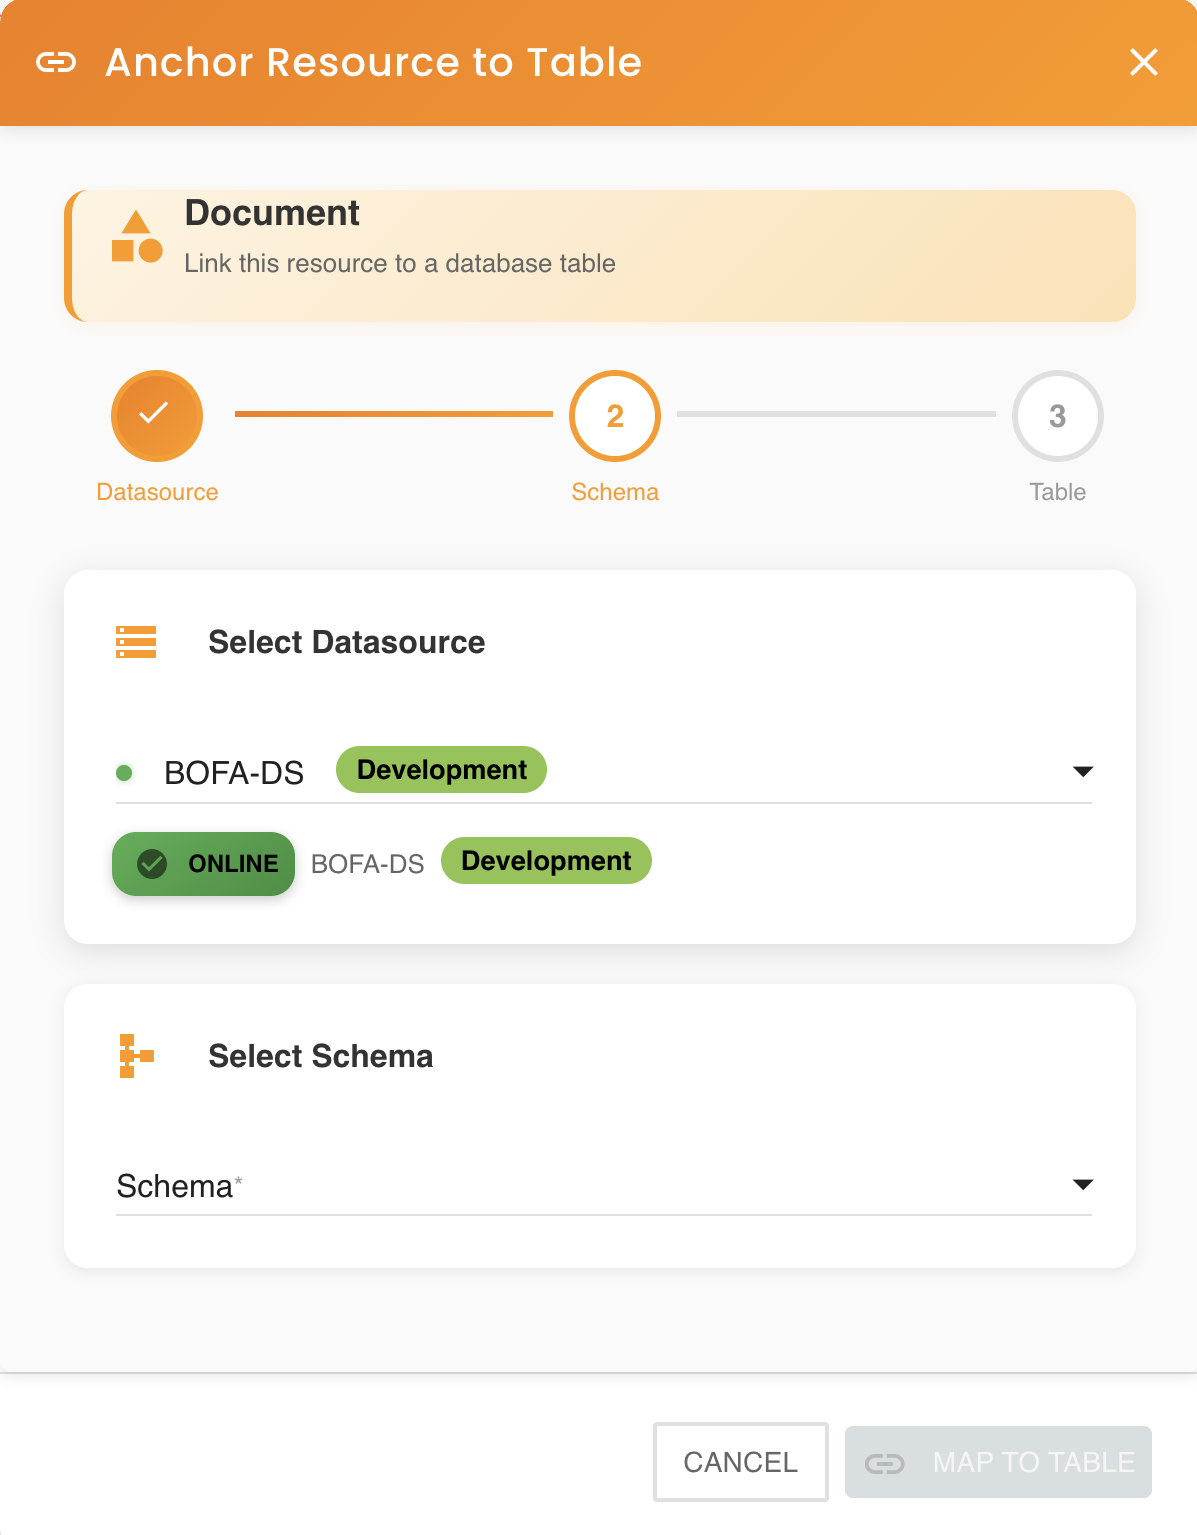
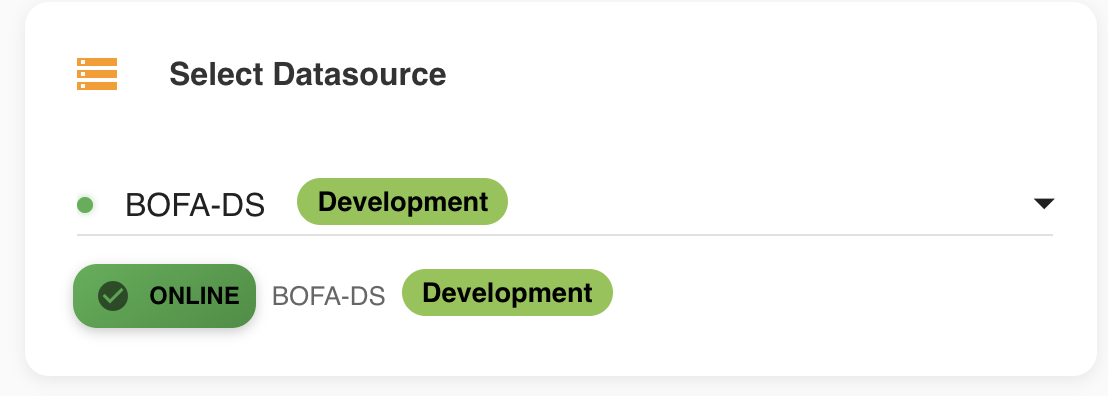
Step 1: Select Datasource
Choose the datasource that contains the target table from the dropdown list.
- Available datasources: Only datasources that are active and online appear in this list
- Connection status: BizMetry displays the current connection status for each datasource
- Database type indicator: Icons or labels may indicate the database type (PostgreSQL, MySQL, Oracle, etc.)
Datasource Filtering
The wizard automatically filters out datasources that are inactive, offline, or have connection errors, preventing selection of unavailable resources.
Step 2: Select Schema
After selecting a datasource, choose the database schema where the target table resides.
- Dynamic loading: The schema list is populated based on the selected datasource
- Permission-based: Only schemas you have permission to access are displayed
- Alphabetical ordering: Schemas are typically listed alphabetically for easy navigation
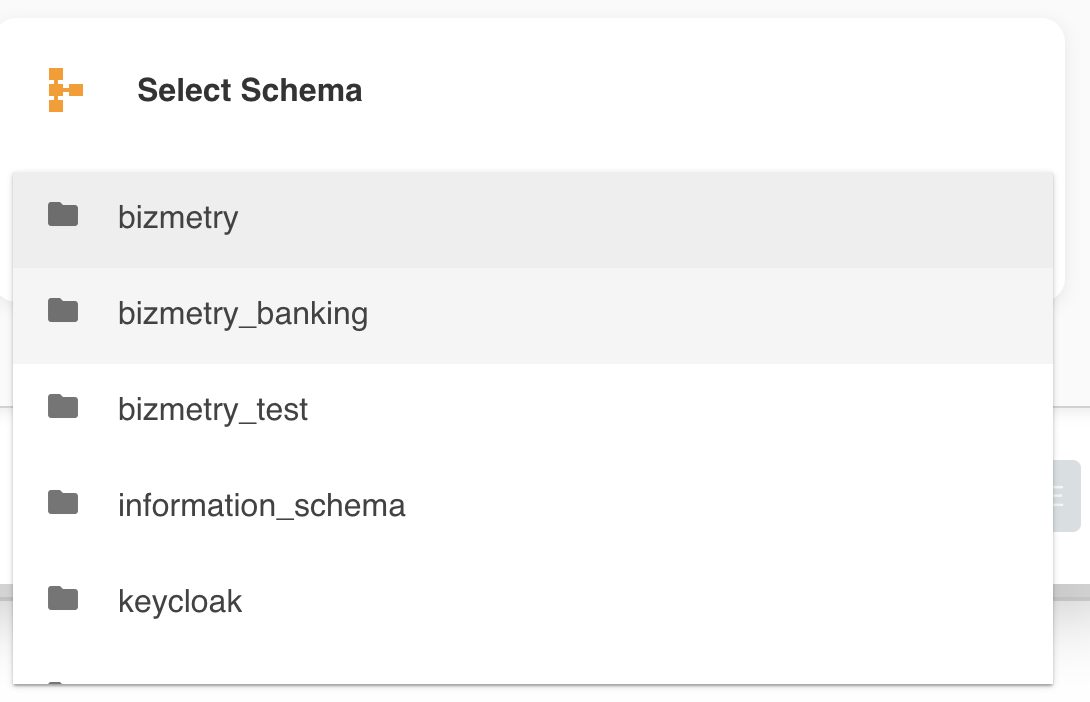
Schema Availability
If you don't see an expected schema in the list:
- Verify the datasource credentials have access to that schema
- Check database-level permissions for the service account
- Confirm the schema actually exists in the selected datasource
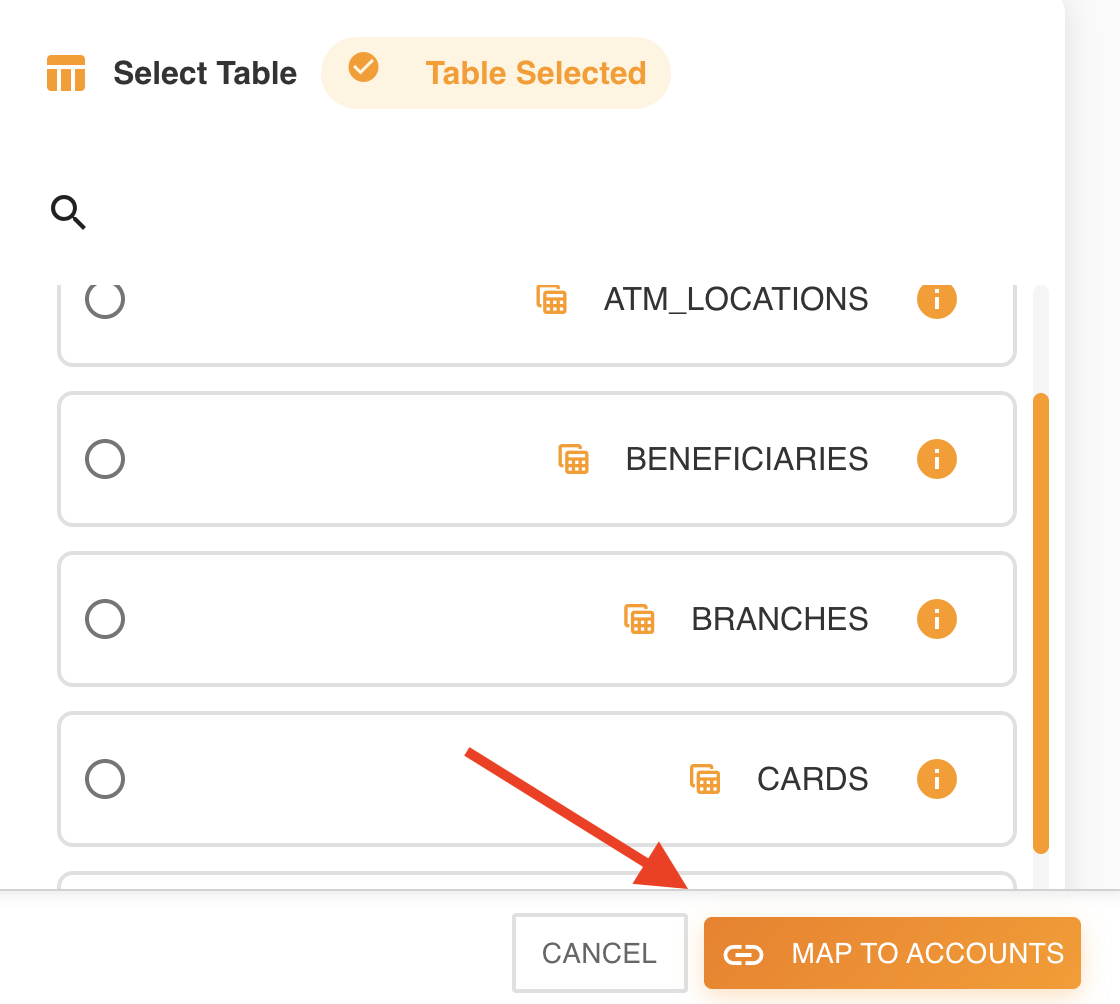
Step 3: Select Table
Finally, choose the specific table to anchor to your ASBO.
- Table listing: All tables within the selected schema are displayed
- Metadata preview: Some table information may be shown (row count, size, etc.)
- Search capability: For schemas with many tables, a search function may be available

Exploring Table Structure
Before committing to a table selection, you can inspect its structure:
- Click the information icon (i) next to any table in the list
- A schema viewer opens, displaying:
- Column names
- Data types
- Constraints (primary keys, foreign keys, unique constraints)
- Nullable status
- Default values
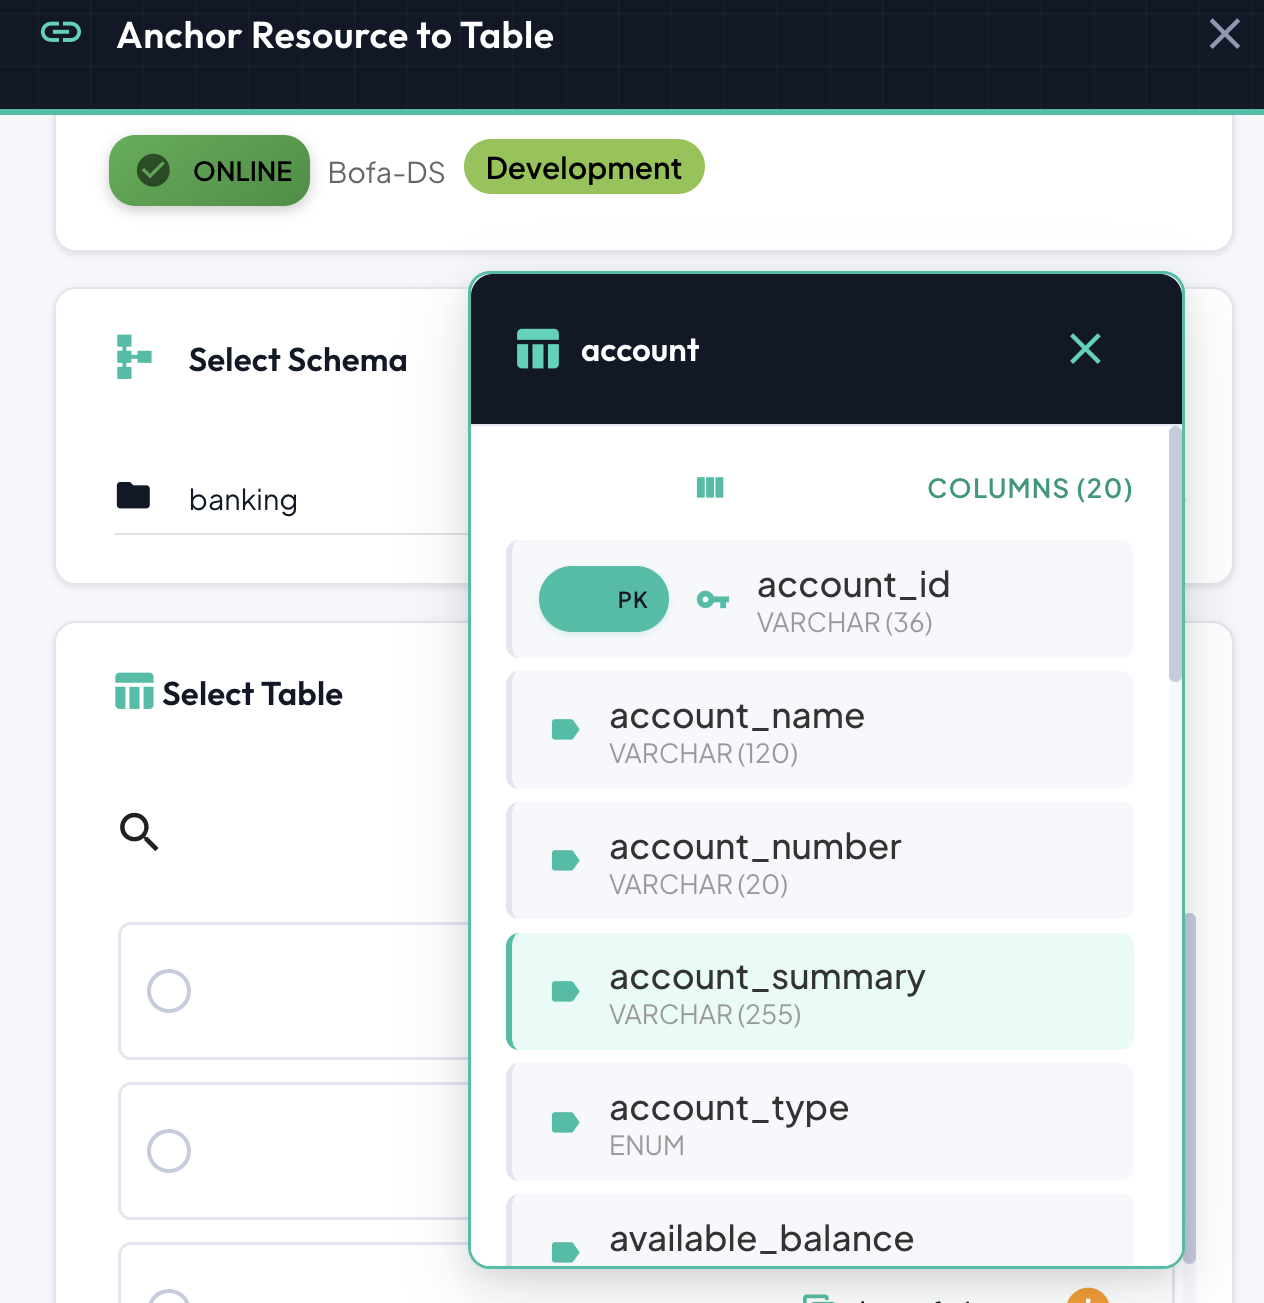
Pre-Selection Validation
Use the schema viewer to verify the table contains the columns you expect before proceeding. This helps avoid mapping issues later in the process.
Proceeding to Mapping
Once you've selected your target table:
- Review your selections (datasource, schema, table)
- Click the "Map to [table_name]" button
- The Table Mapper tool opens automatically
Next Step
With a table selected, you're ready to define how its columns relate to your ASBO's attributes. Continue to The Table Mapper to learn about drag-and-drop mapping, type compatibility, creating new attributes, and the Auto-Map automation feature.