Step 6 — Configure Mapping
The final step is the Business Event Mapper: a split-pane view where you map fields from your selected operations (left, Sources) onto the target Frame's components (right, Target).
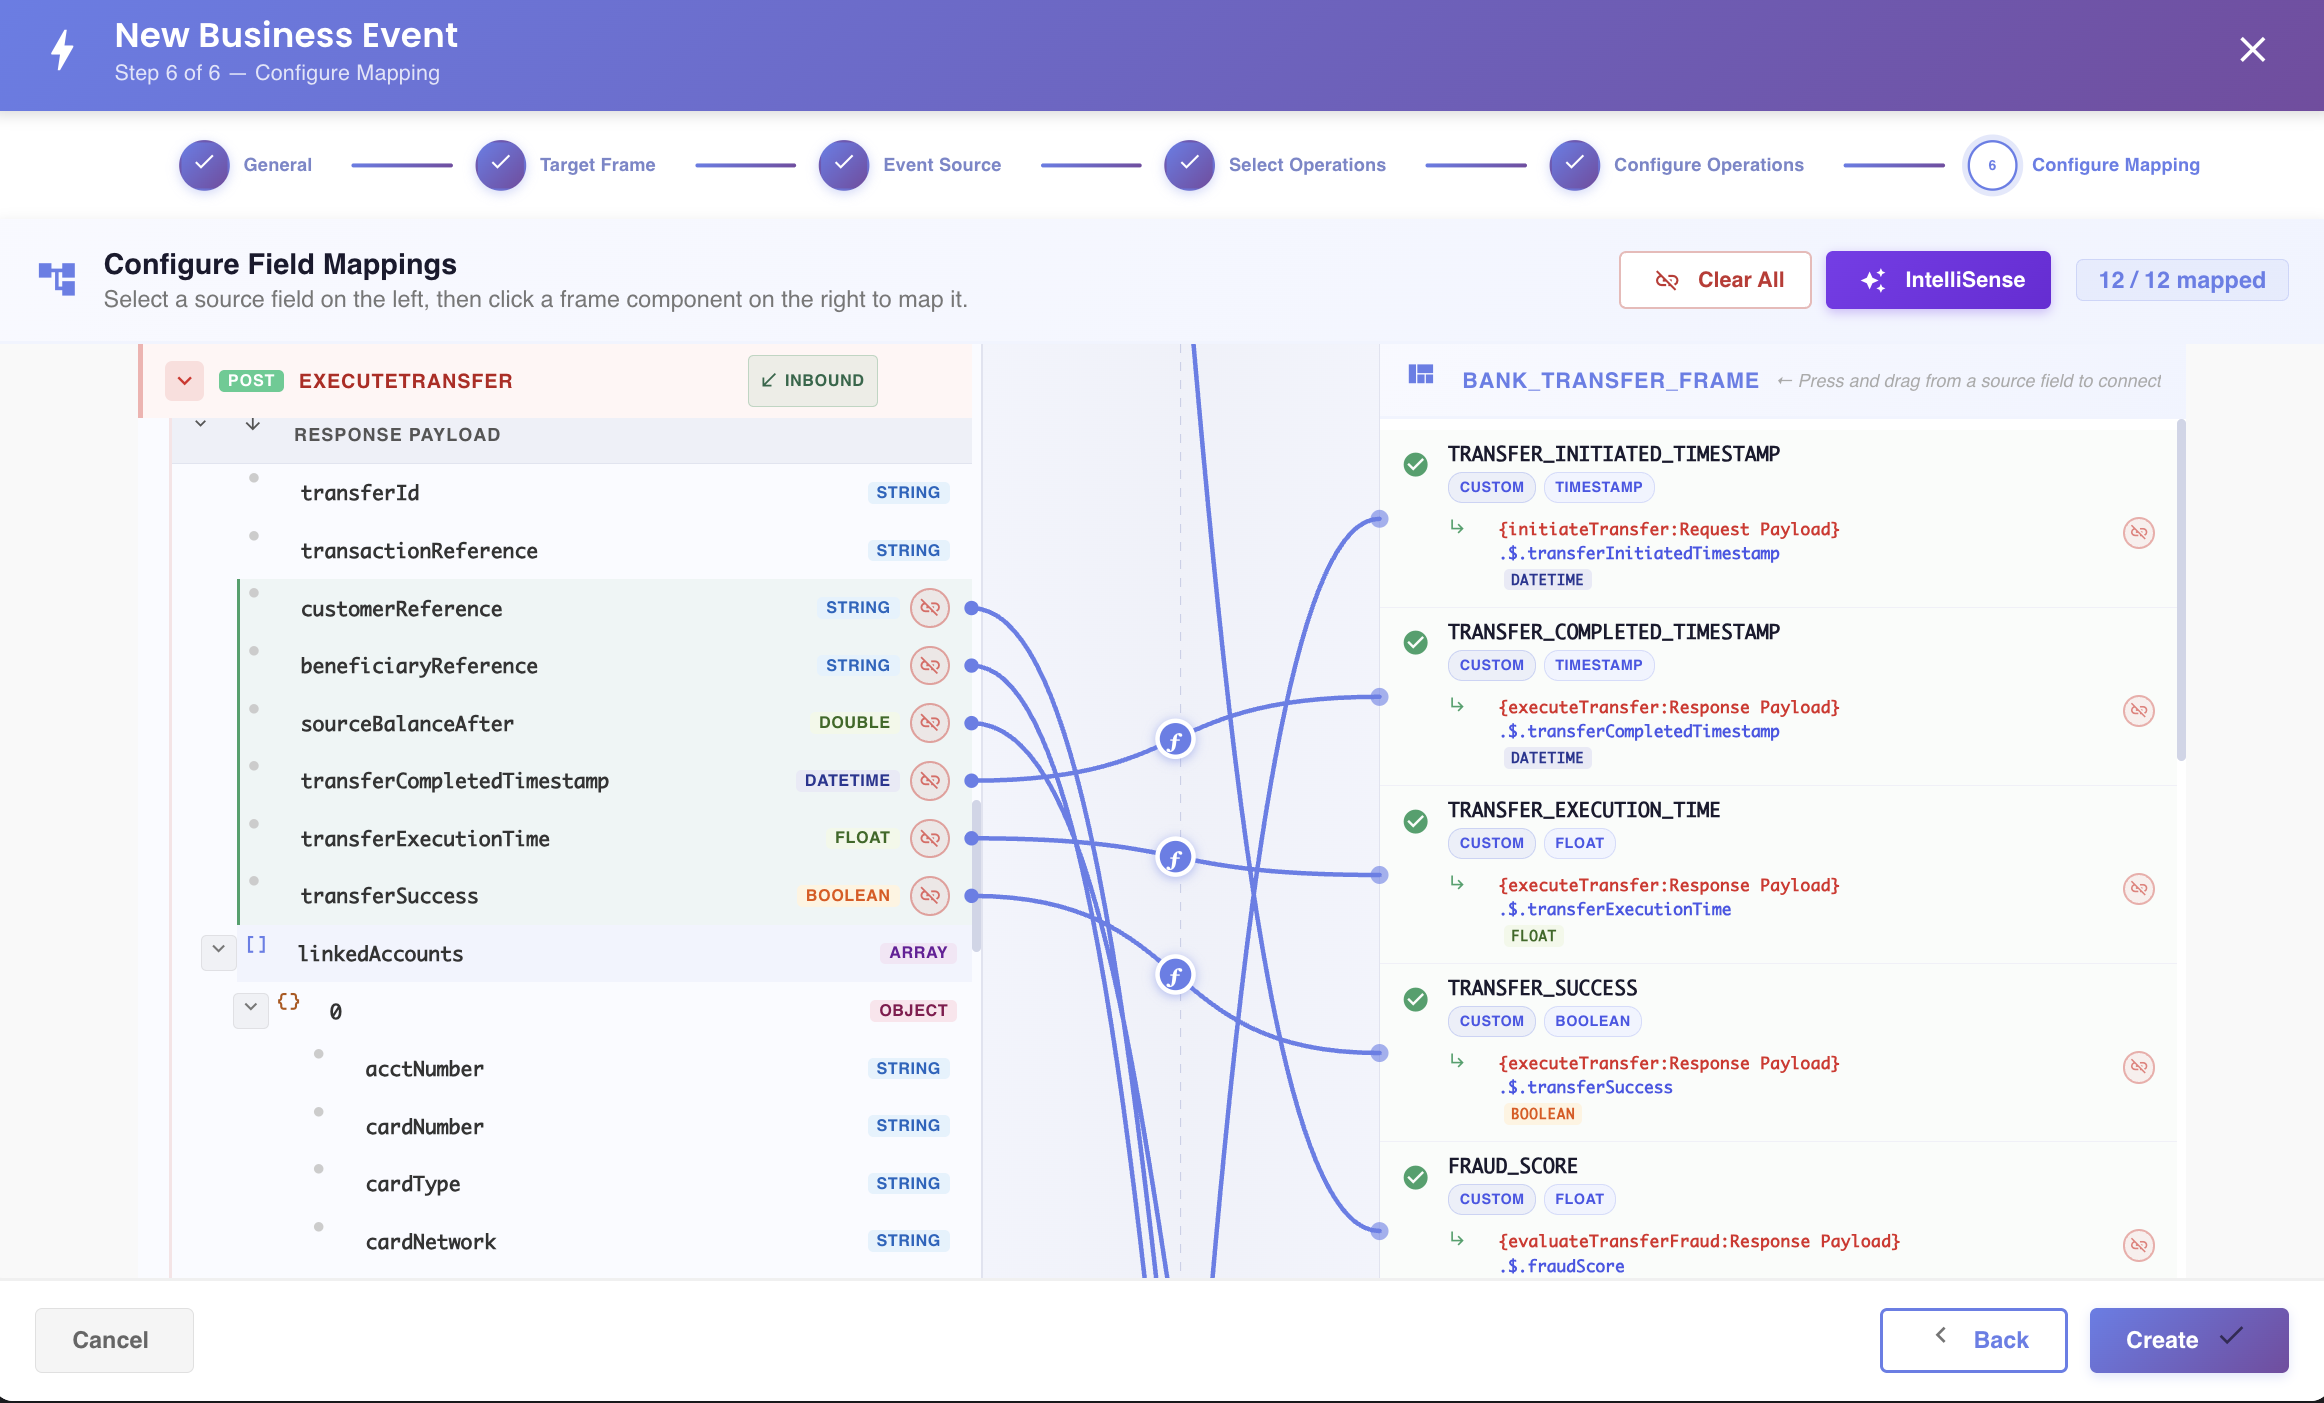
A running counter in the header (e.g. 12 / 12 mapped) tracks how many target components currently have a mapping.
Arriving with mappings already in place
If you selected your operations using IntelliSense back in Step 3, the mapper opens with those field-level suggestions already applied — you don't need to click IntelliSense again to get started. Review them the same way you would a fresh run (see below); clicking IntelliSense here just fills in whatever is still unmapped.
Required vs. optional components
Not every component in the target Frame Type needs a mapping. Each one is marked as either required or optional:
- A required component is rendered with a red asterisk (
*) right after its name. - An optional component has no asterisk — you can leave it unmapped and still create the event.
This directly affects when you can finish the wizard — see Creating the Business Event below.
Working the source panel
Each selected operation appears as its own collapsible tree on the left, with its request/response fields nested underneath. Click the chevron next to an operation's name to collapse or expand its field tree — collapsing the operations you're not currently working on reduces clutter when several are selected:
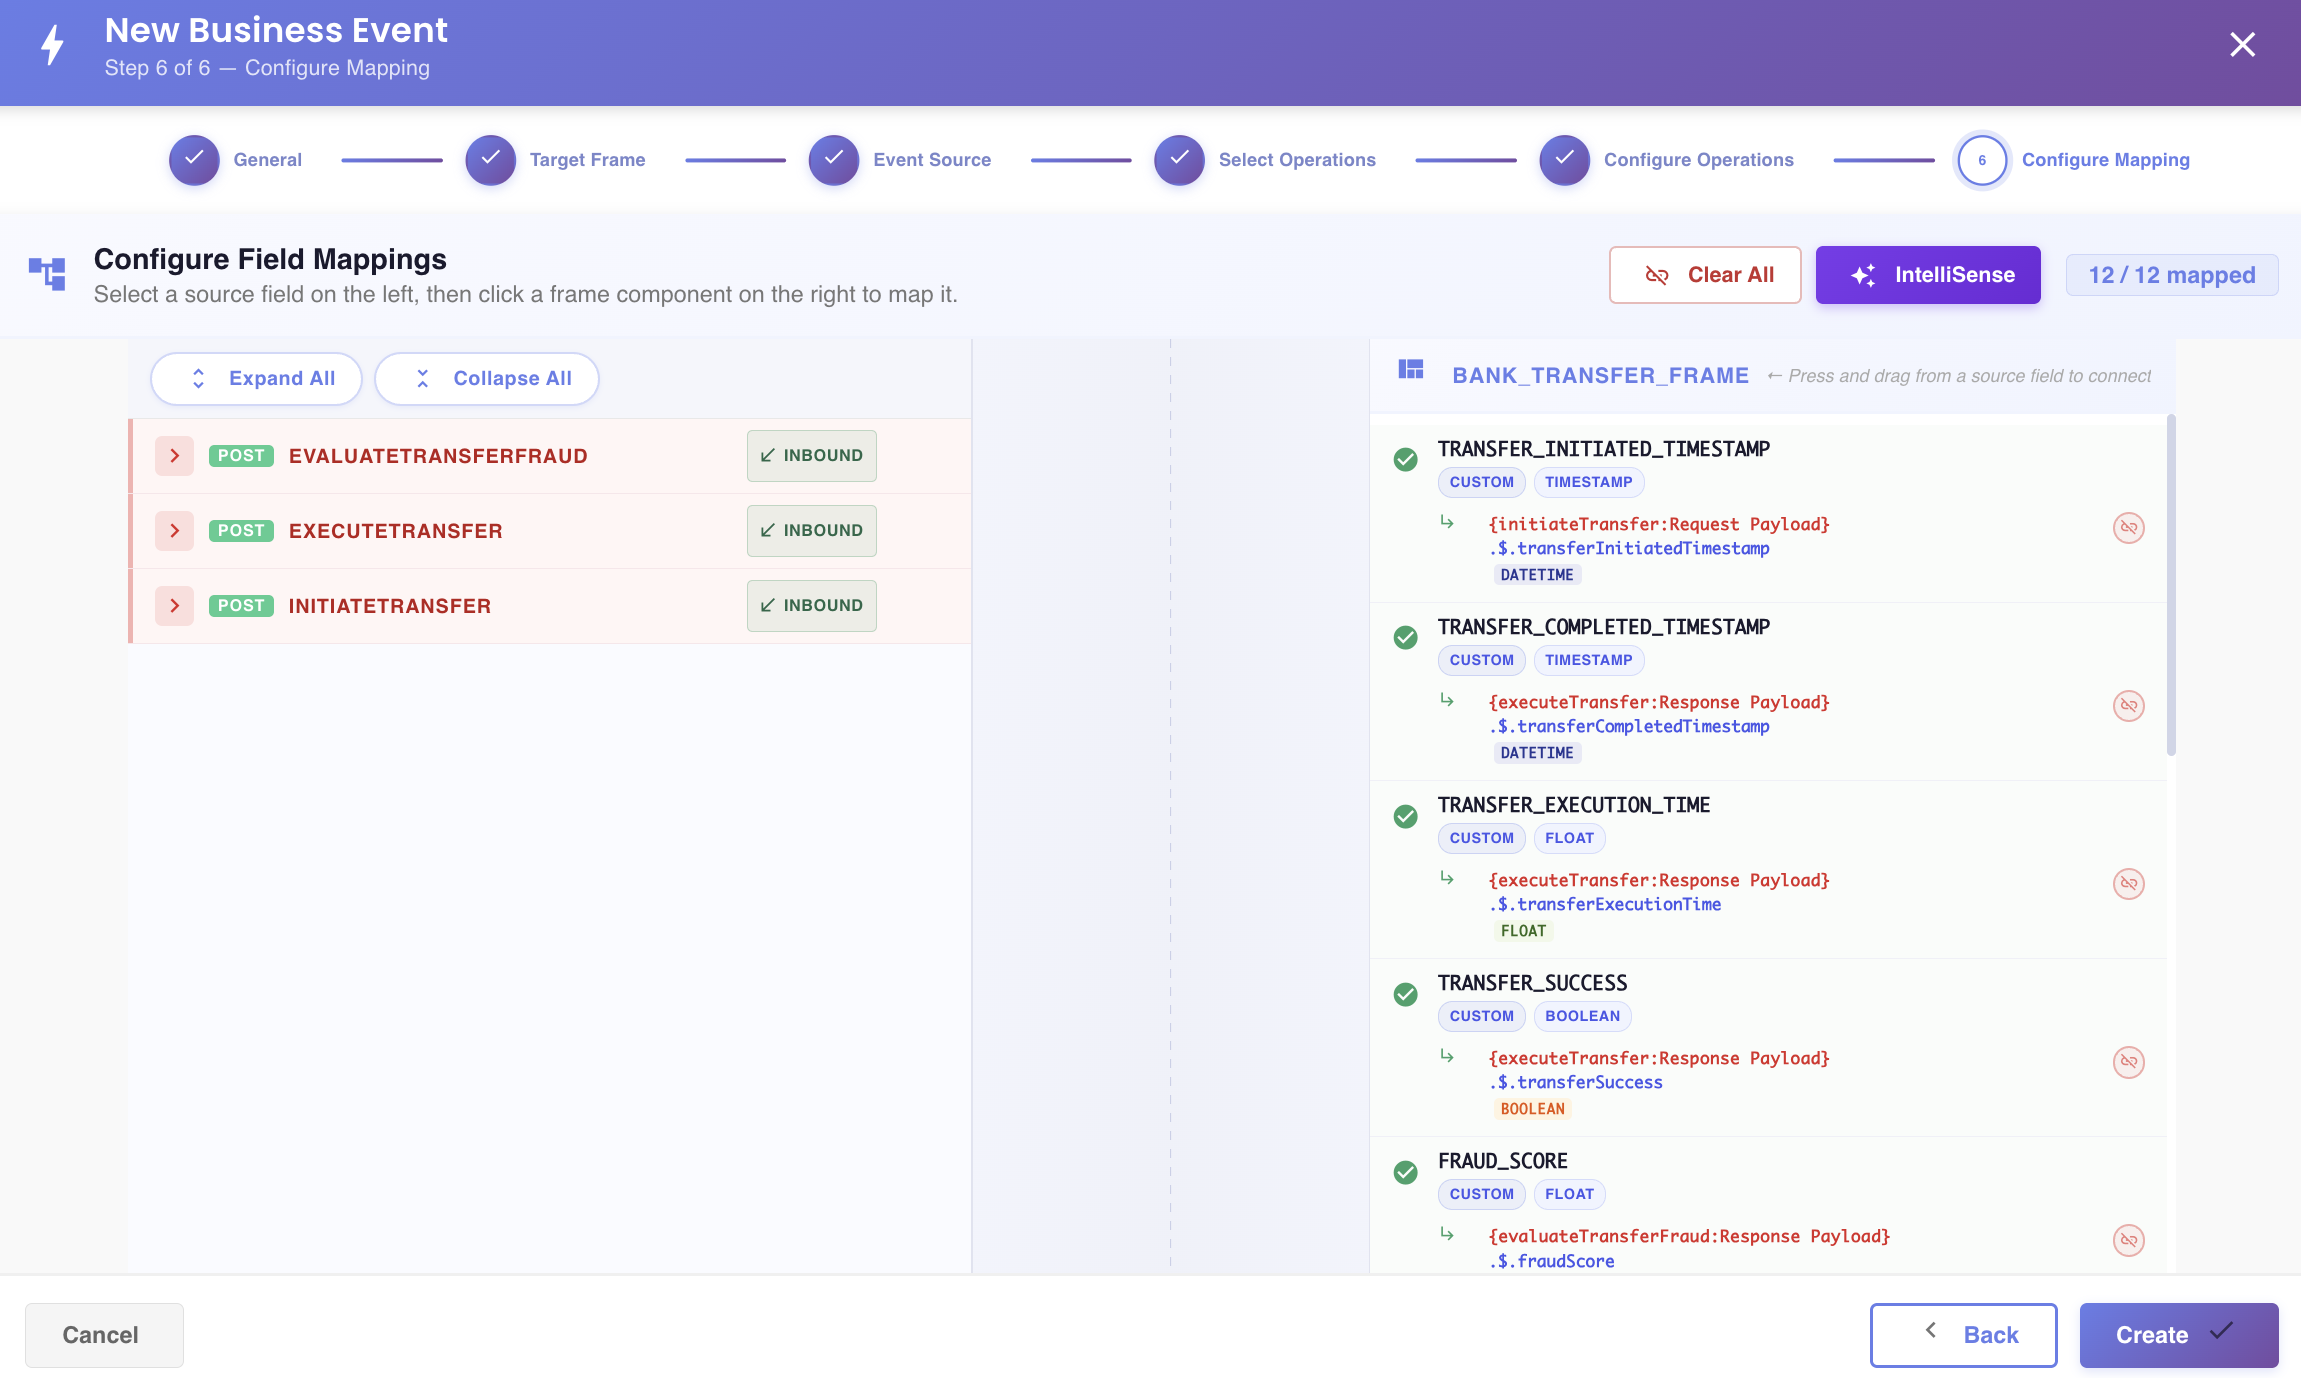
Creating mappings by drag and drop
To create a mapping:
- Click and hold on a source field row on the left panel.
- Drag it across to the target component you want it mapped to, on the right panel.
- Release the mouse button over the target component.
A connector line is drawn between the two once the mapping is created, and the target component is marked as mapped (its checkmark turns green):
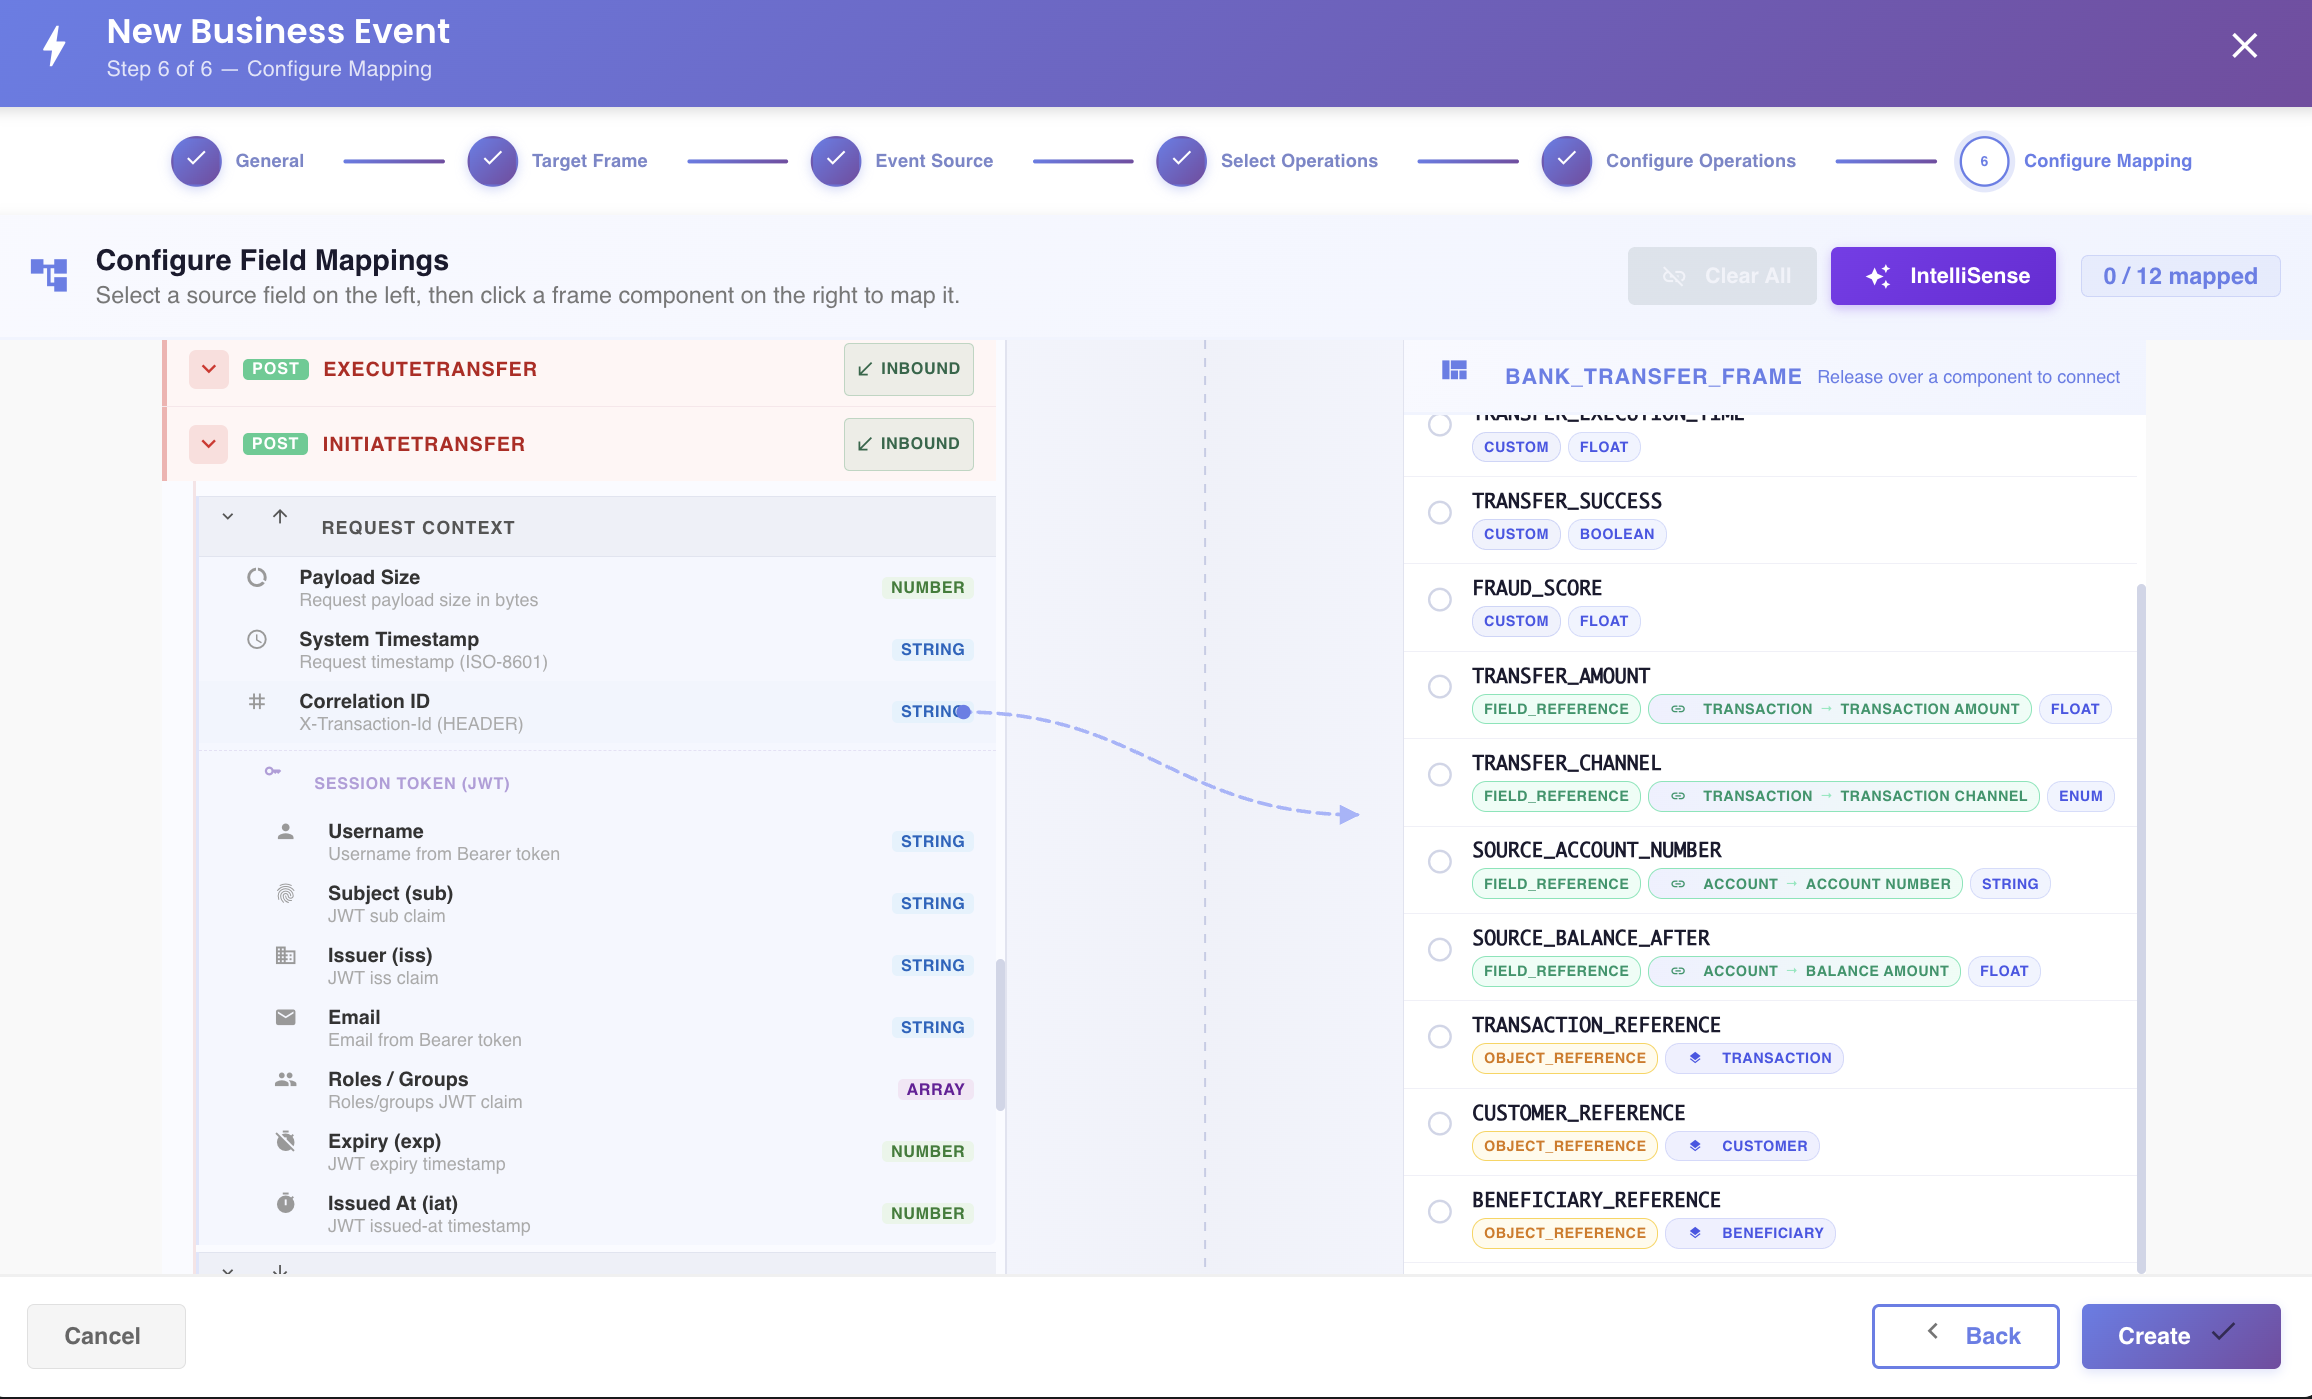
A target component can receive multiple source field mappings — dragging additional source fields onto a component that's already mapped adds them alongside the existing one, rather than replacing it. When a component has more than one source mapped, use BMEL to define how those sources should be combined into the single value assigned to that component.
Removing a mapping
Hover over either end of a connector to reveal a small unlink icon, and click it to remove that mapping. Unlinking from the source side or the target side isn't quite symmetric, since a target component can have multiple sources mapped to it (see above):
From the source field — removes only that field's connection to the target, leaving any other sources still mapped to it untouched:
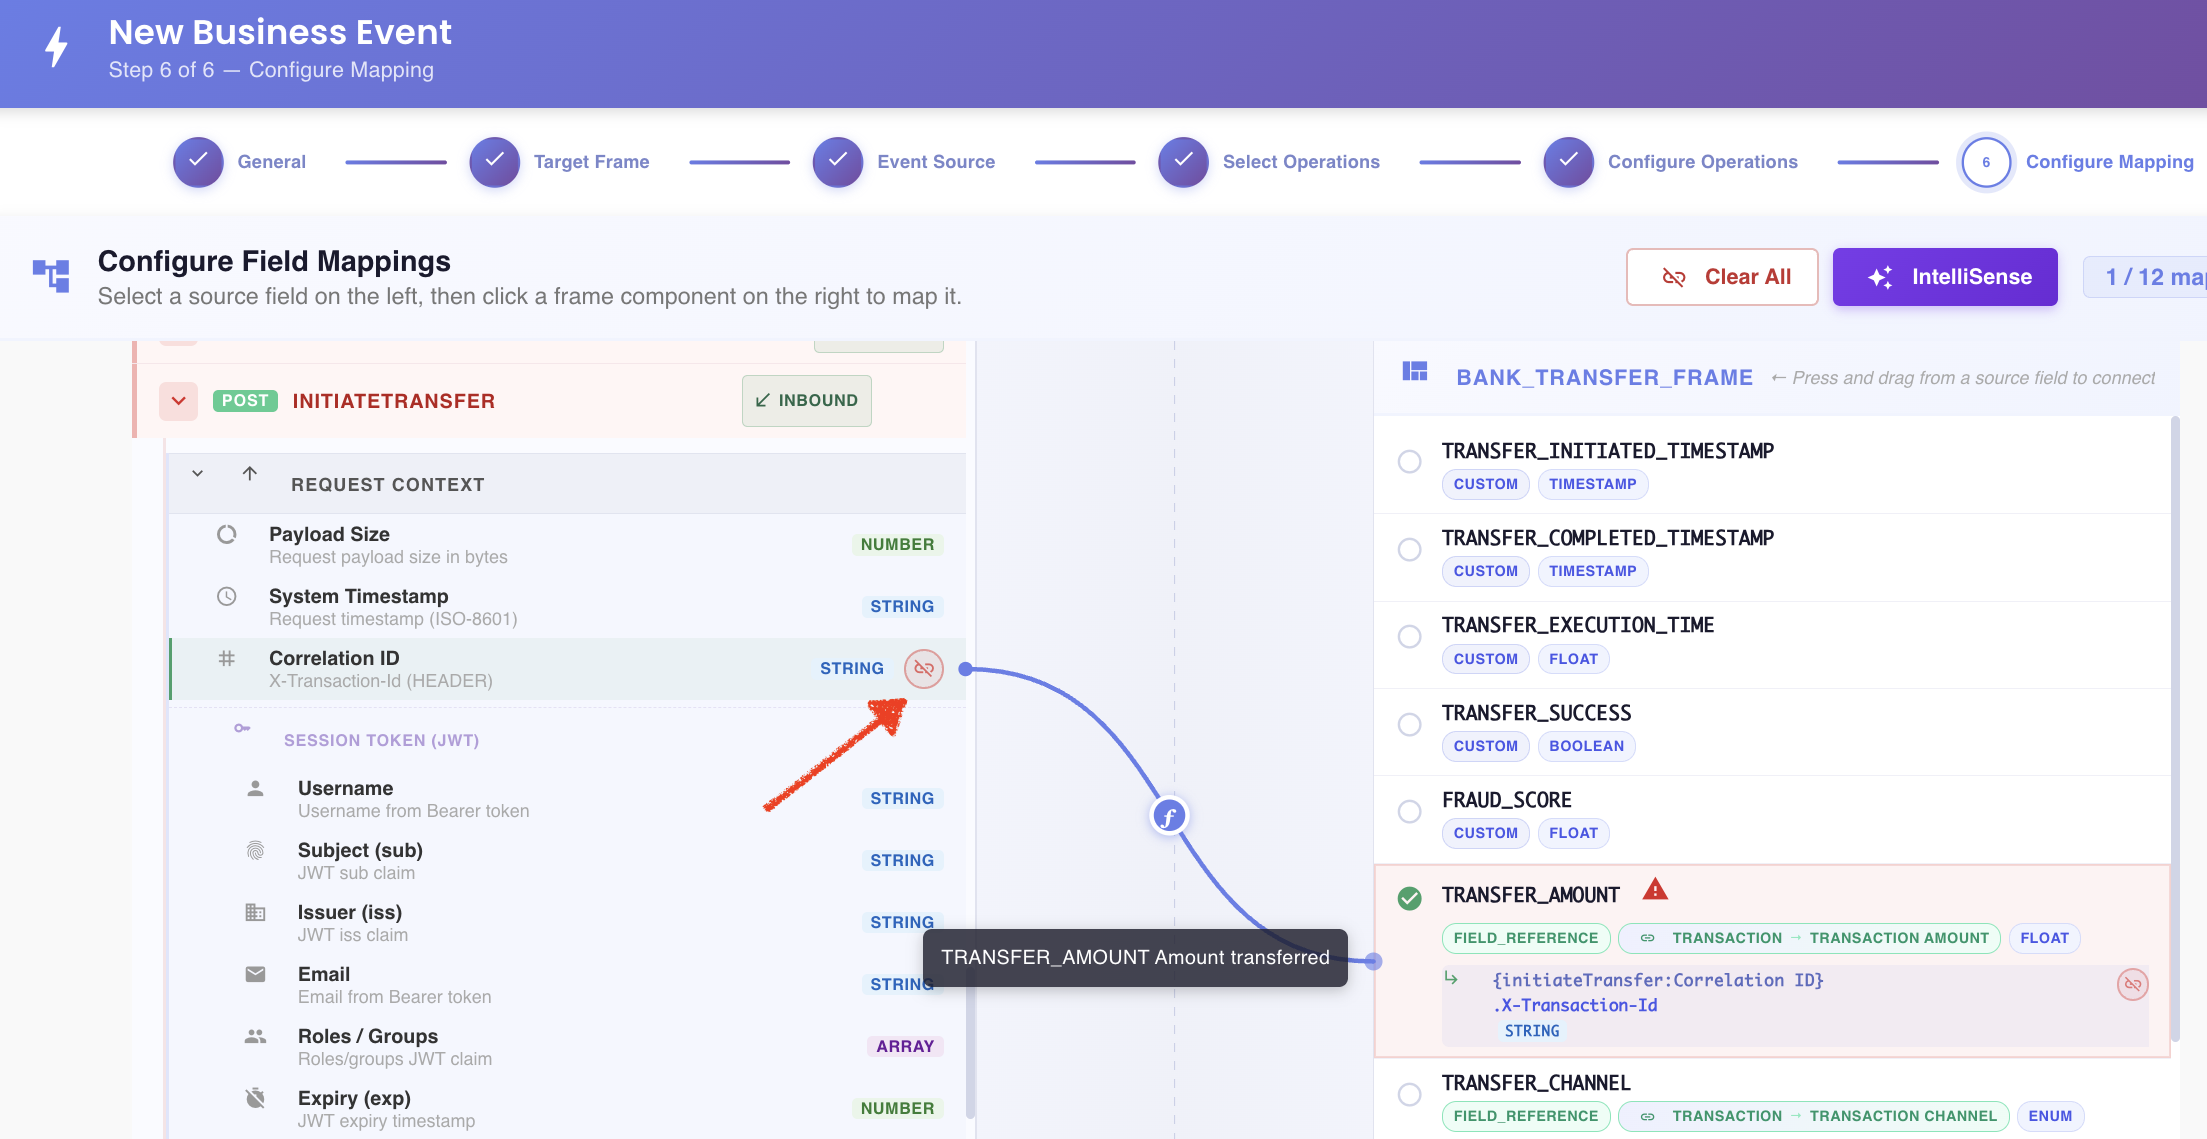
From the target component — removes all source mappings connected to it at once, not just one. Use this when you want to unmap a component entirely and start its mapping over from scratch:
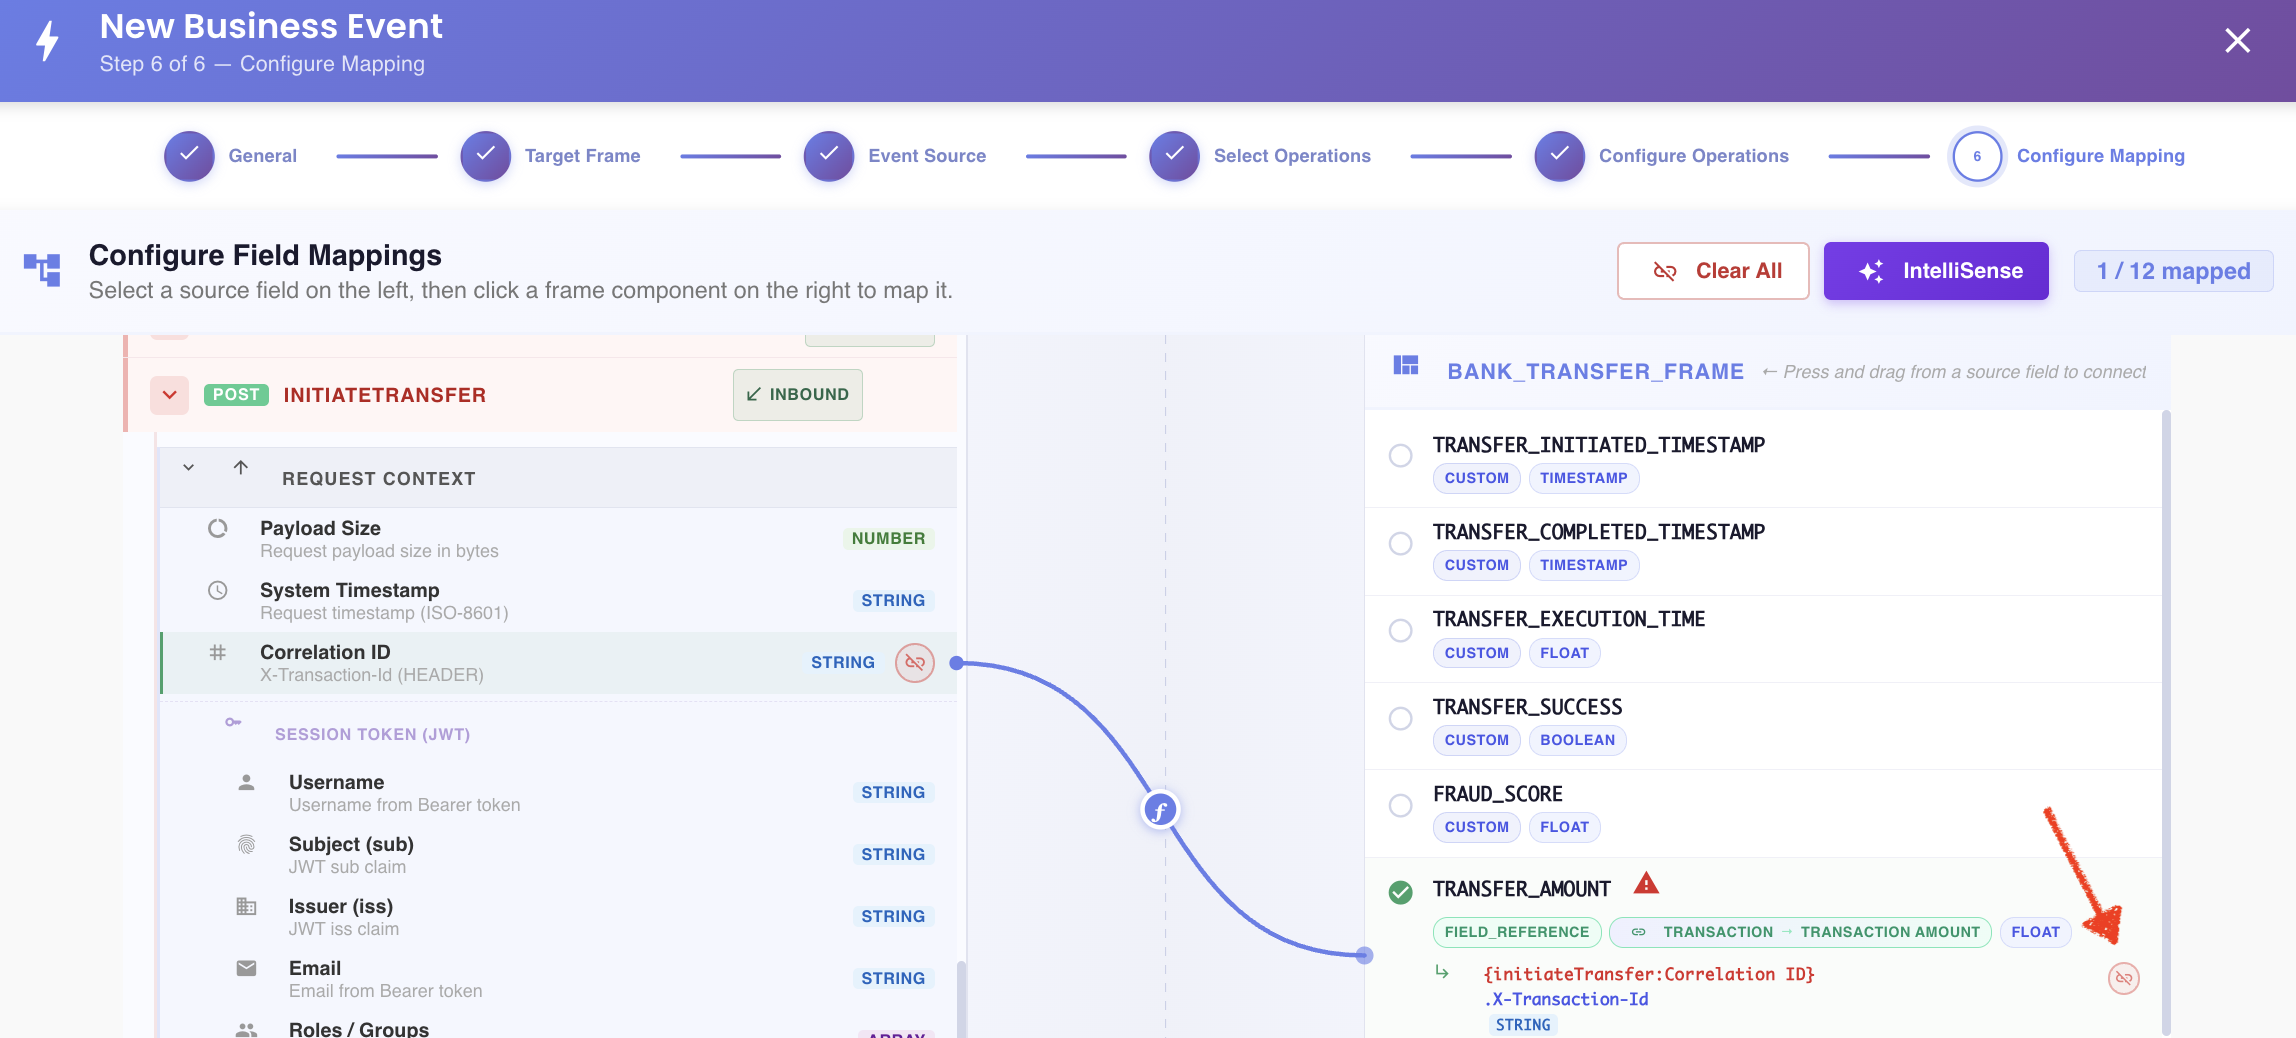
Tip
Use the Clear All button in the mapper header to remove every mapping for every component at once, instead of unlinking one by one.
Auto-mapping with IntelliSense
Instead of dragging fields manually, click the IntelliSense button in the mapper header to have BizMetry suggest mappings automatically, based on name and type similarity between source fields and target components.
While it runs, a progress overlay appears over the mapper:
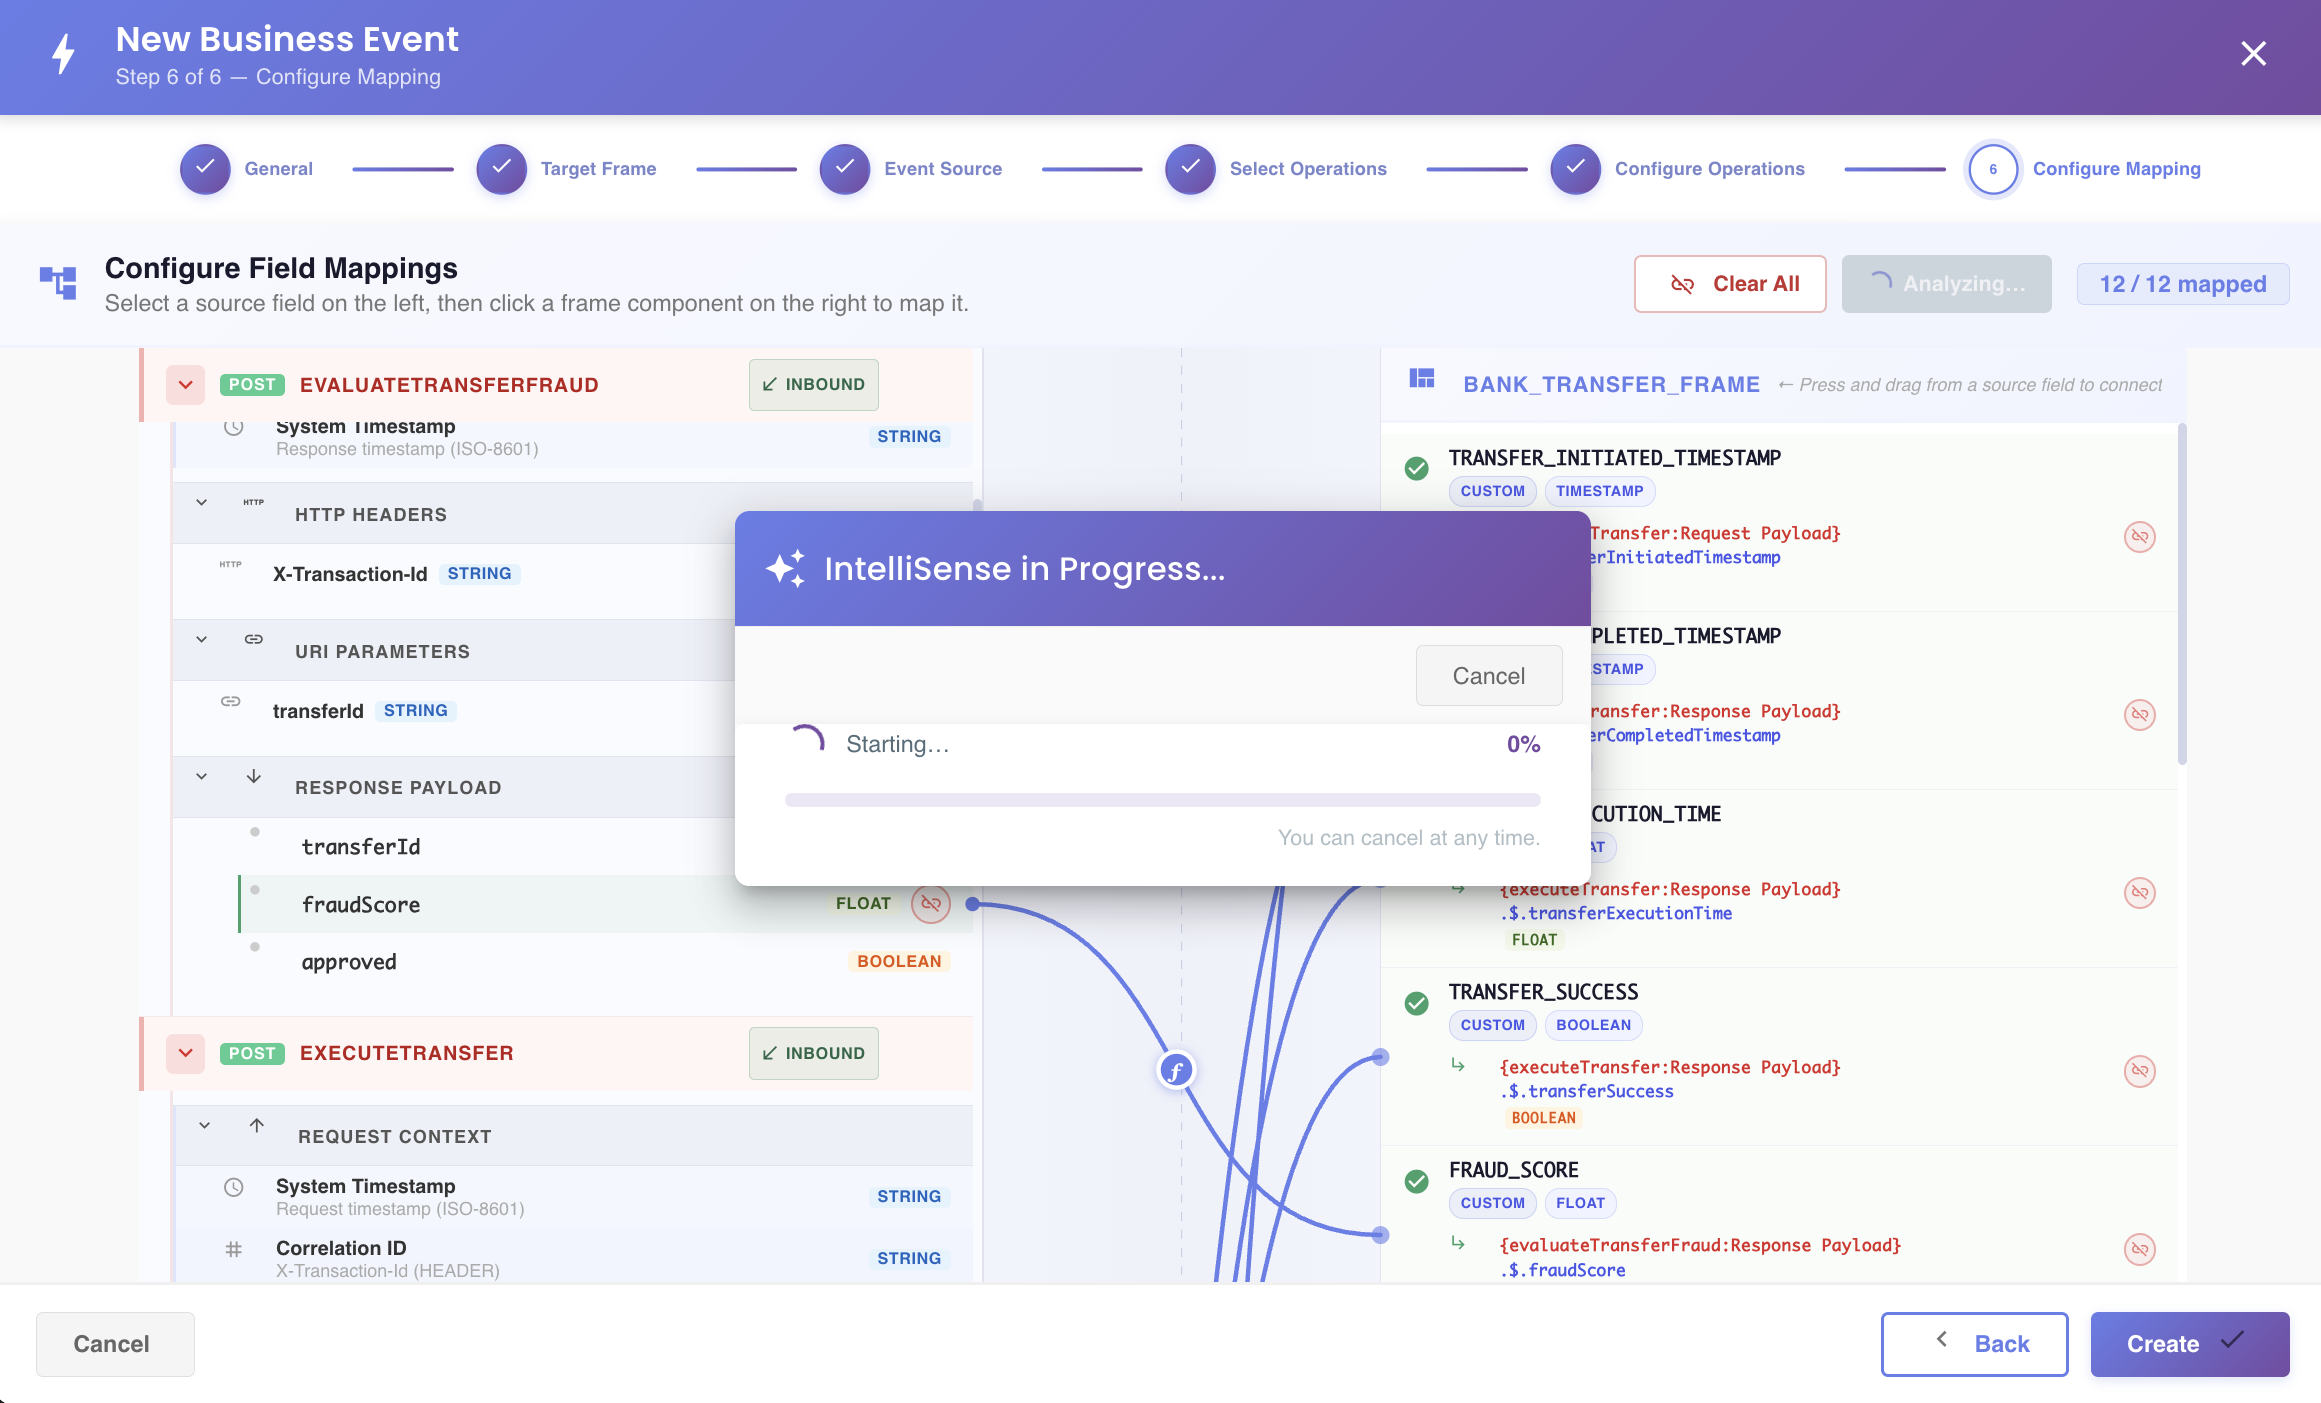
Once it completes, IntelliSense applies its suggested mappings directly onto the target panel — you'll see the connector lines and the mapped-count in the header update automatically. Review the result the same way you would a manual mapping: drag a different source field onto any component to override a suggestion you disagree with, or unlink it if it shouldn't be mapped at all.
Tip
Running IntelliSense doesn't clear mappings you already created manually first — it only fills in components that are still unmapped. Use Clear All beforehand if you want IntelliSense to remap everything from scratch.
Navigating complex mappings
When a mapping involves many source fields, or the source and target panels are scrolled far apart, BizMetry gives you two shortcuts to keep track of a connection:
- Click a component's BMEL expression (the small line of code shown under a mapped component) to have BizMetry automatically scroll both panels so the full connection — every source field feeding into it — comes into view.
- Click a component's name to jump straight into editing its mapping, opening the BMEL editor for it.
BMEL expressions
For computed values, or mappings that combine or transform multiple source fields, open the BMEL editor for a target component either by clicking its name, or by clicking the ƒ icon shown on the connector line linking it to its source(s):
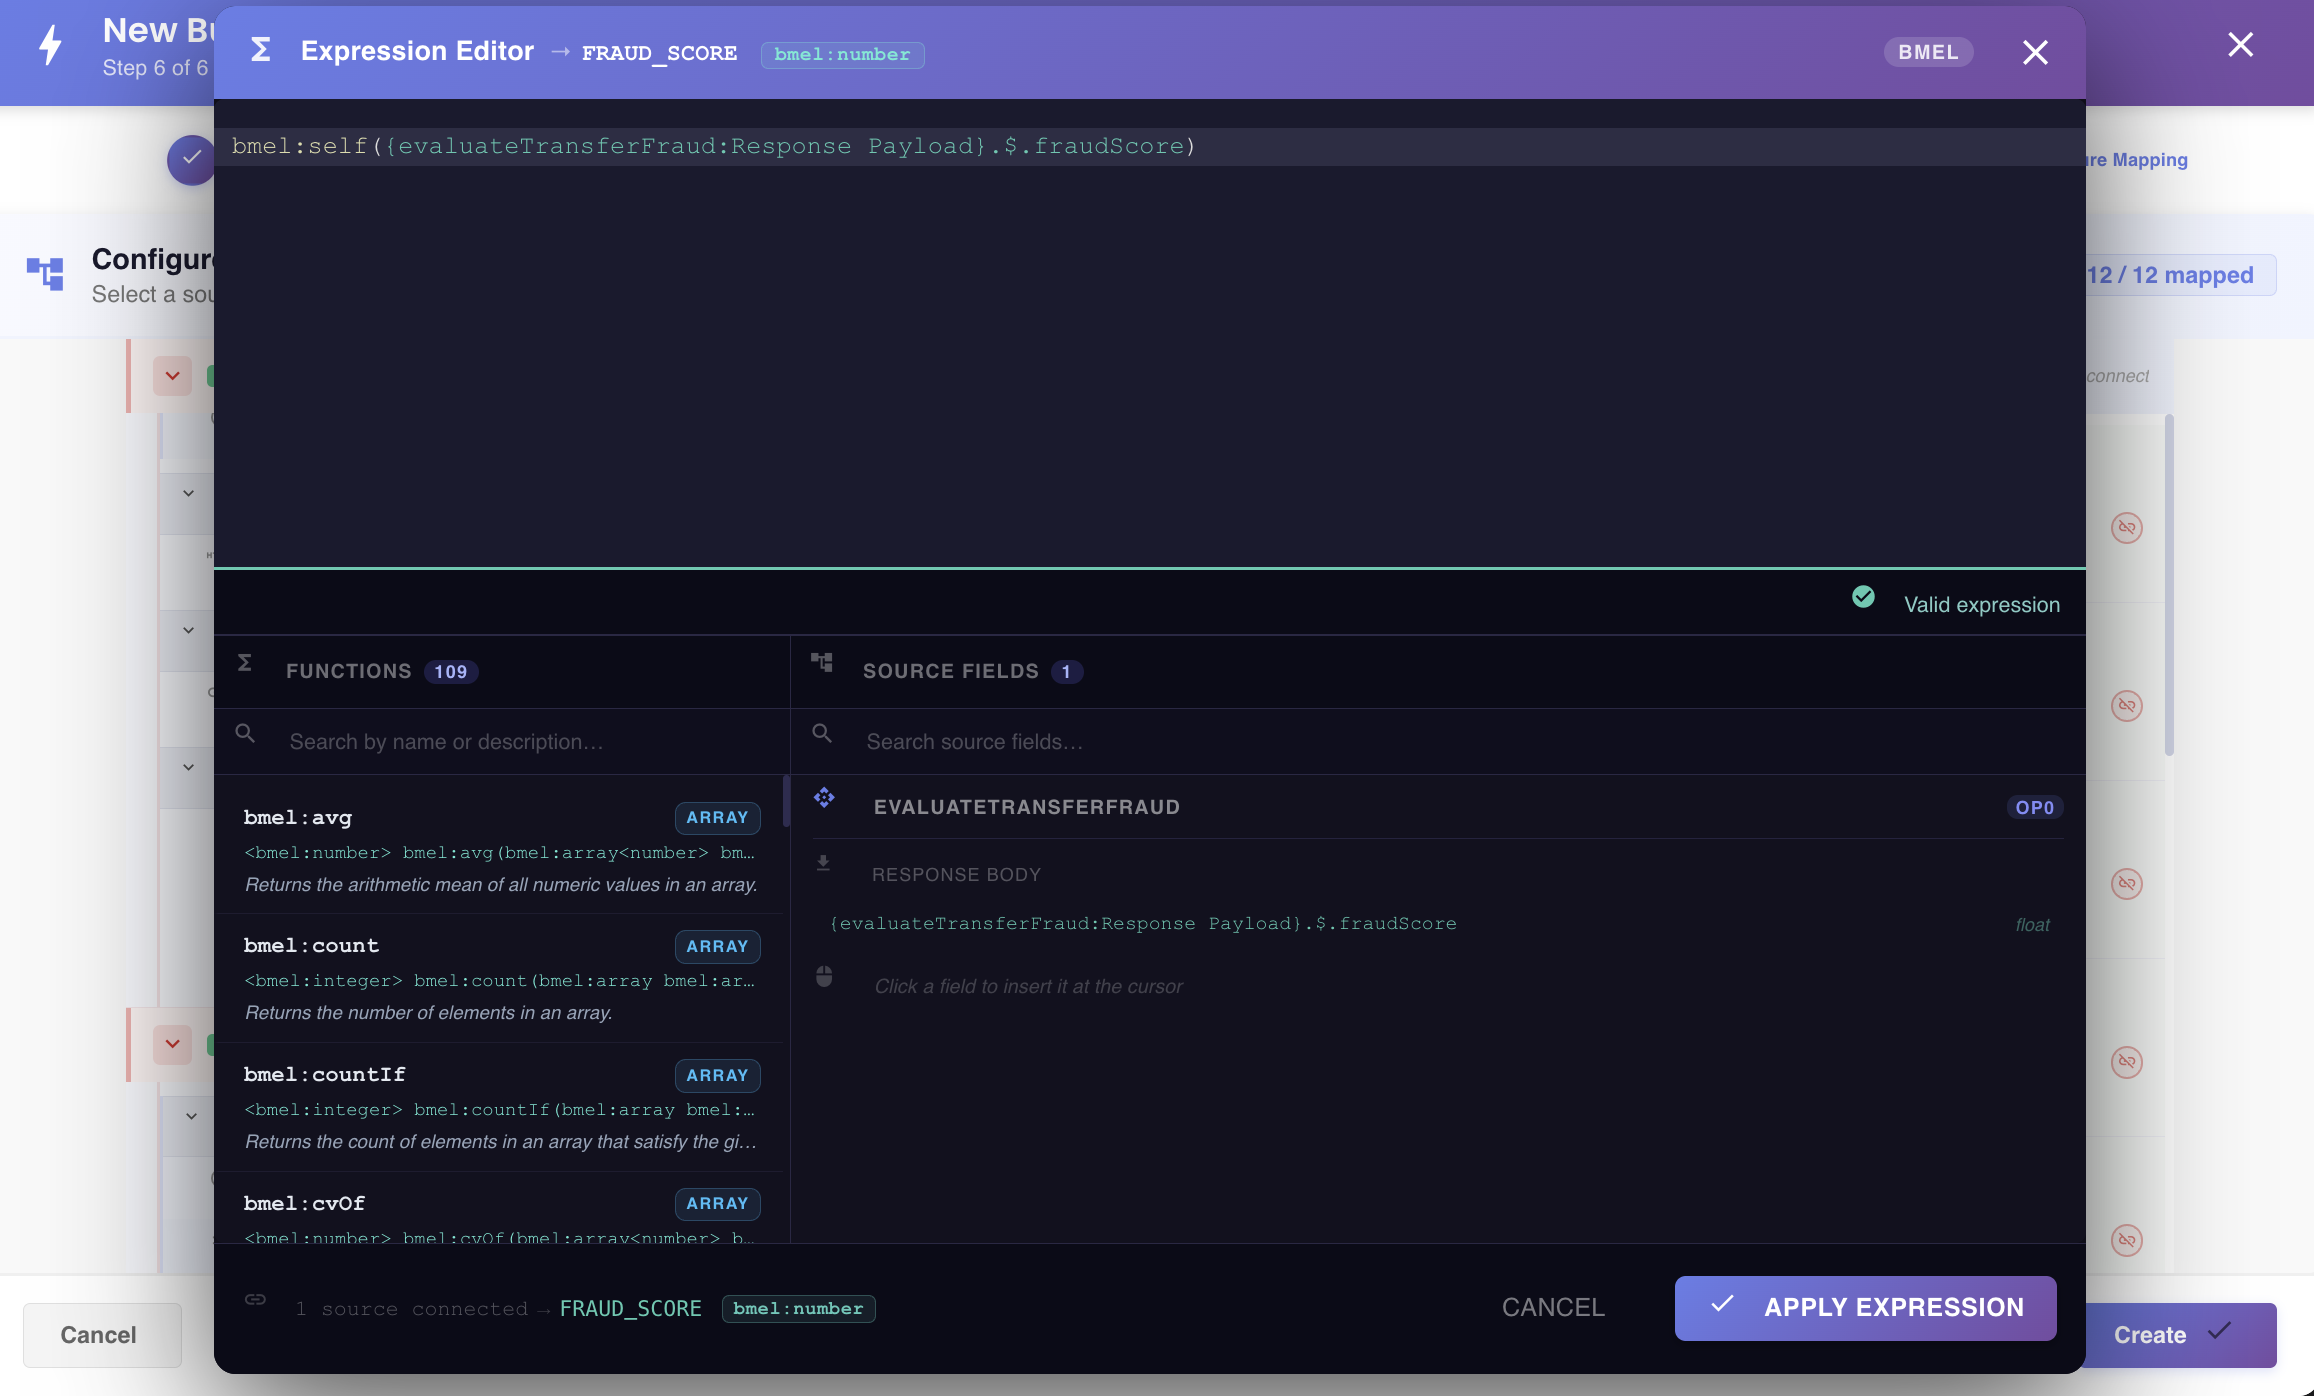
From here you can:
- Type a BMEL expression directly into the editor.
- Browse the Functions panel on the left and click a function to insert it at the cursor.
- Browse the Source Fields panel on the right and click a field to insert its reference at the cursor.
Use the search box in either panel to quickly find a specific function or field by name:
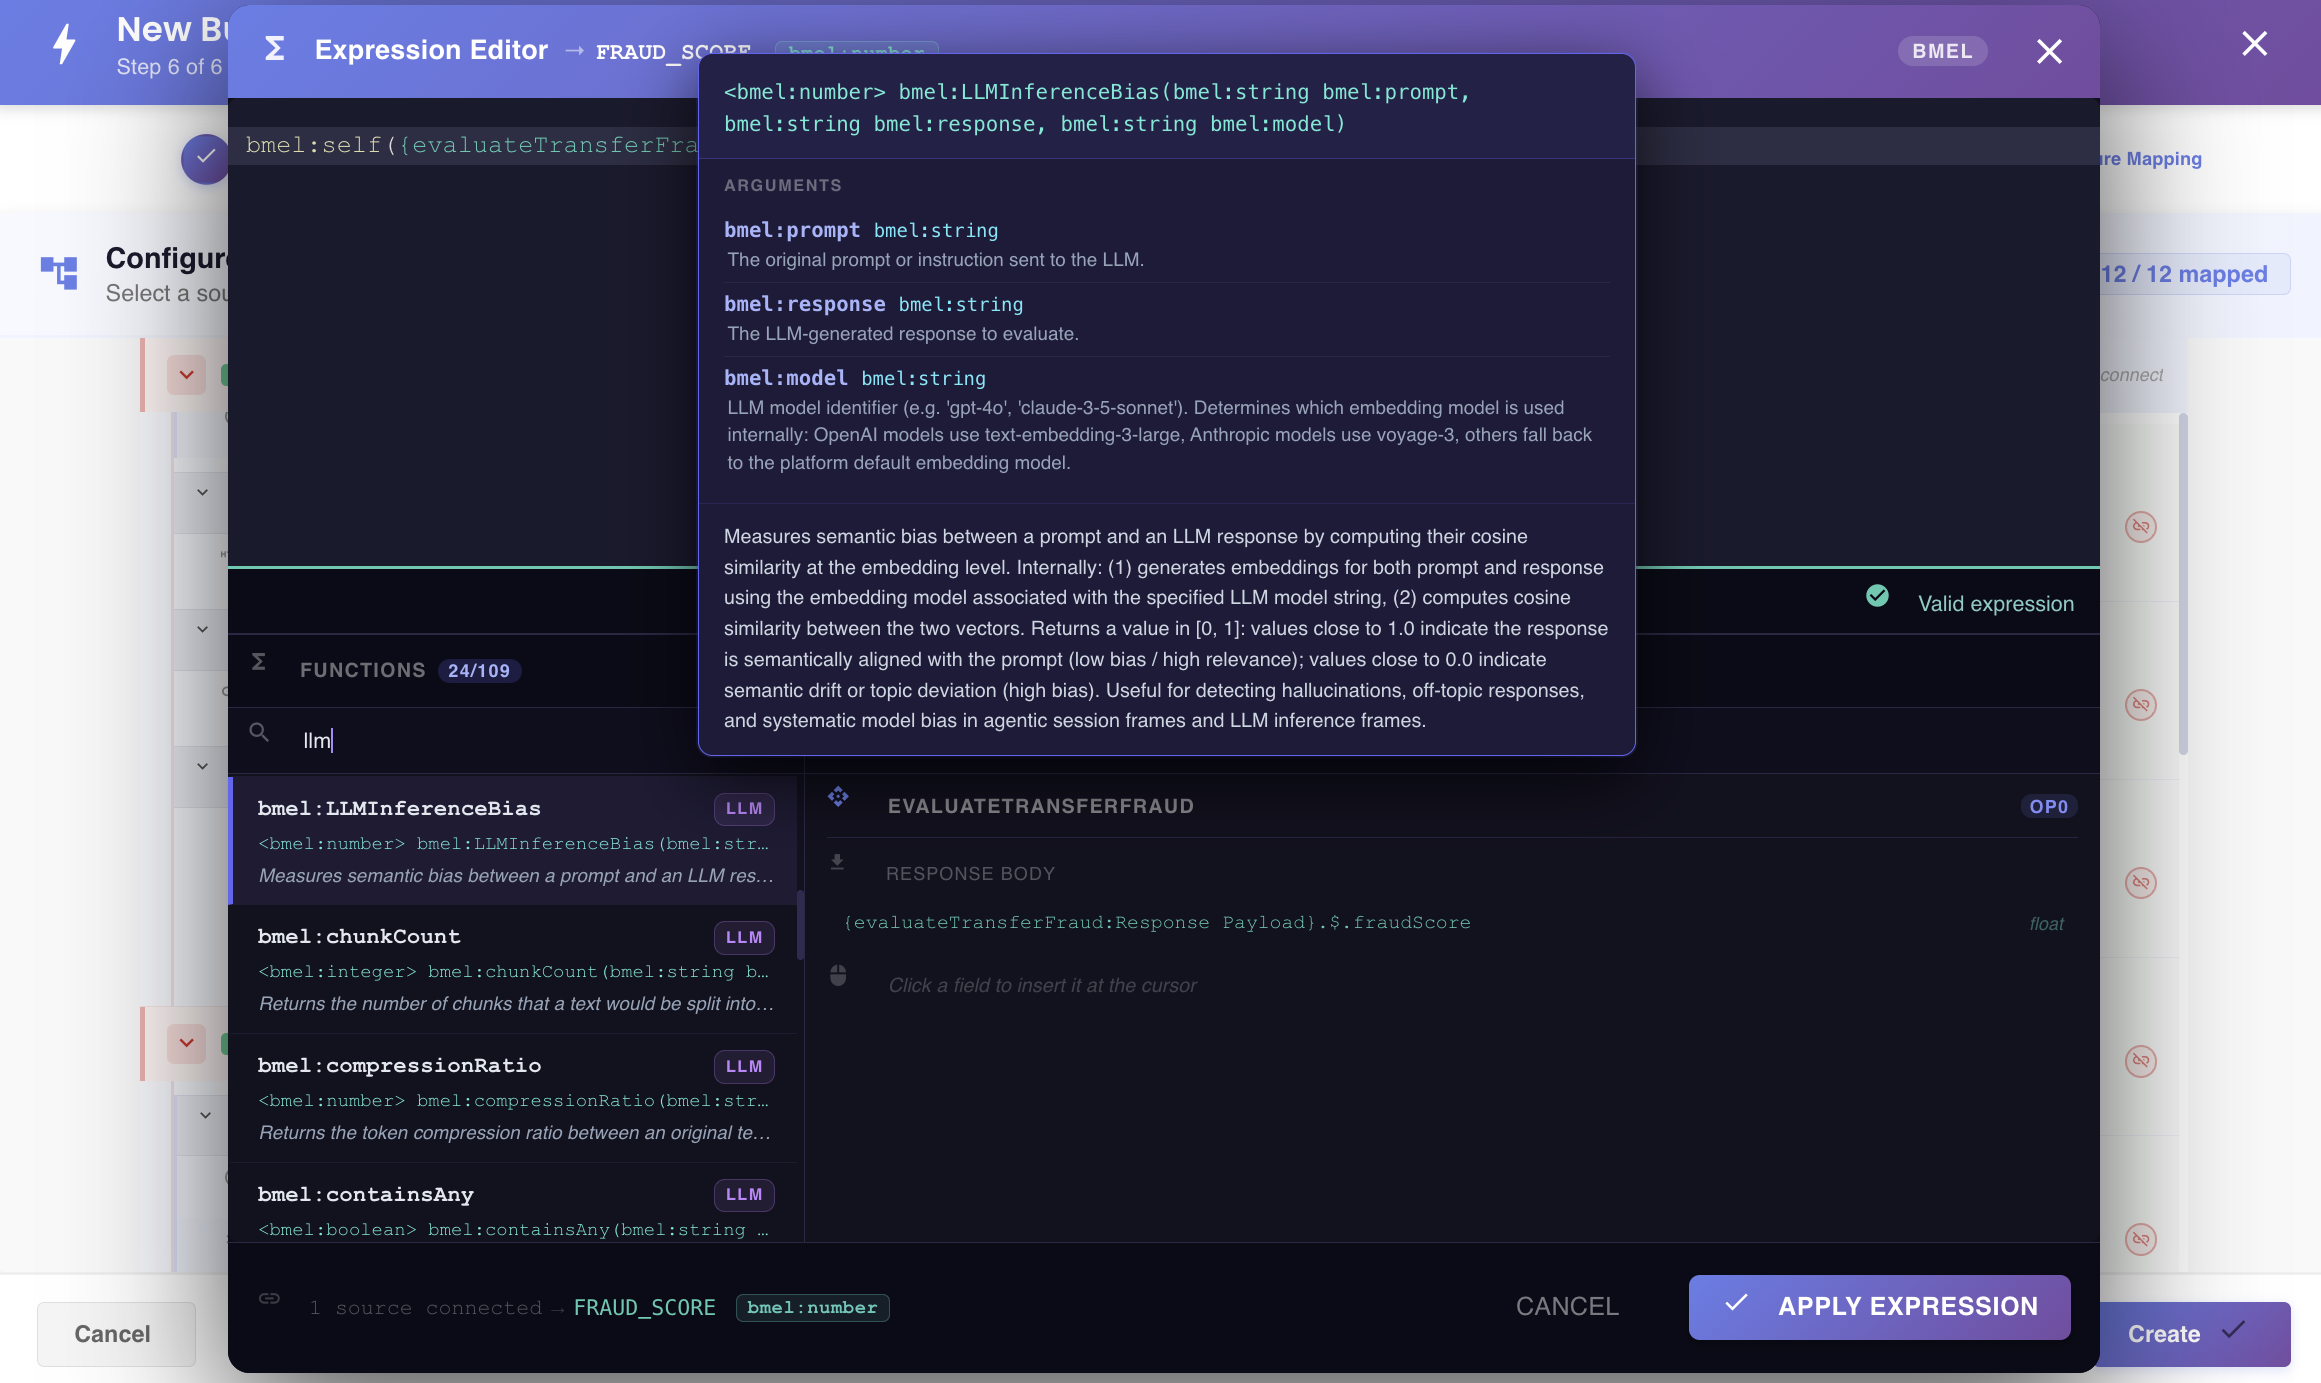
Once you're happy with the expression, click Apply Expression at the bottom of the editor to save it back to the mapping. Closing the editor without applying discards your changes.
Handling syntax errors
Invalid expressions are flagged directly in the editor as you type, with the specific problem shown just below the code area:
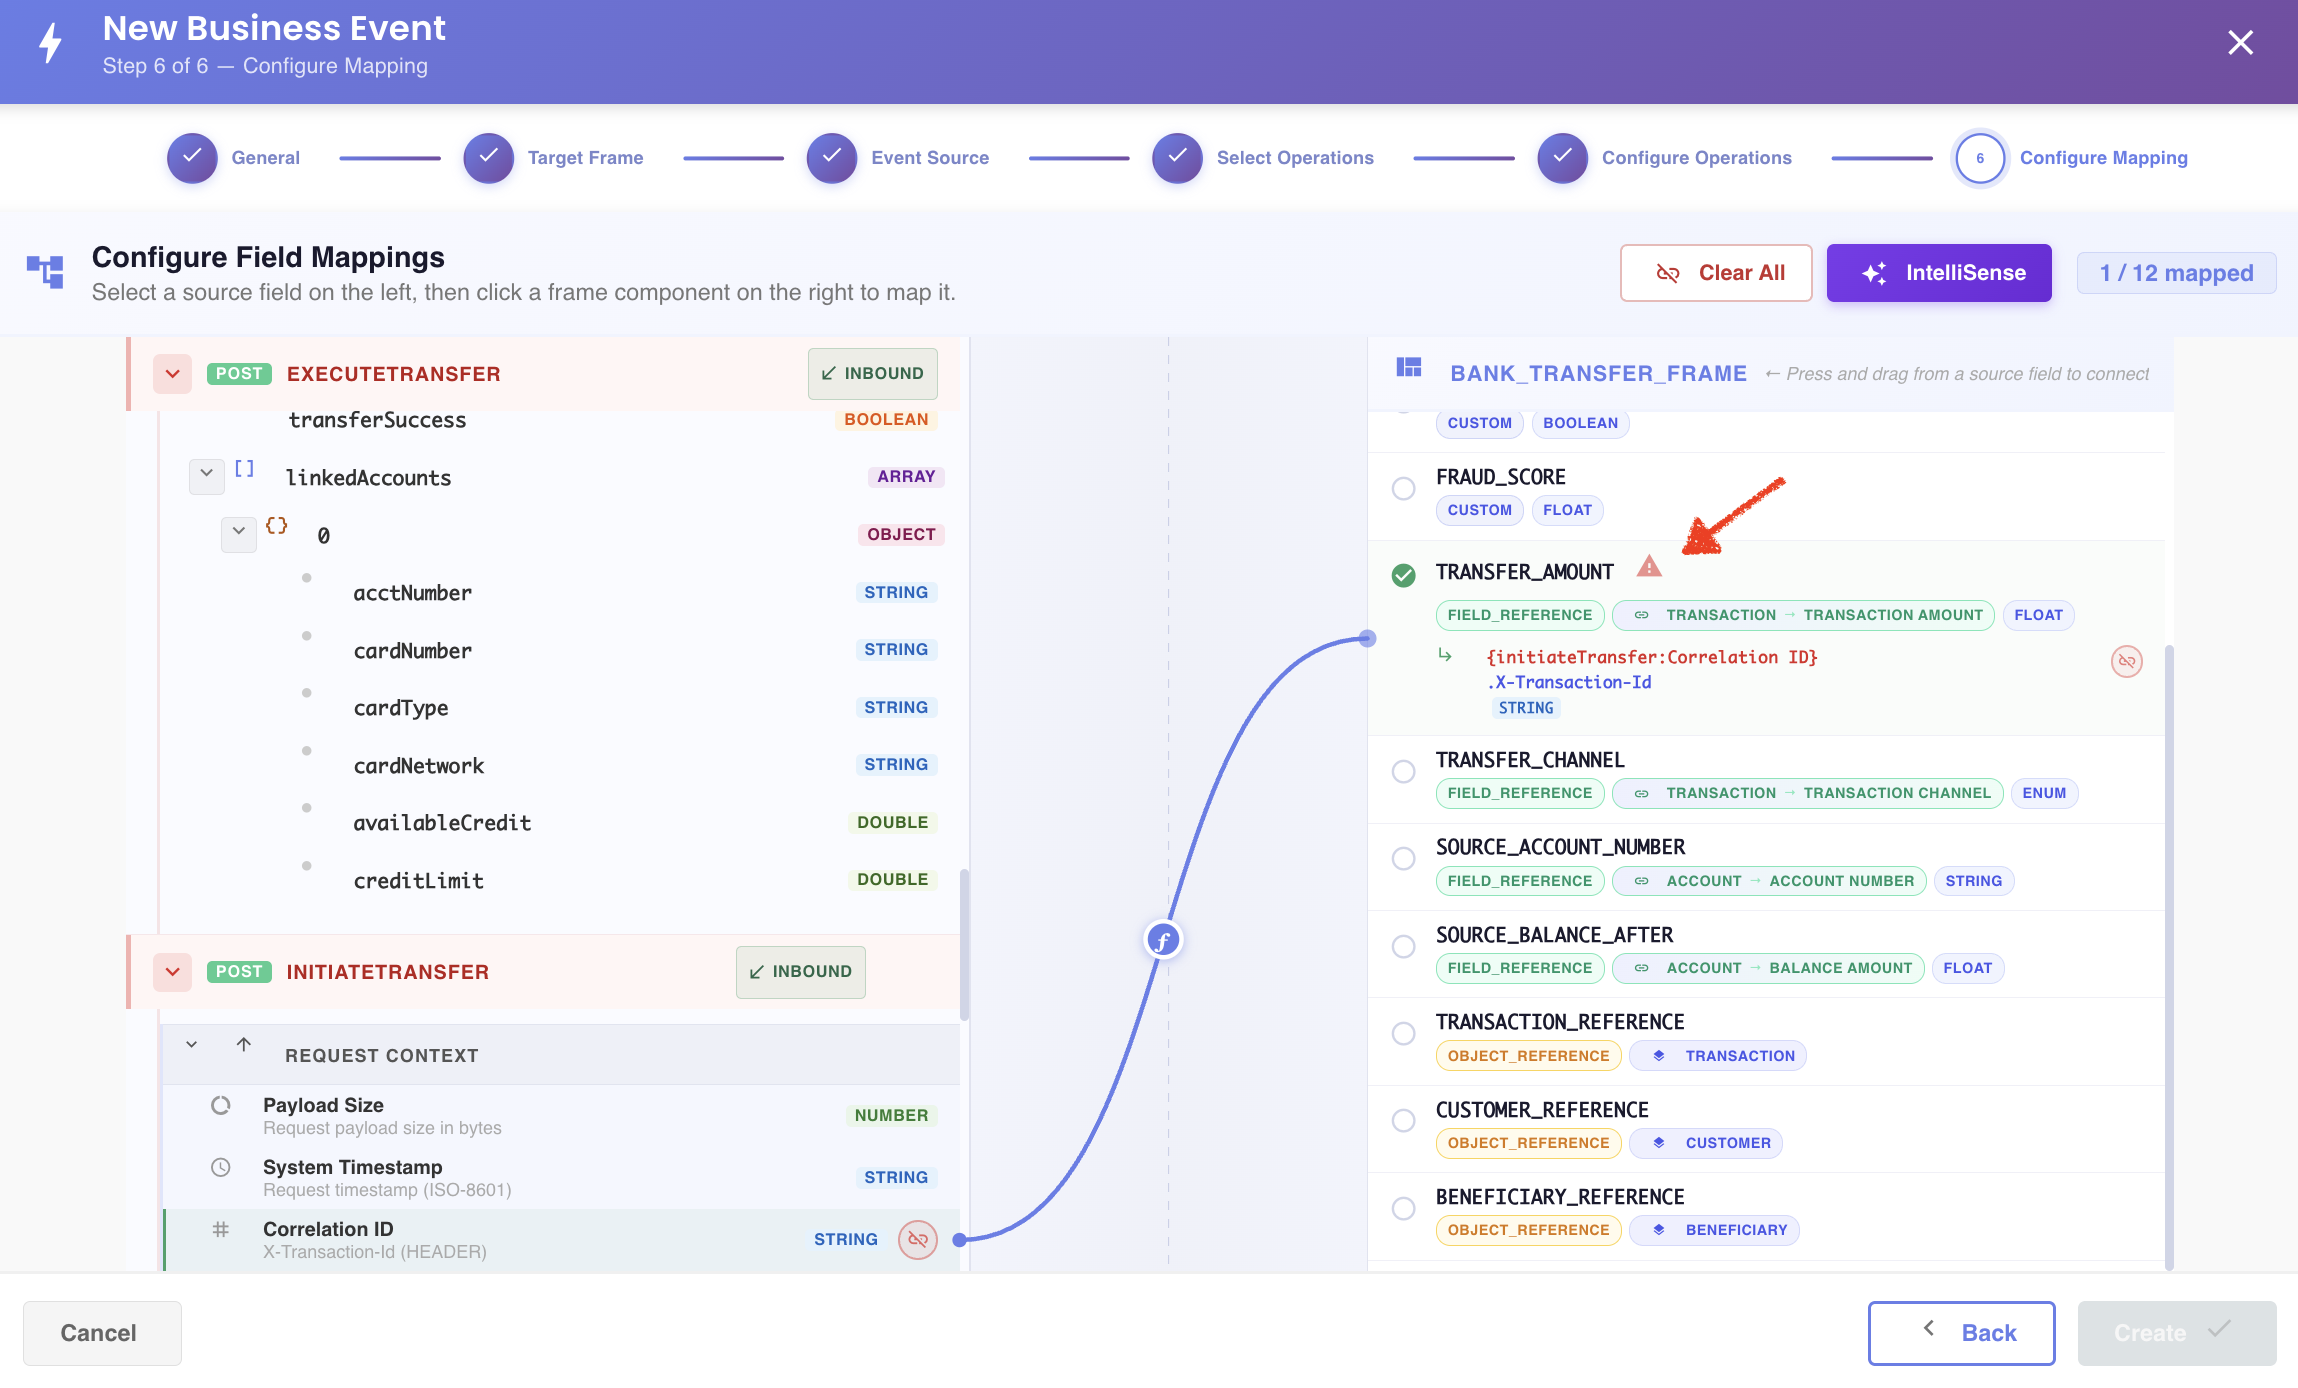
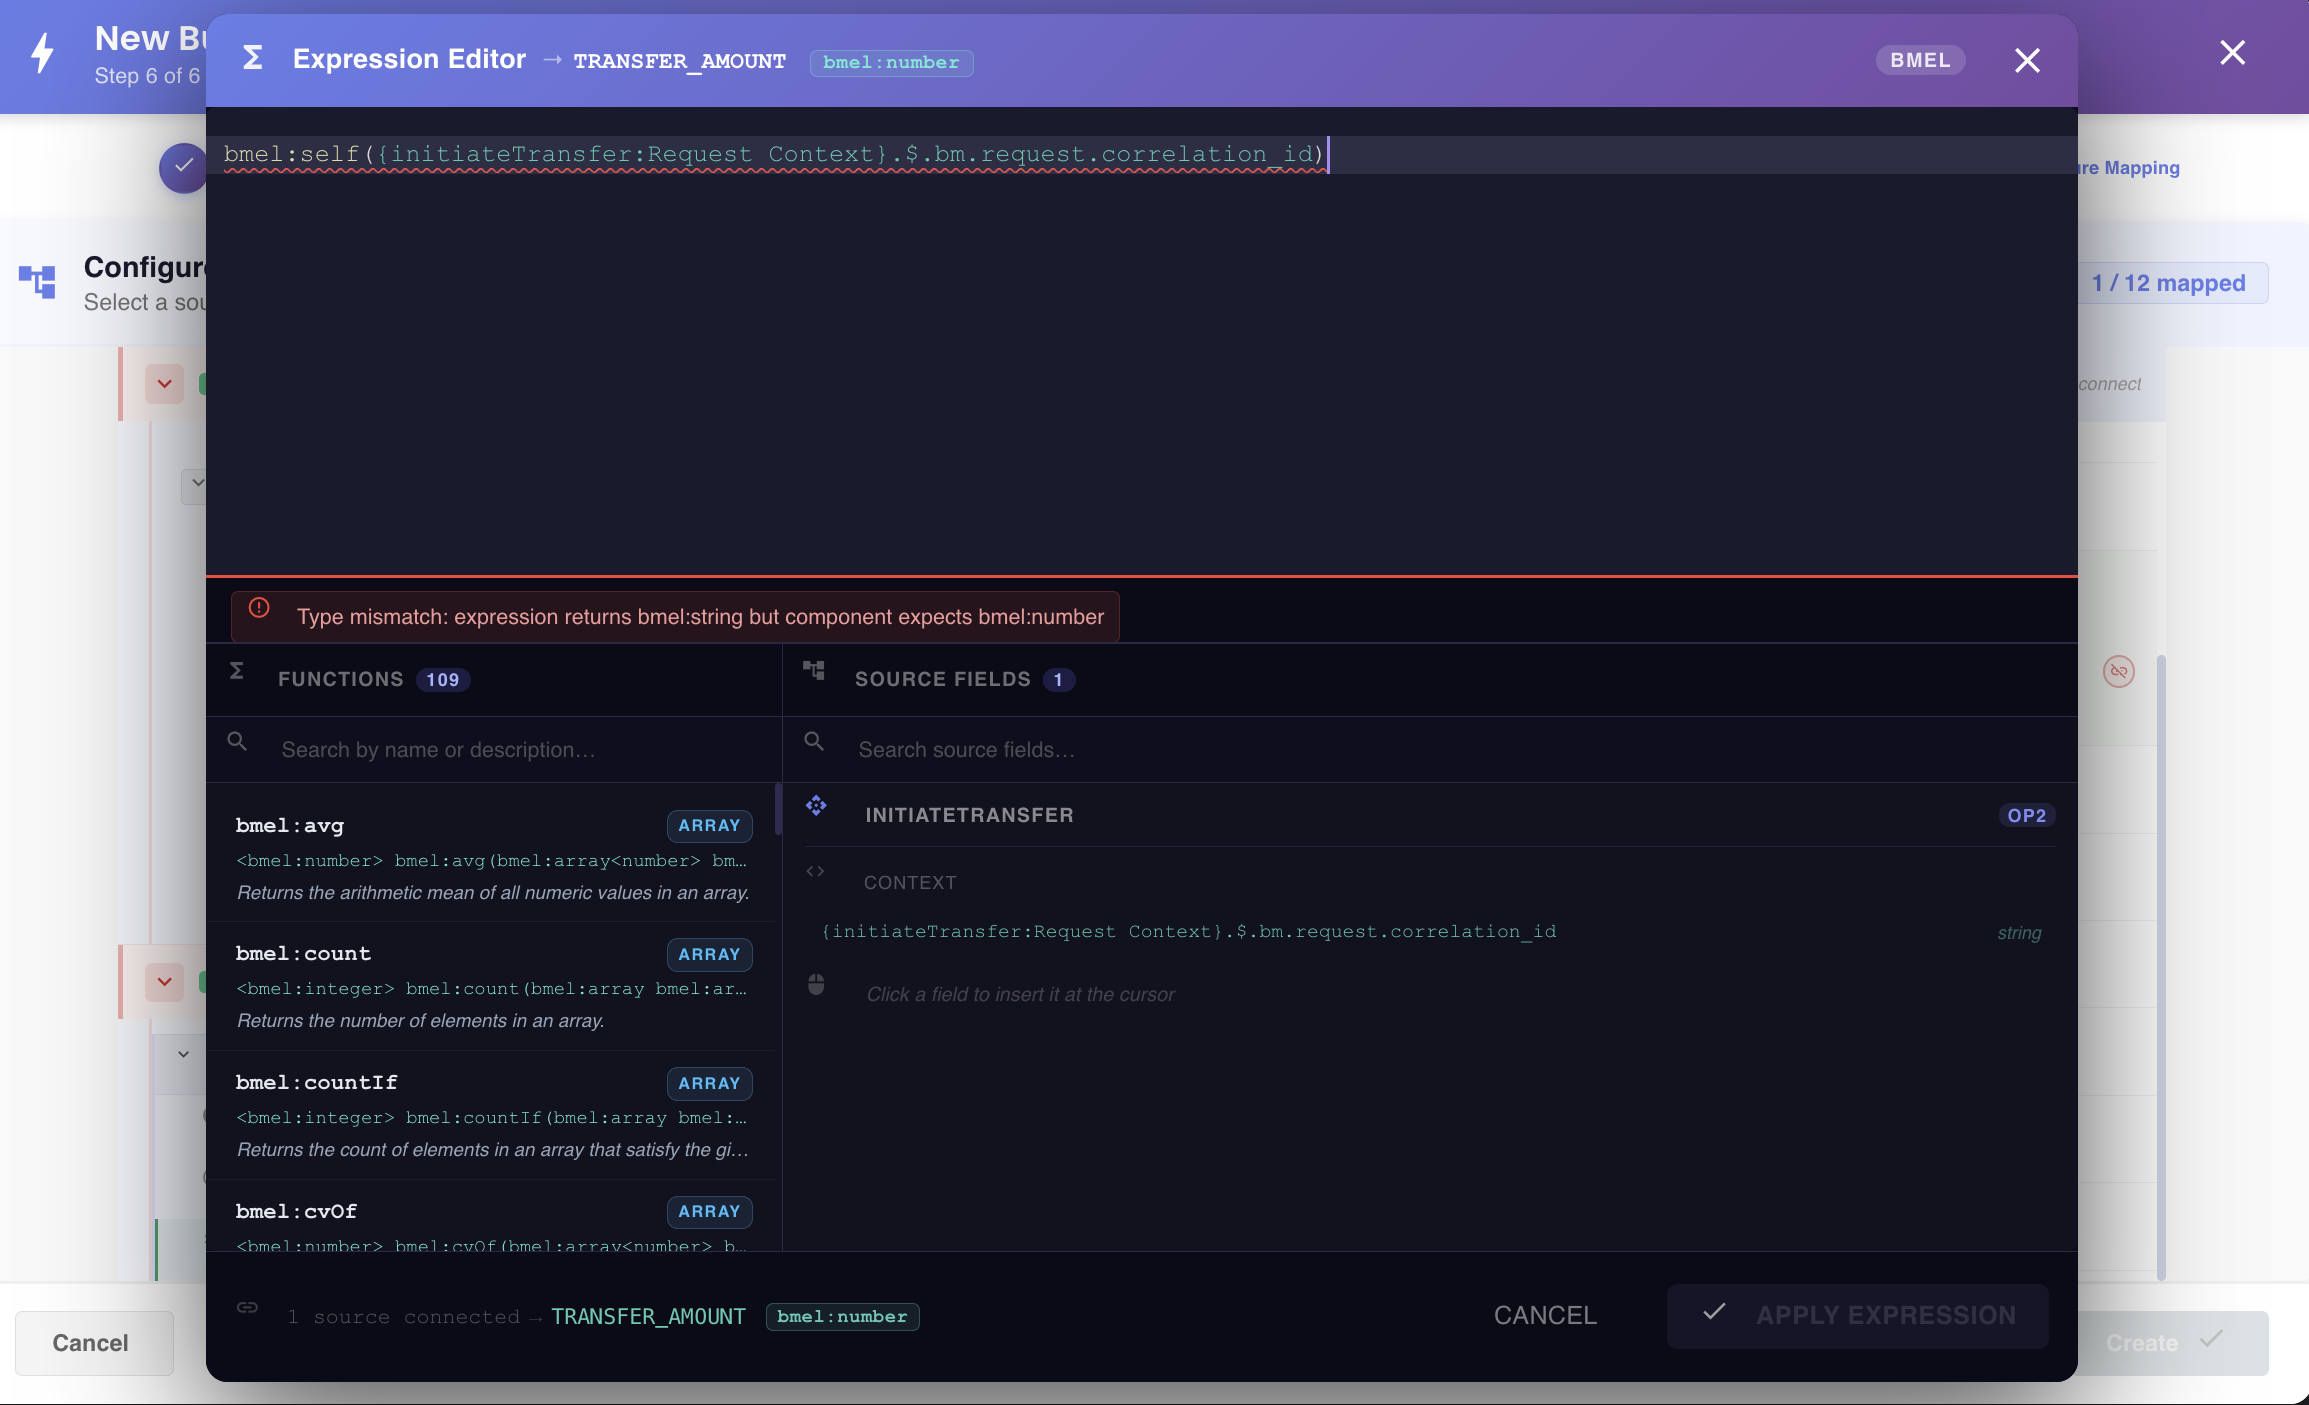
Click into the error, or read the inline message, to see the details of what's wrong — for example a type mismatch between what the expression returns and what the target component expects:
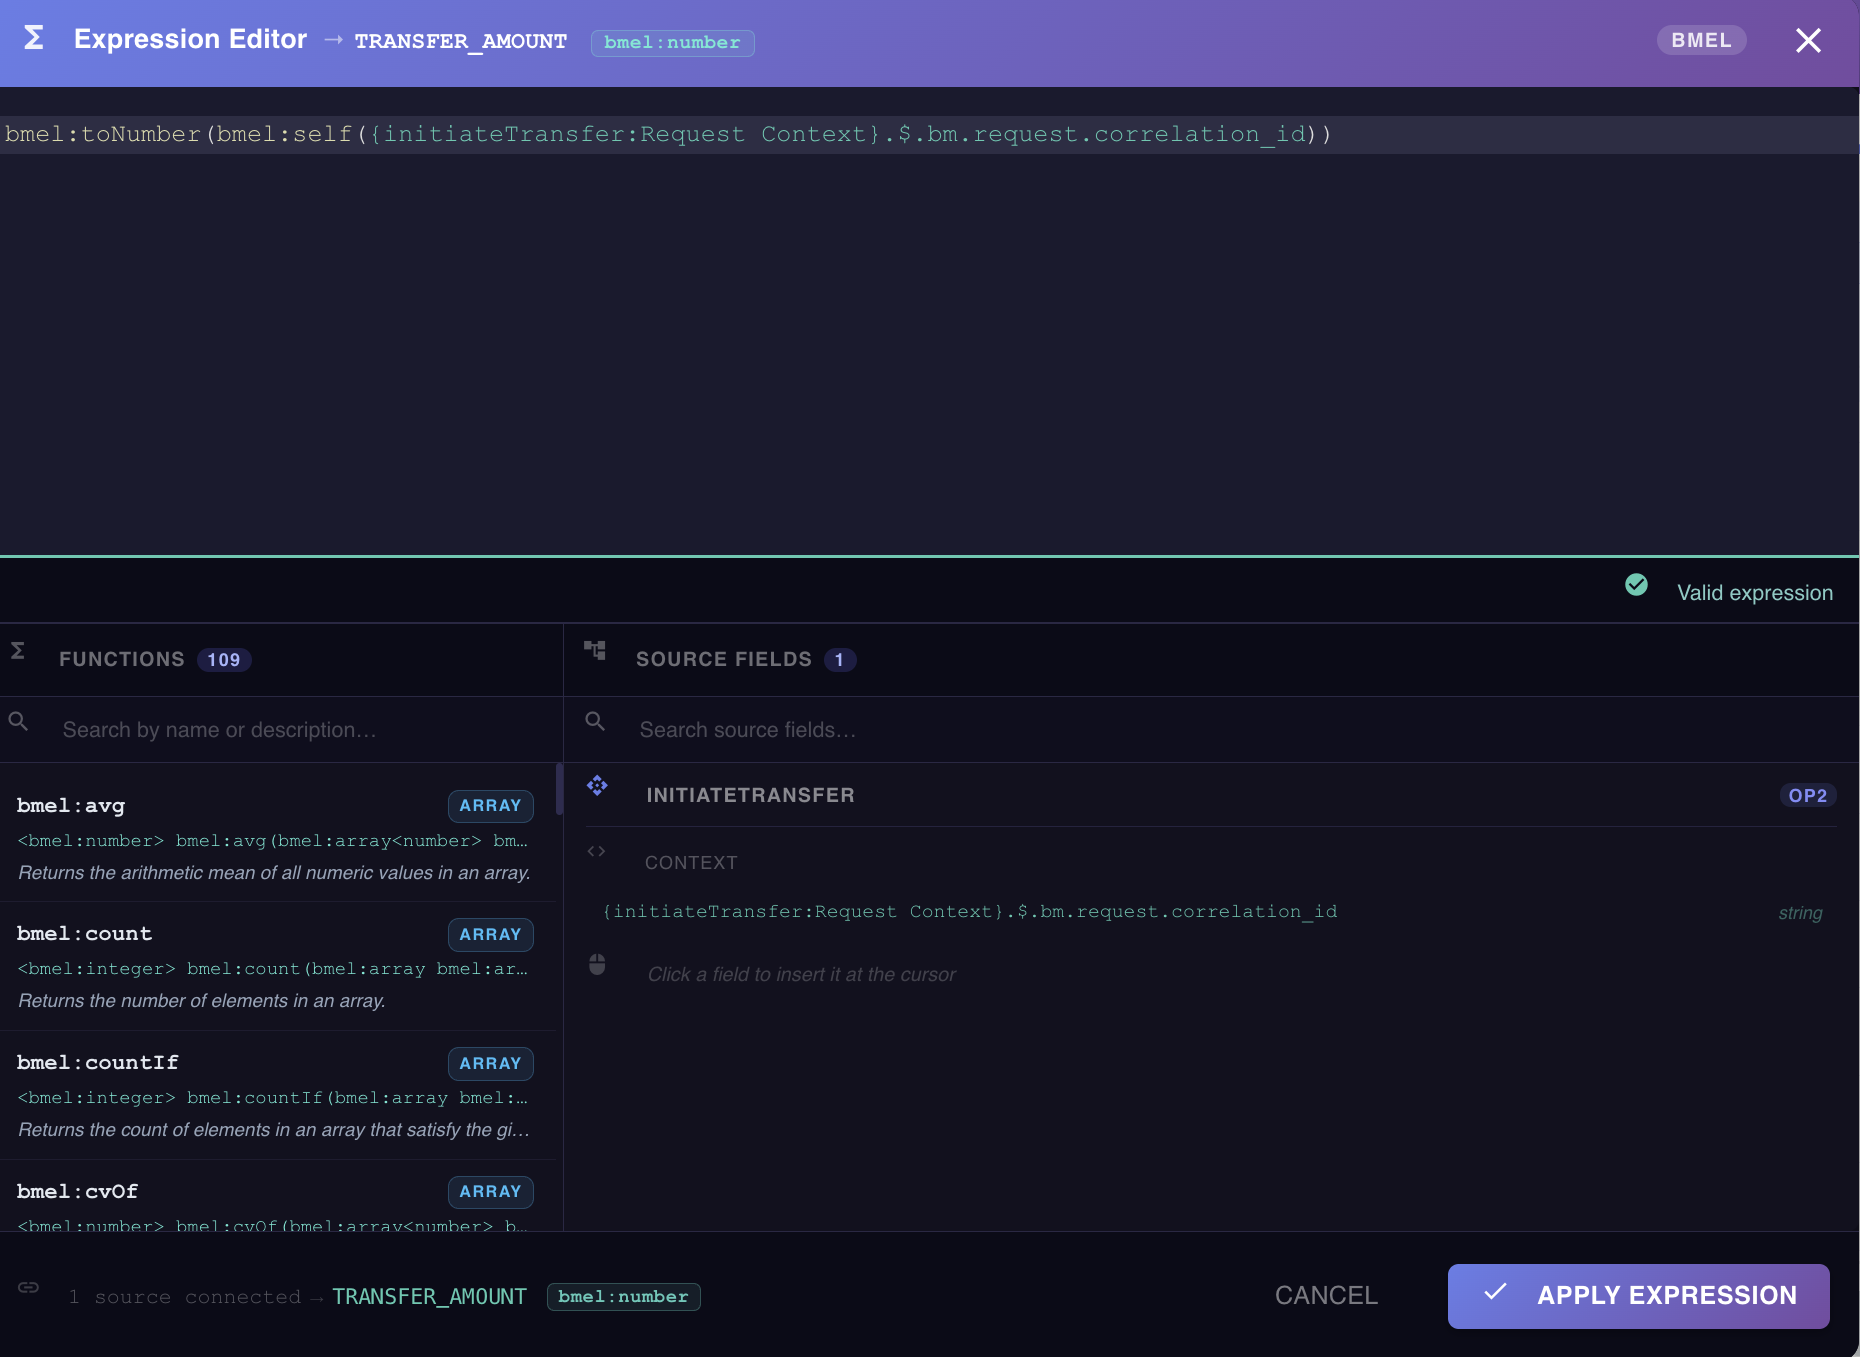
Correct the expression in the editor — the error indicator clears once the syntax is valid, and Apply Expression becomes available again:
Warning
You can't finish creating the event while any BMEL expression has a syntax error — fix or remove it first. The Create button stays disabled until every expression in use is valid.
Cancelling
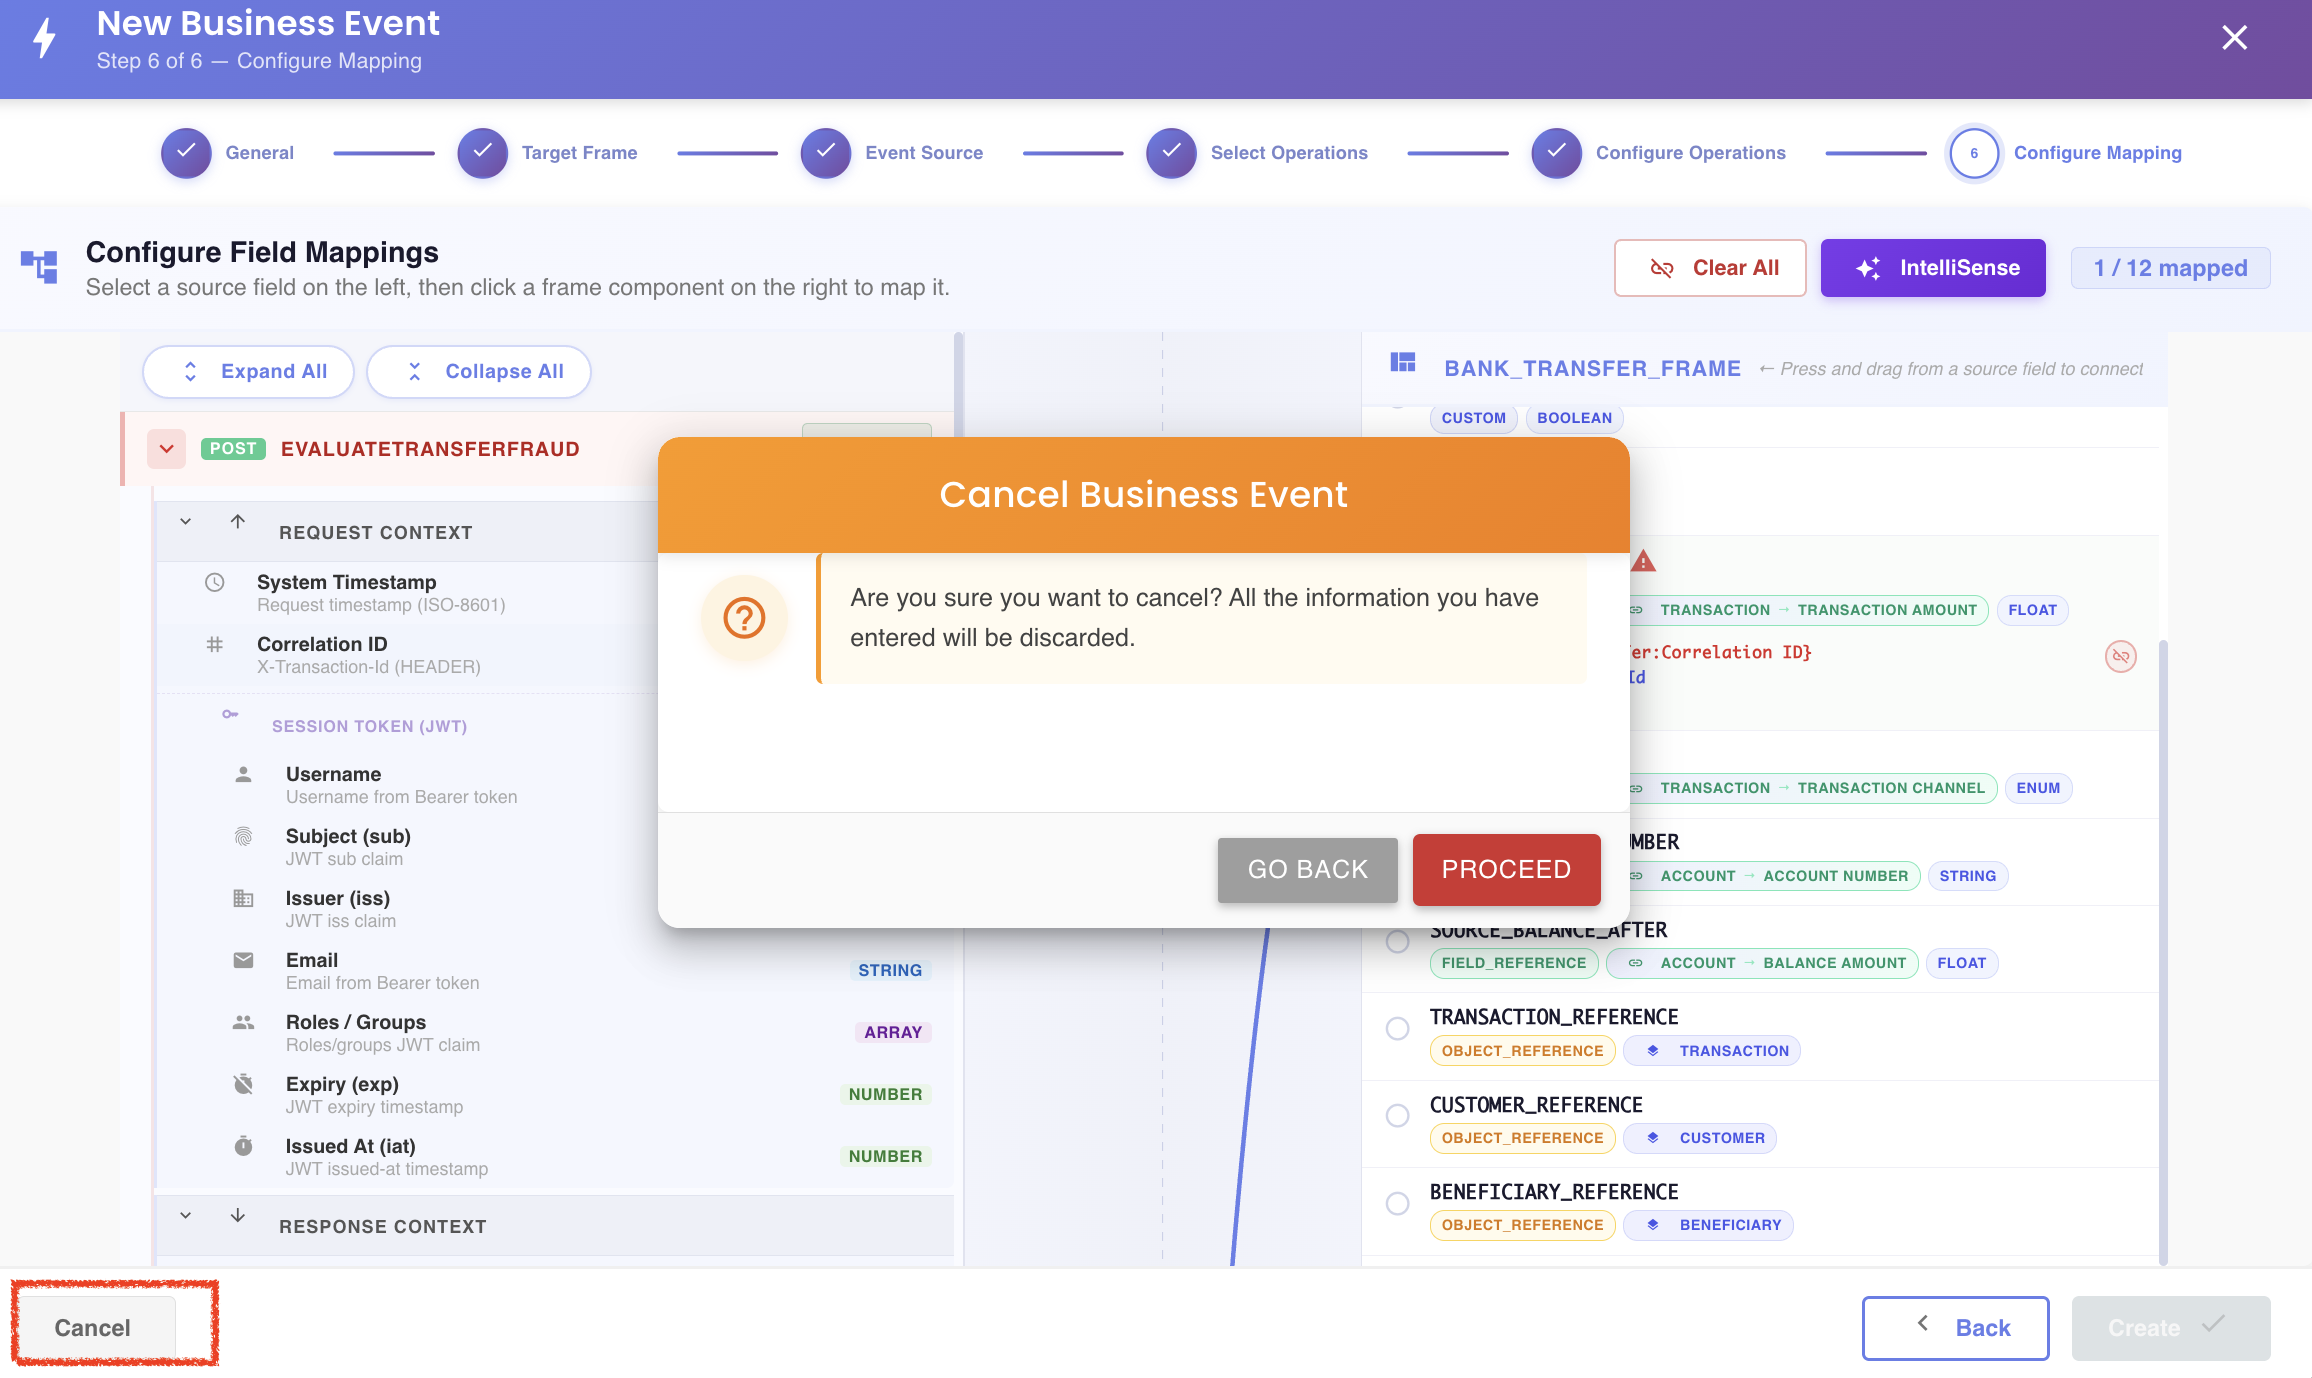
Clicking Cancel at any point in the wizard prompts you to confirm — proceeding discards all progress on this Business Event, including every mapping and BMEL expression configured on this screen:
Creating the Business Event
Once every required target component is mapped and there are no pending BMEL errors, the Create button becomes enabled — optional components don't need to be mapped for this to happen. Click Create to submit the new Business Event:
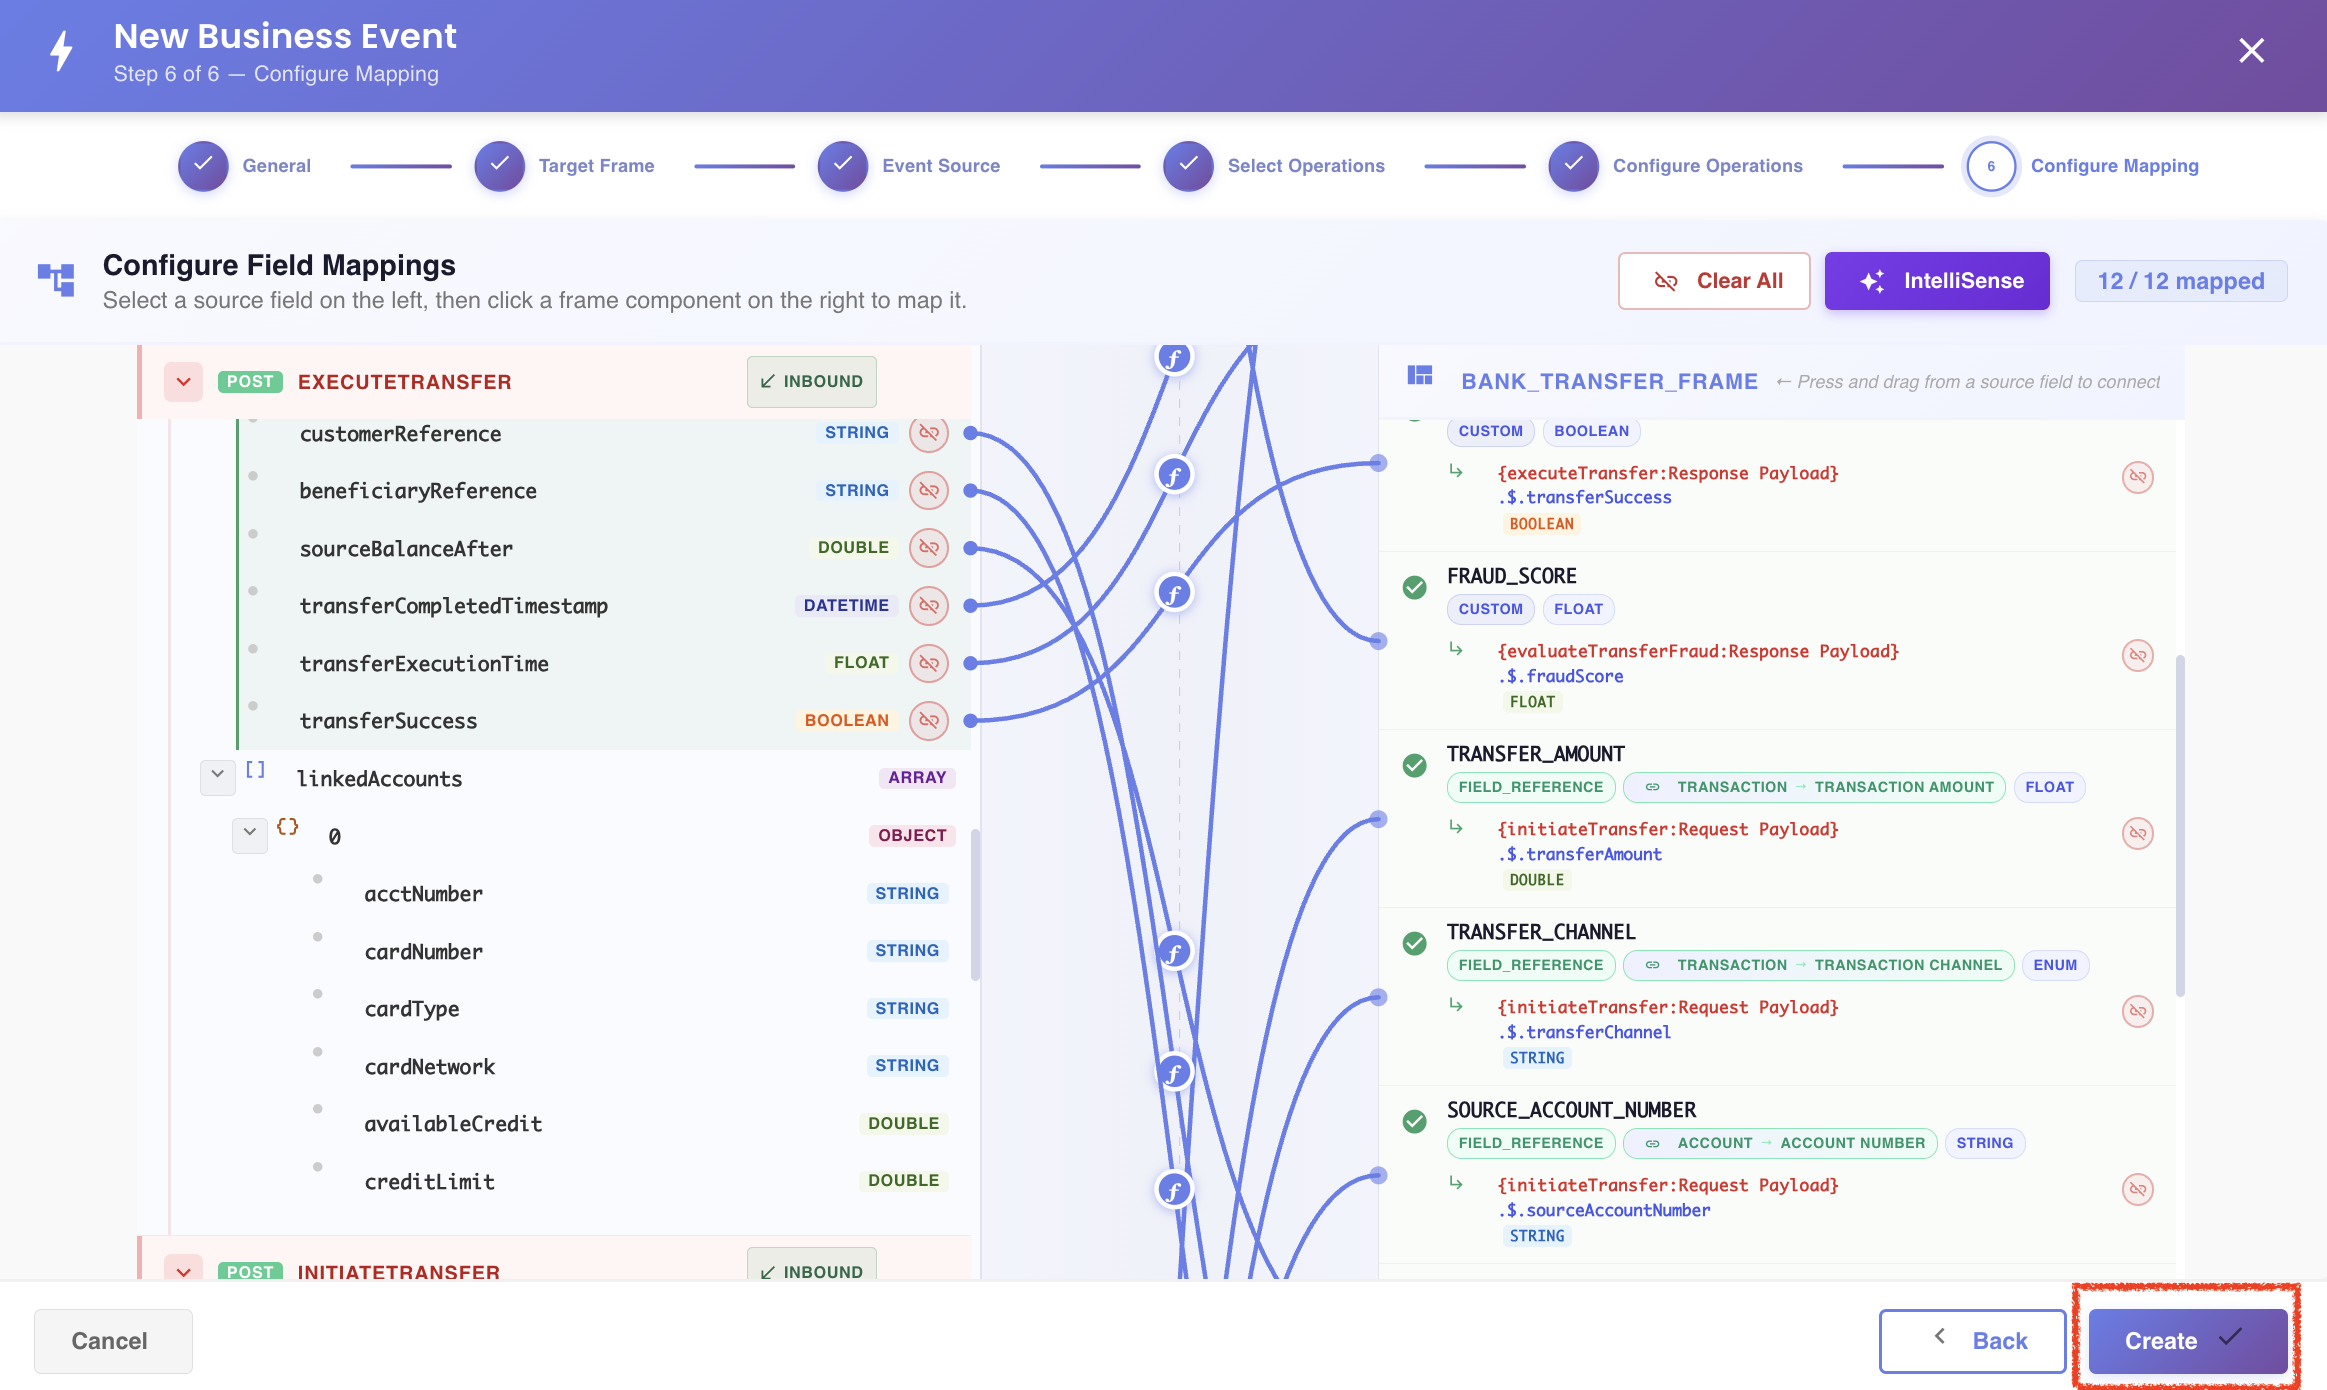
The wizard submits the new Business Event version in DRAFT status and takes you to its summary view.
Click Back to return to Step 5 — Event Identity.
Back to the wizard overview.