Step 3 — Select Target Frame
Pick the Template version and, within it, the single Frame Type that this Business Event will populate every time it fires.
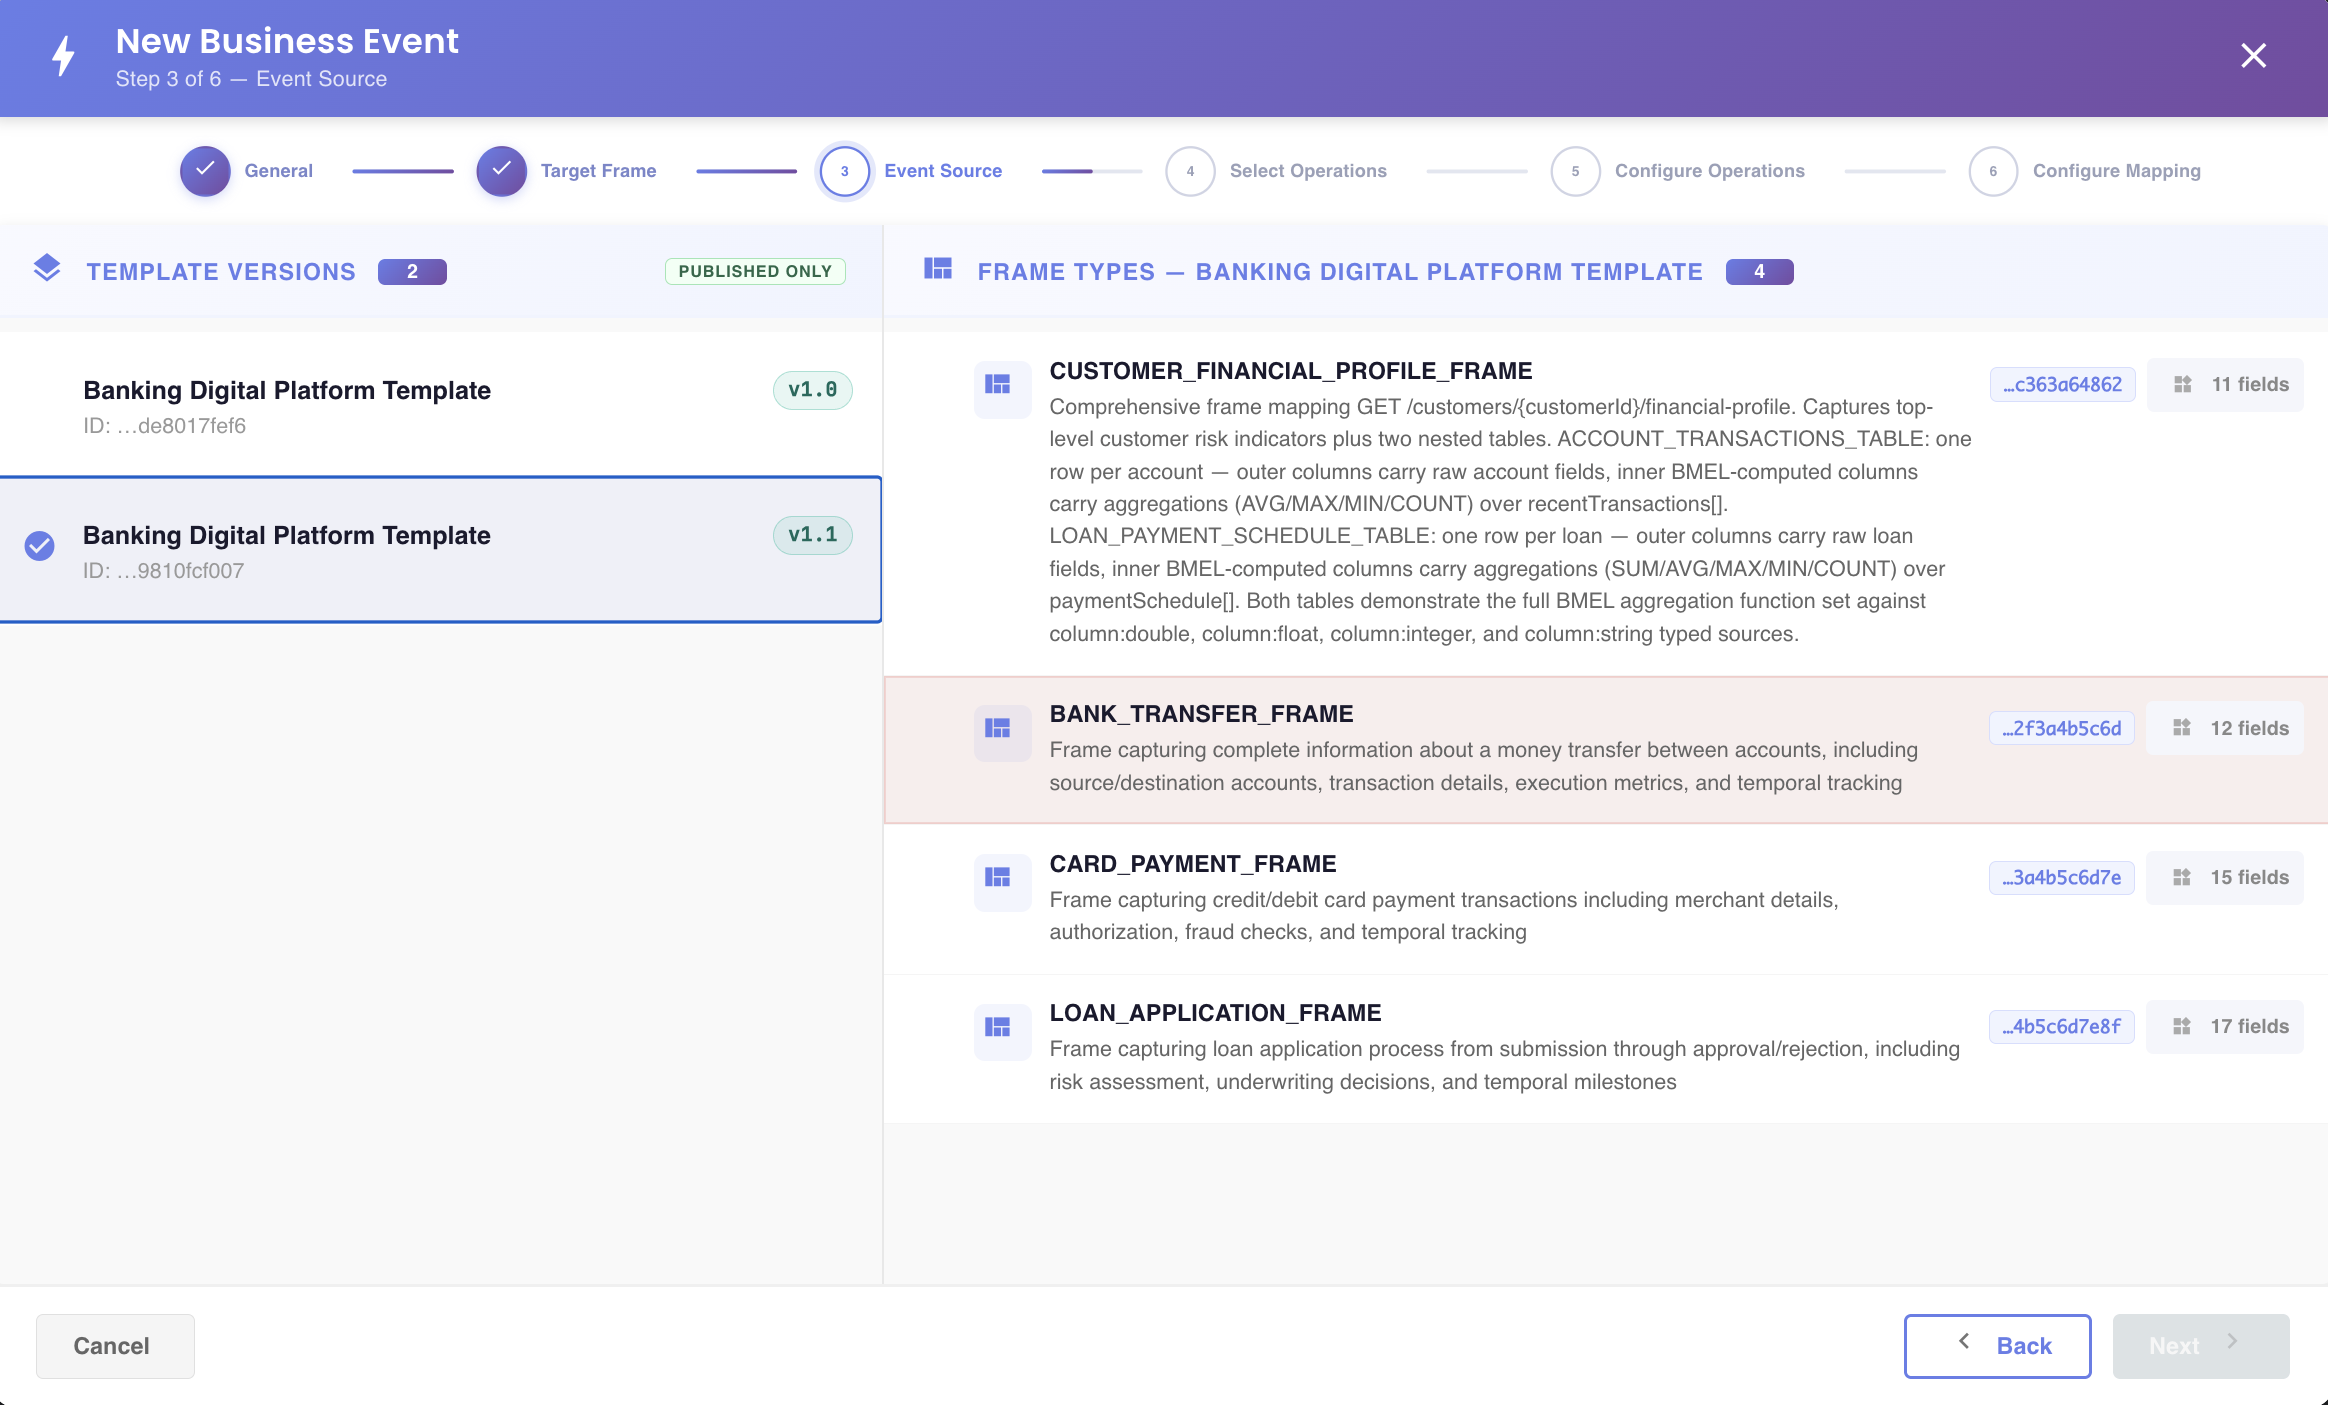
Layout
The screen is split into two panels:
- Left — Template Versions. Lists every published version of the Template associated with the current Profile. Only
PUBLISHEDversions are shown here — draft, pending-review, approved, rejected, or retired versions of the Template are not selectable as a mapping source. - Right — Frame Types. Once you pick a Template version on the left, this panel lists all the Frame Types defined in that specific version.
Selecting
- There is no search box on this screen — selection is fully manual: click a Template version on the left, then click a Frame Type on the right.
- You can only select one Template version at a time.
- Within that version, you can only select one target Frame Type — the Business Event maps to exactly one Frame Type.
The Frame Type you select here defines the set of components you'll map source fields onto in Step 6 — Configure Mapping.
Click Next to continue to Step 4 — Select Operations.
Click Back to return to Step 2 — Source Type.