Create a Collection from Local File
This flow imports an OpenAPI / Swagger specification by uploading a file directly from your local machine. It supports .json, .yaml, and .yml formats.
This is the recommended method when you have a local copy of the spec — for example, a file generated by your build pipeline, exported from Postman or Stoplight, or maintained in your version control repository — and do not need to fetch it from a live endpoint.
Step 1 — Import Source: From Local File
Click + New Collection from the API Collections Summary. The wizard opens on Step 1.
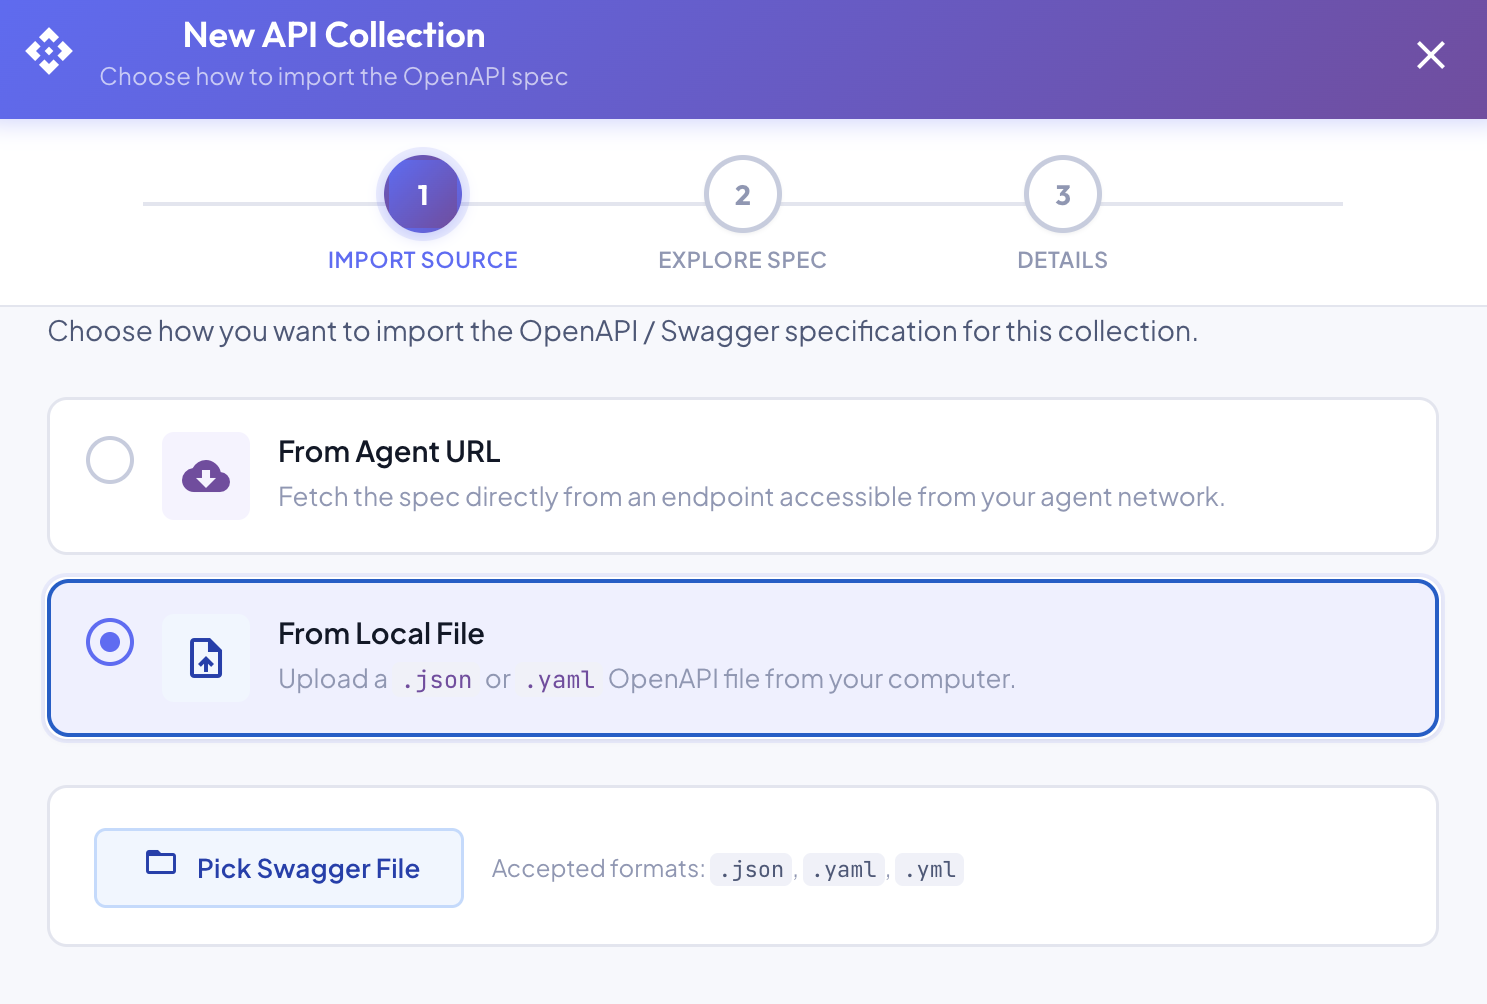
Select From Local File. A file picker area appears below:
| Control | Description |
|---|---|
| Pick Swagger File | Opens your browser's file picker. Accepted formats: .json, .yaml, .yml. |
| Accepted formats | .json · .yaml · .yml |
Click Pick Swagger File and select your OpenAPI spec file. Once selected, the file is parsed immediately client-side and a confirmation row appears showing:
- File name and size (e.g.
banking-enriched.swagger.yaml · 37.5 KB) - Validation result — a green confirmation showing the detected API name and path count (e.g.
✅ Digital Banking Platform API — 8 paths)
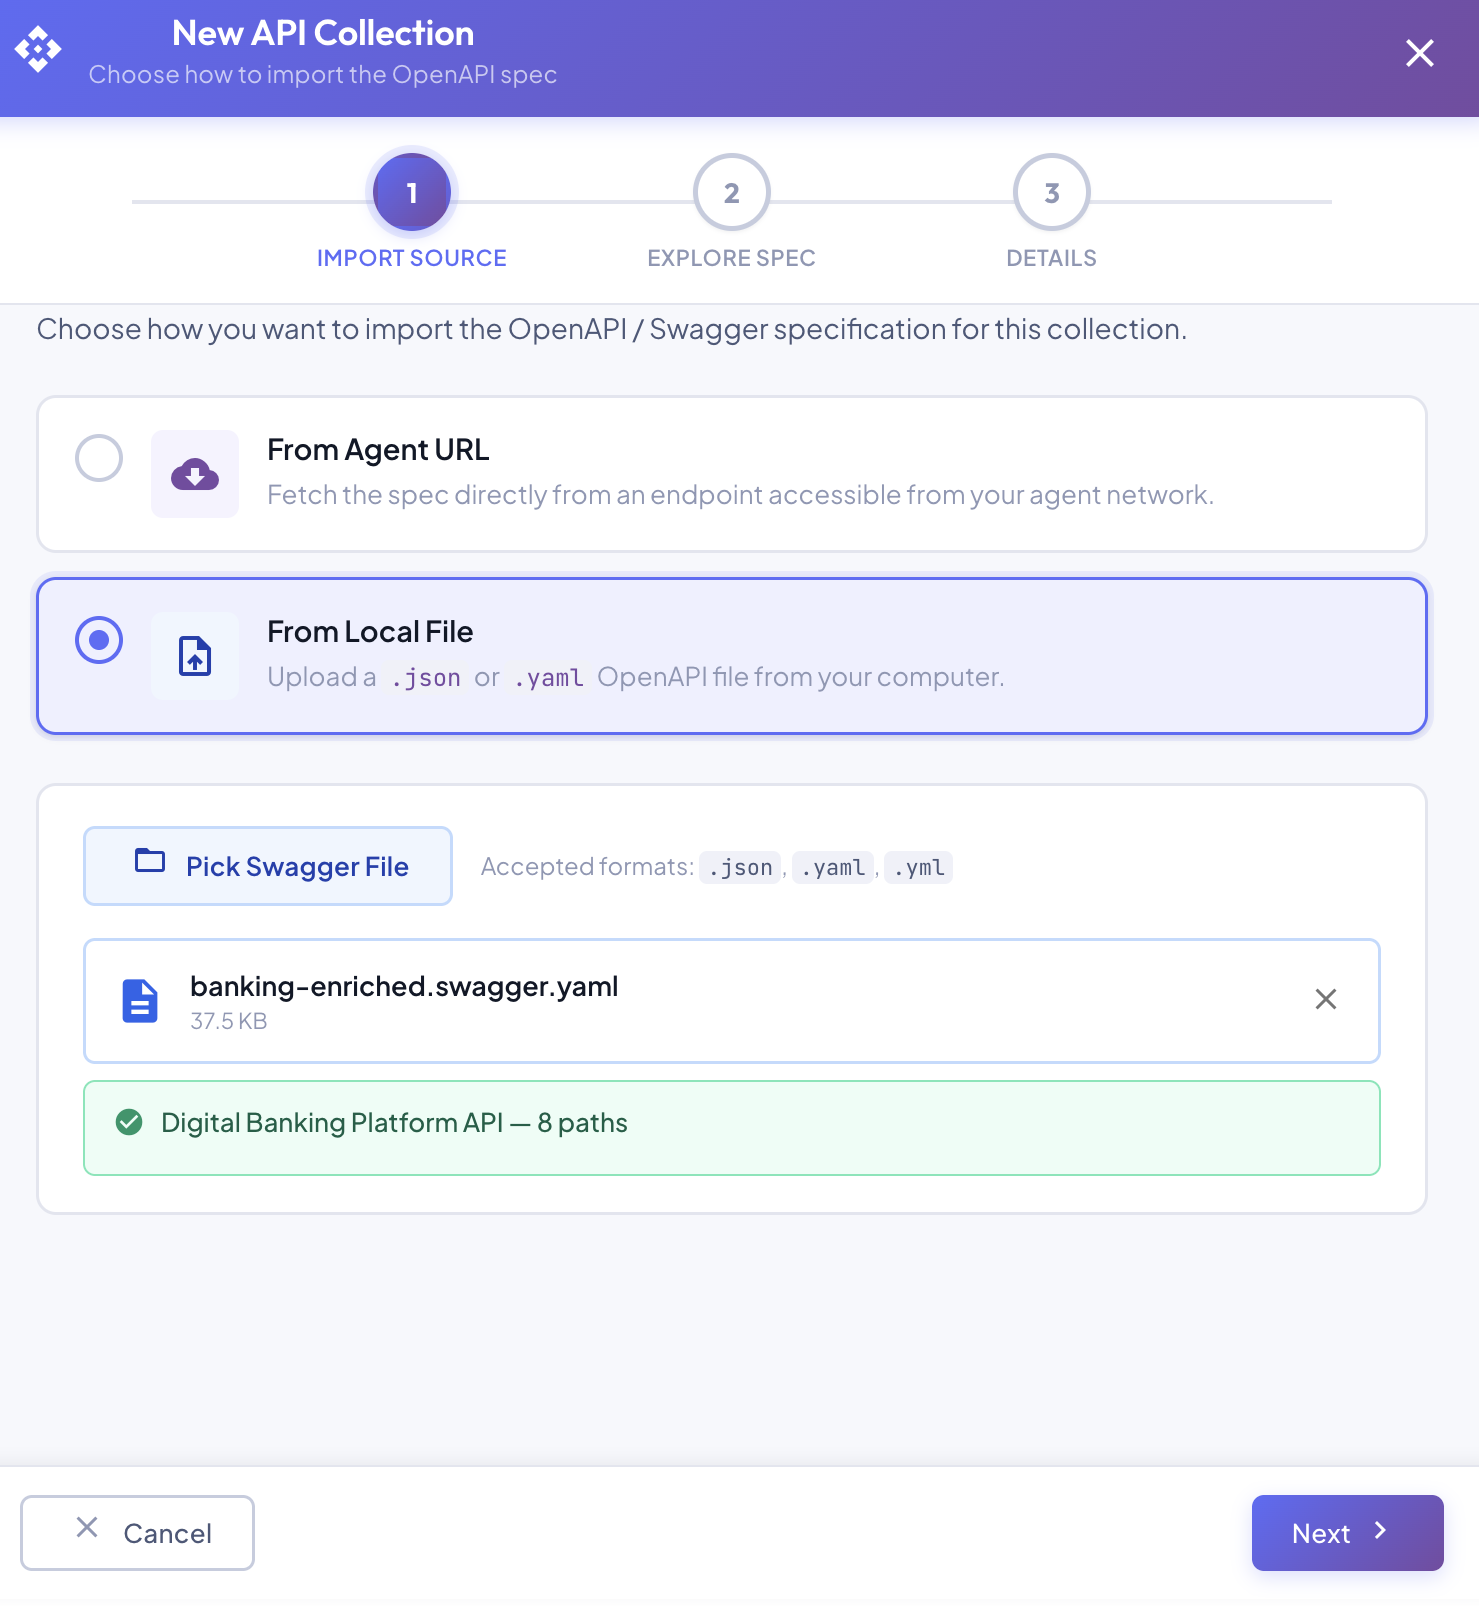
If the file is not a valid OpenAPI / Swagger document, an error is shown instead of the green confirmation. Correct the file and re-upload before proceeding.
Click Next to proceed. The Next button is disabled until a valid file has been successfully parsed.
Step 2 — Explore Spec
BizMetry renders an interactive preview of the imported spec.
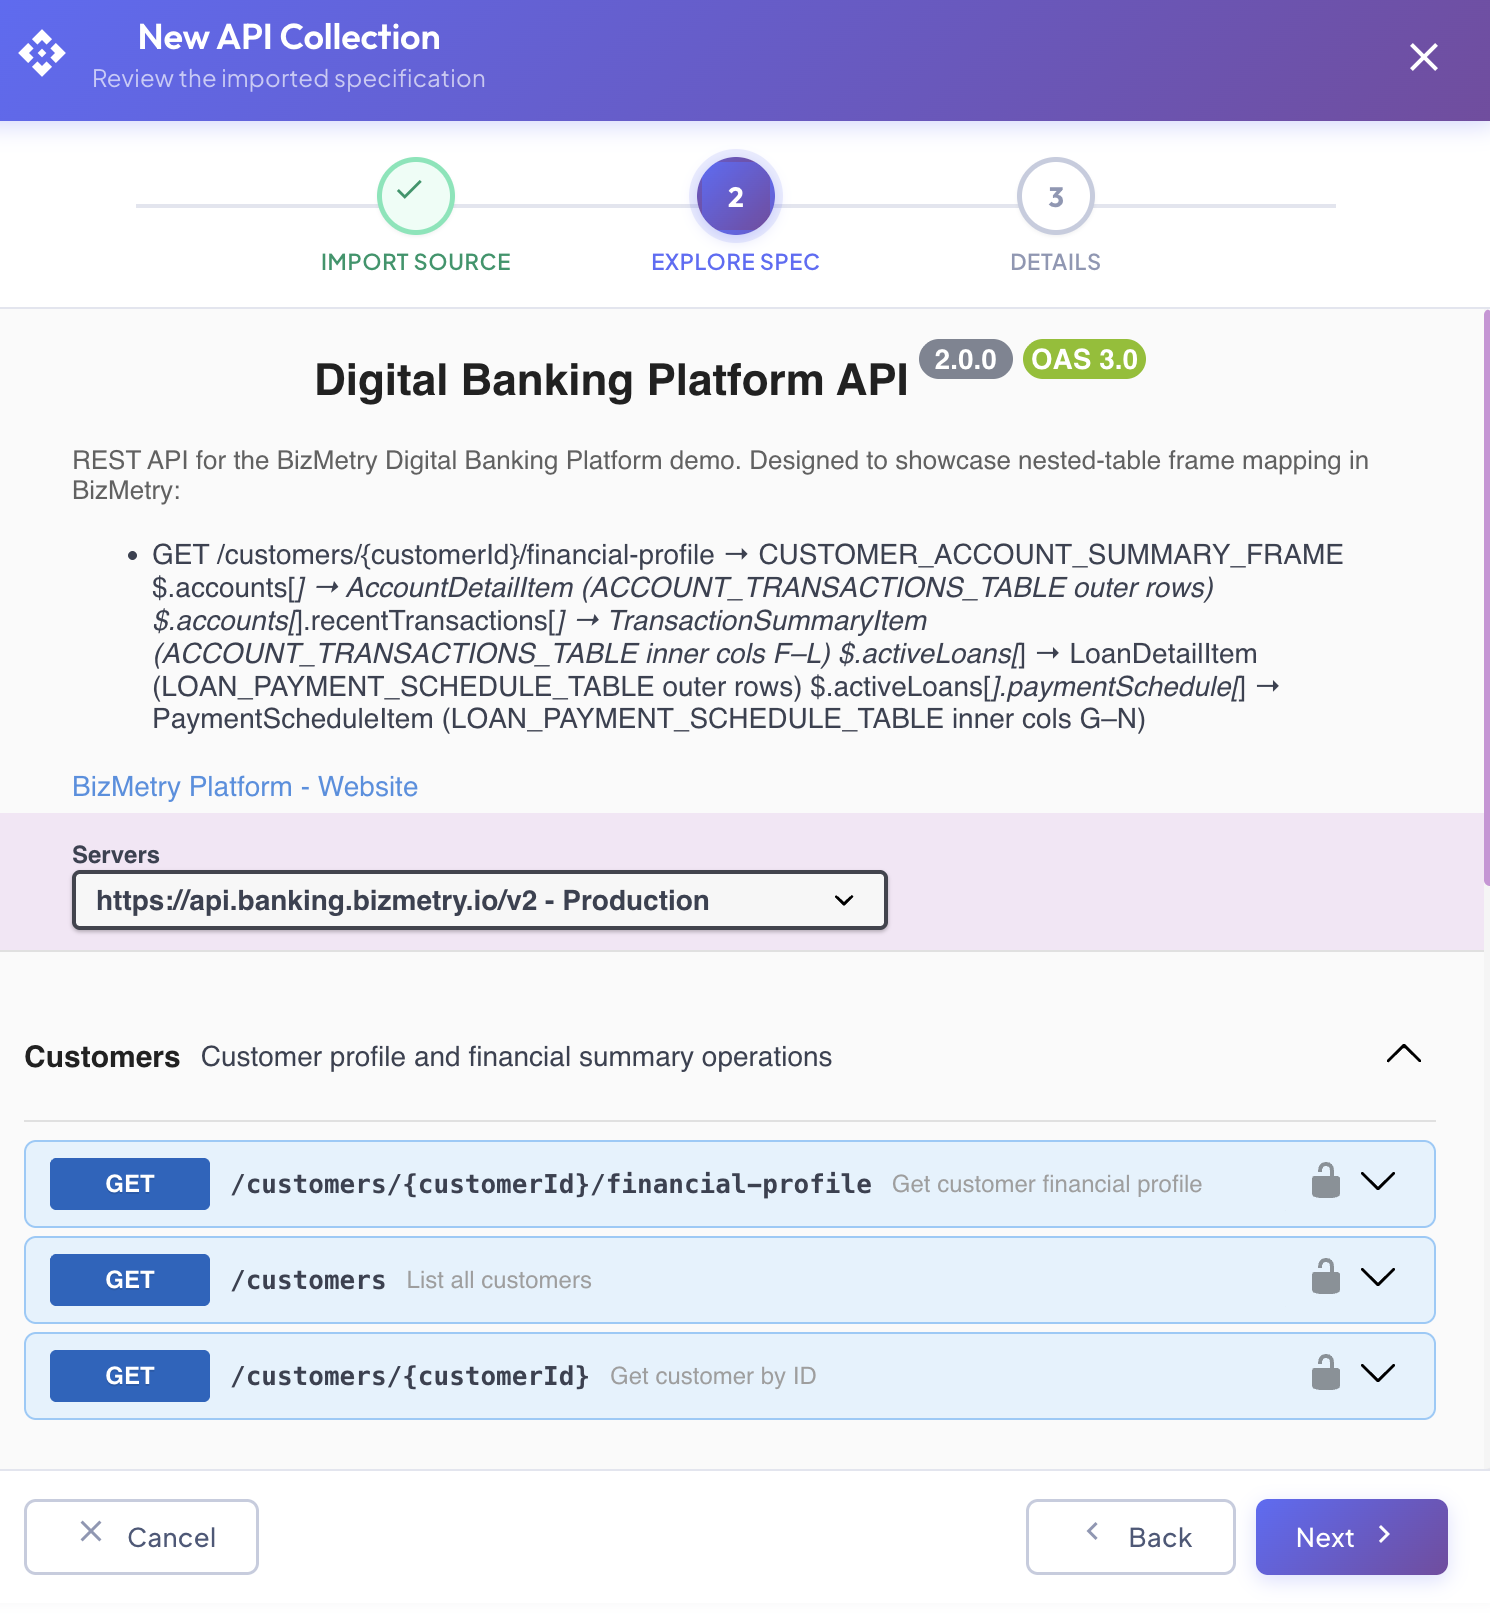
The preview shows:
- API name and version badges — extracted from
info.titleandinfo.version(e.g.Digital Banking Platform API · 2.0.0 · OAS 3.0). - Description — the
info.descriptionfield from the spec, rendered as formatted text. - Server selector — if the spec defines multiple servers, a dropdown allows selecting the active base URL (e.g.
https://api.banking.bizmetry.io/v2 - Production). - Tags and path groups — operations grouped by their OpenAPI tag with a group summary. Each group is expandable.
- Endpoint rows — each row shows the HTTP method badge (
GET,POST, etc.), the path, the operation summary, and a lock icon if the endpoint requires authentication. Click the chevron (▾) to expand and inspect the full operation detail.
Review the spec carefully to confirm it is the correct contract before saving. Click Next to continue. Click Back to return to Step 1 and upload a different file.
Step 3 — Details
Set the collection name and description before saving.
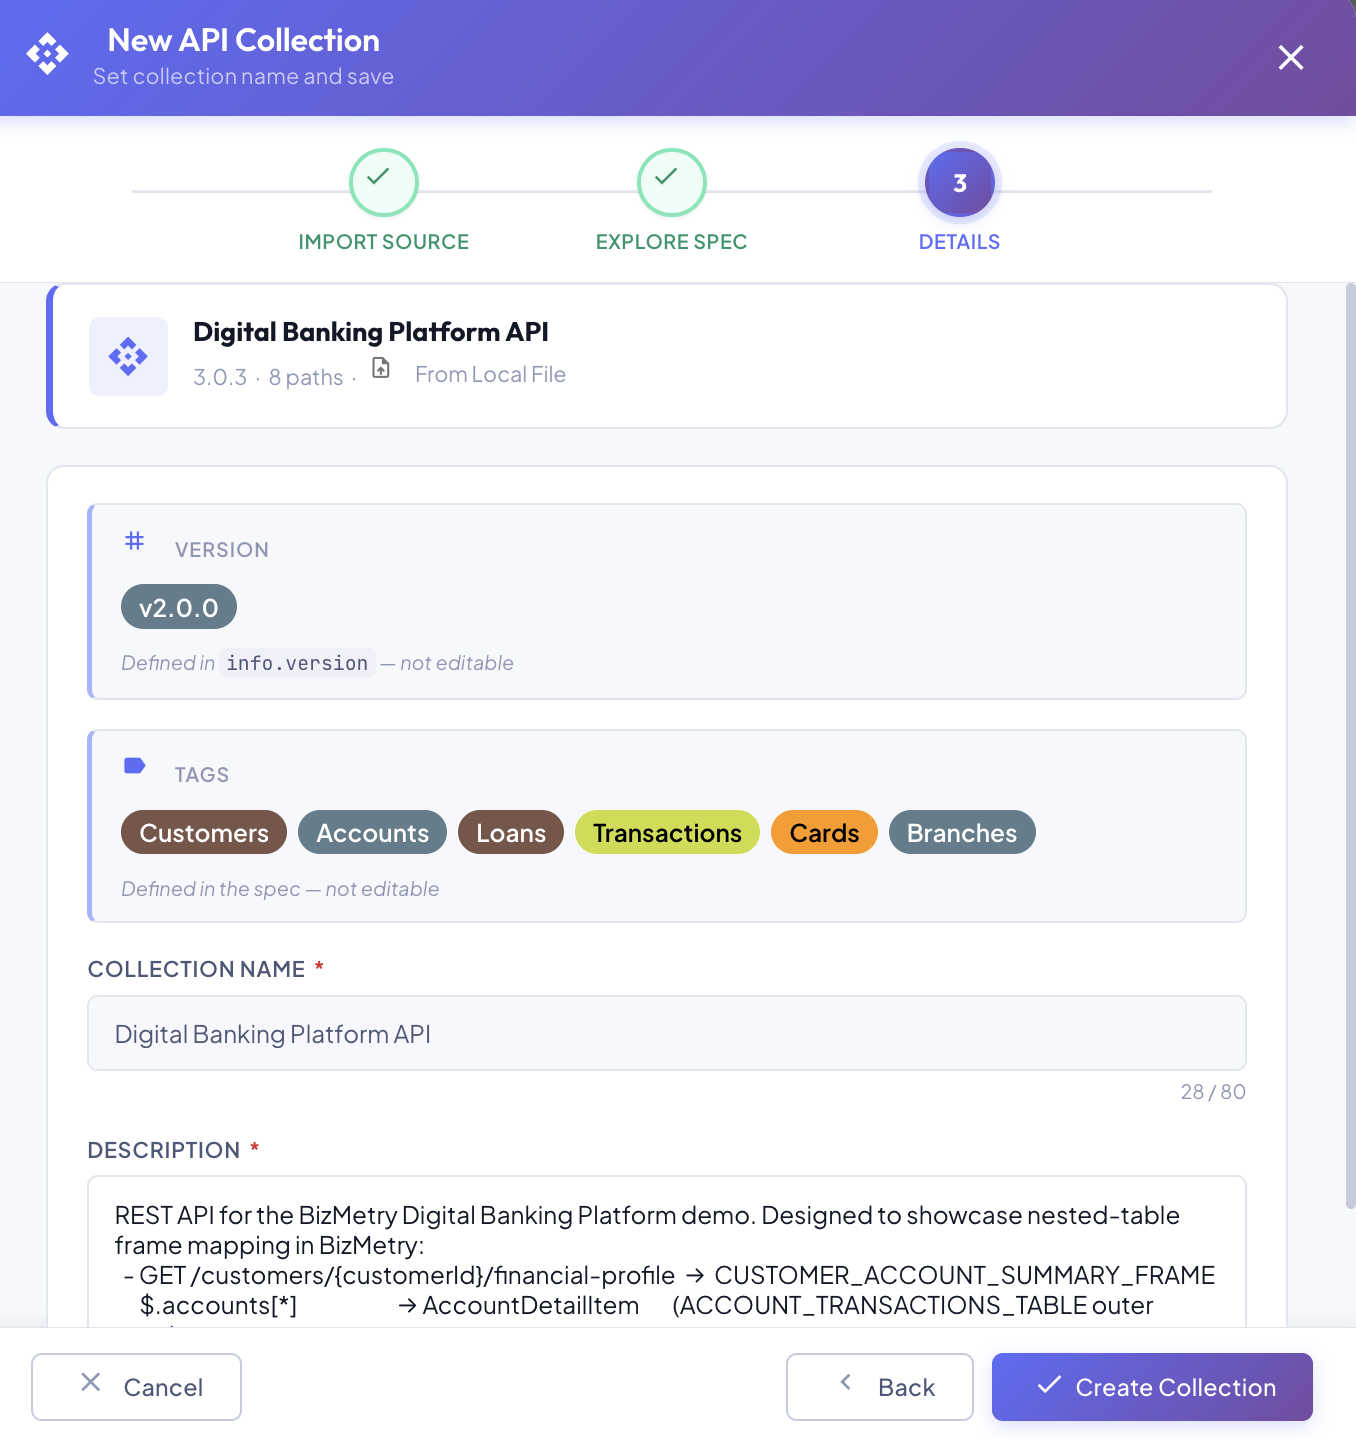
A summary card at the top confirms what was imported:
API name · version · N paths · From Local File
Below it, two read-only fields and two editable fields:
| Field | Editable | Description |
|---|---|---|
| Version | ❌ | Extracted from info.version in the spec. Not editable — defined by the spec itself. |
| Tags | ❌ | Tag groups defined in the spec (e.g. Customers, Accounts, Loans, Transactions, Cards, Branches). Extracted automatically — not editable. |
| Collection Name | ✅ | Display name for this collection in BizMetry (max 80 characters). Pre-filled from the spec's info.title. |
| Description | ✅ | Free-text description of this collection's purpose. Pre-filled from the spec's info.description. |
Click ✓ Create Collection to save the collection in DRAFT state. Click Back to return to Step 2. Click Cancel to discard.
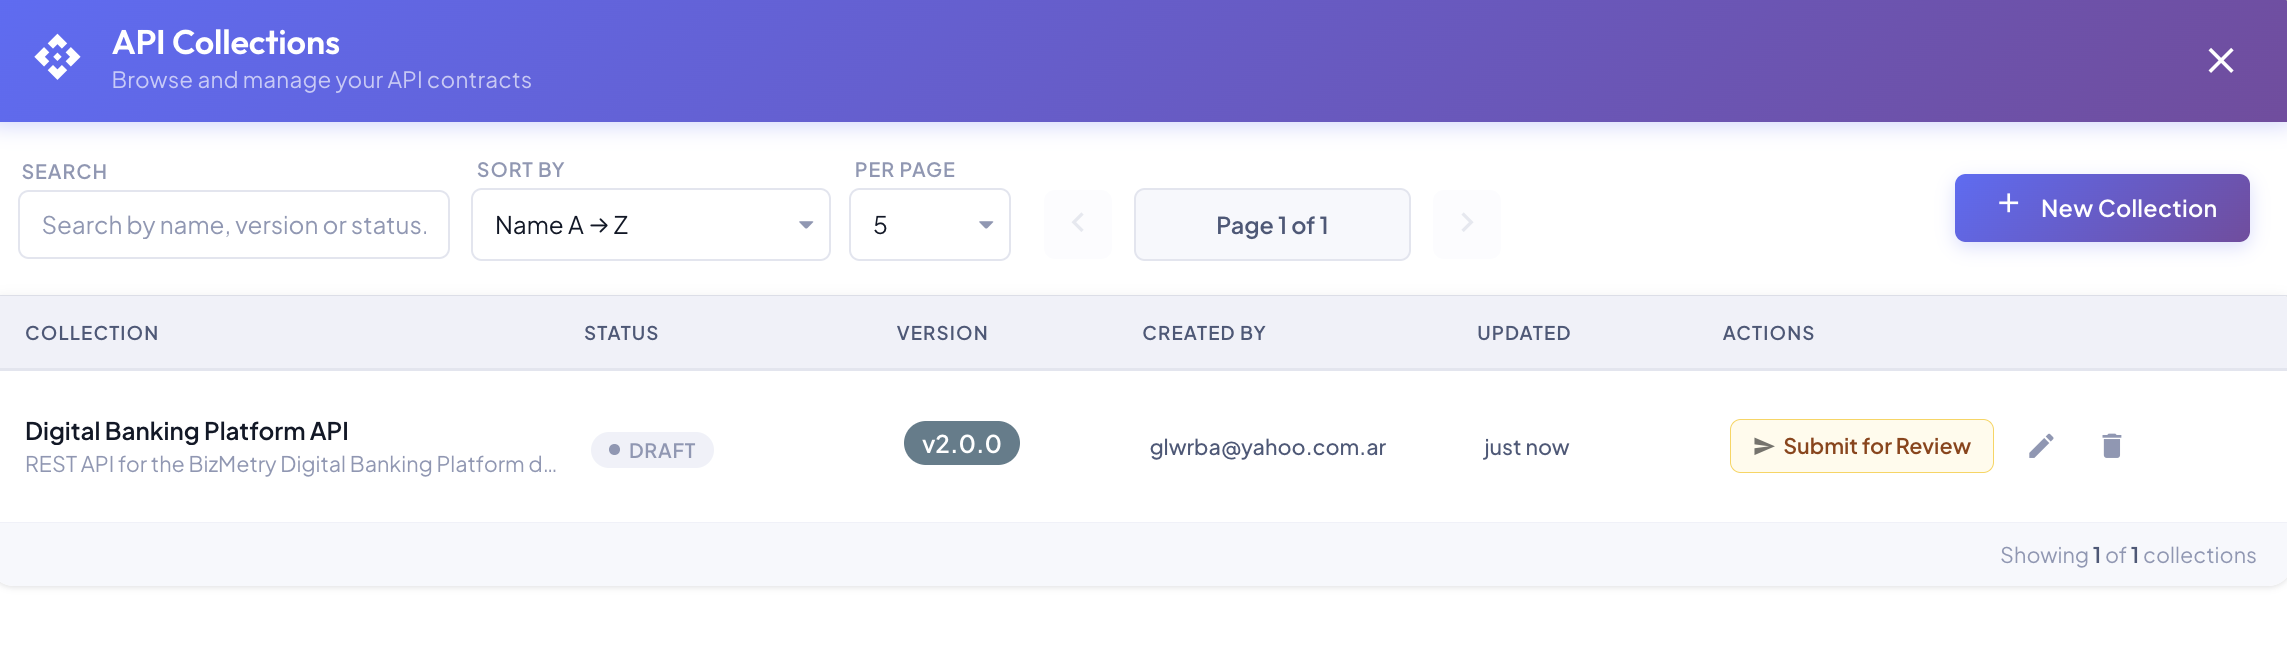
✅ After Creation
The collection is created in DRAFT state and appears in the API Collections Summary. From there you can:
- Edit the name and description (while in DRAFT).
- Submit it for review when it is ready.
- Proceed through the full lifecycle to publish it and make it available for Biz Event mappings.