Create a Collection from Agent URL
This flow imports an OpenAPI / Swagger specification by fetching it directly from a live endpoint accessible through a connected BizMetry agent. The agent acts as a network proxy between the BizMetry platform and the on-premise service, allowing the platform to reach internal Swagger docs that are not publicly exposed.
This is the recommended method when your services run on-premise or in a private network and expose a live Swagger UI endpoint (e.g. /v3/api-docs, /swagger.json). The agent must be ONLINE and able to reach the target service from the same network.
Step 1 — Import Source: From Agent URL
Click + New Collection from the API Collections Summary. The wizard opens on Step 1.
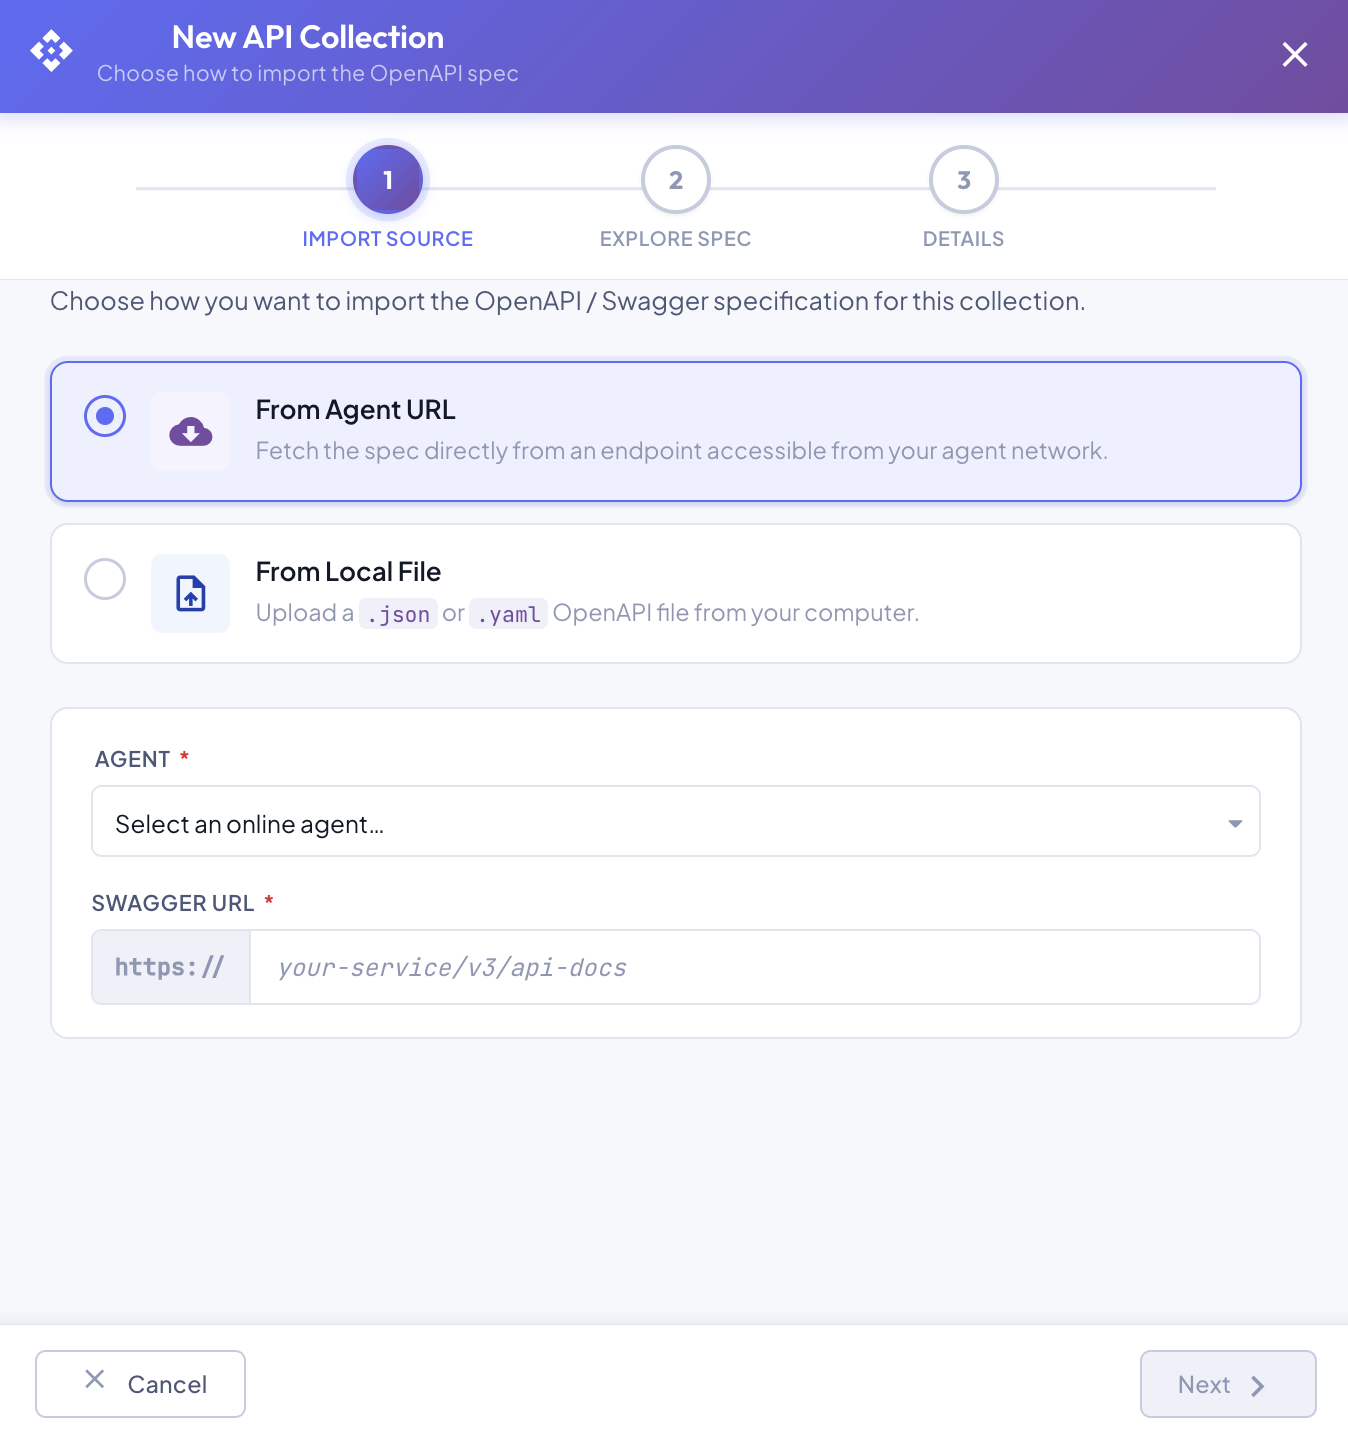
Select From Agent URL. Two fields appear below:
| Field | Required | Description |
|---|---|---|
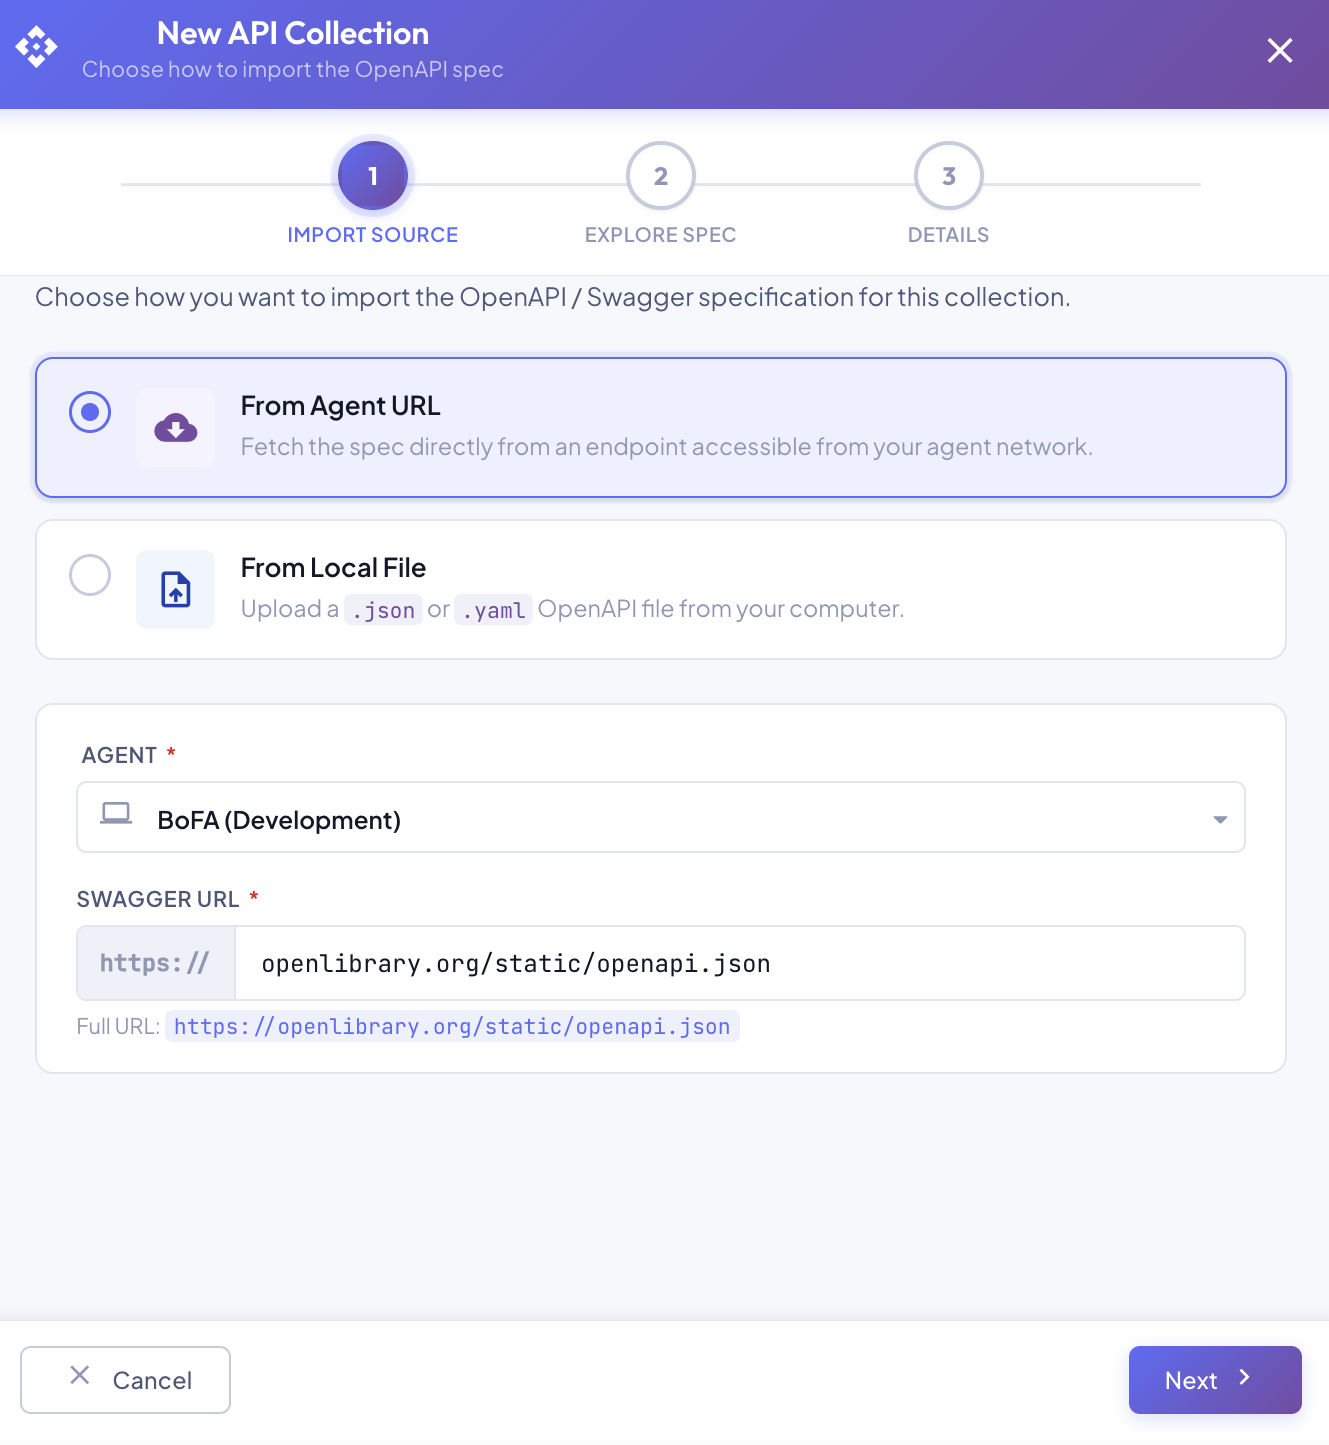
| Agent | ✅ | Select an ONLINE agent from the dropdown. Only agents currently in ONLINE status are available. The agent must be reachable and able to connect to the target service. |
| Swagger URL | ✅ | The path portion of the Swagger spec endpoint (e.g. your-service/v3/api-docs). BizMetry prepends https:// automatically — the full resolved URL is shown below the field for confirmation. |
The Swagger URL field expects only the path and host — do not include https://. Example: openlibrary.org/static/openapi.json resolves to https://openlibrary.org/static/openapi.json.
The Next button is disabled until a valid agent is selected and a Swagger URL is entered. The agent must be ONLINE at the time of import — offline agents are not listed.
Once both fields are filled, click Next to fetch and parse the spec.
Step 2 — Explore Spec
BizMetry fetches the spec through the selected agent and renders an interactive preview.
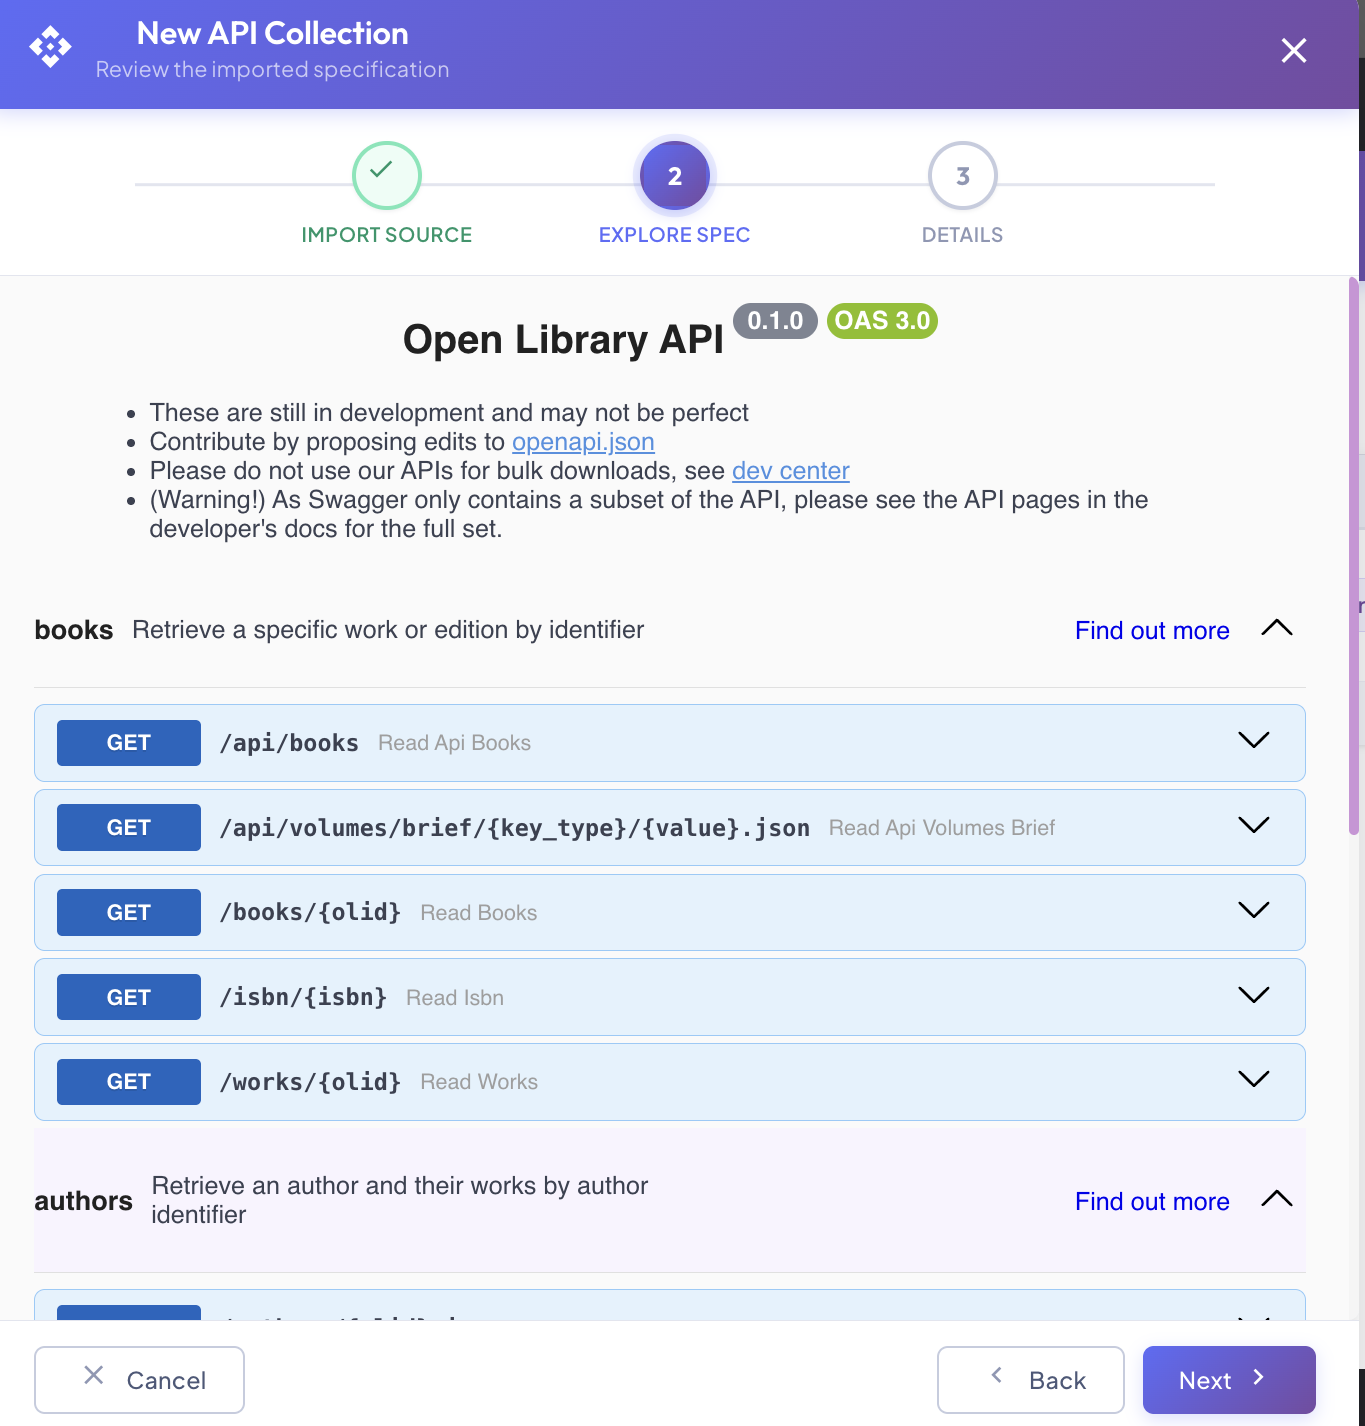
The preview shows:
- API name and version badges — extracted from
info.titleandinfo.versionin the spec (e.g.Open Library API · 0.1.0 · OAS 3.0). - Description — the
info.descriptionfield from the spec, rendered as formatted text. - Server selector — if the spec defines multiple servers, a dropdown allows selecting the active base URL.
- Tags and path groups — operations grouped by their OpenAPI tag. Each group shows a summary and can be expanded to view individual endpoints.
- Endpoint rows — each row shows the HTTP method badge (e.g.
GET), the path, and the operation summary. Click the chevron (▾) to expand and inspect the full operation detail including parameters and response schemas.
Review the spec to confirm it is the correct API contract before proceeding. Click Next to continue. Click Back to return to Step 1 and change the source.
Step 3 — Details
Set the collection name and description before saving.
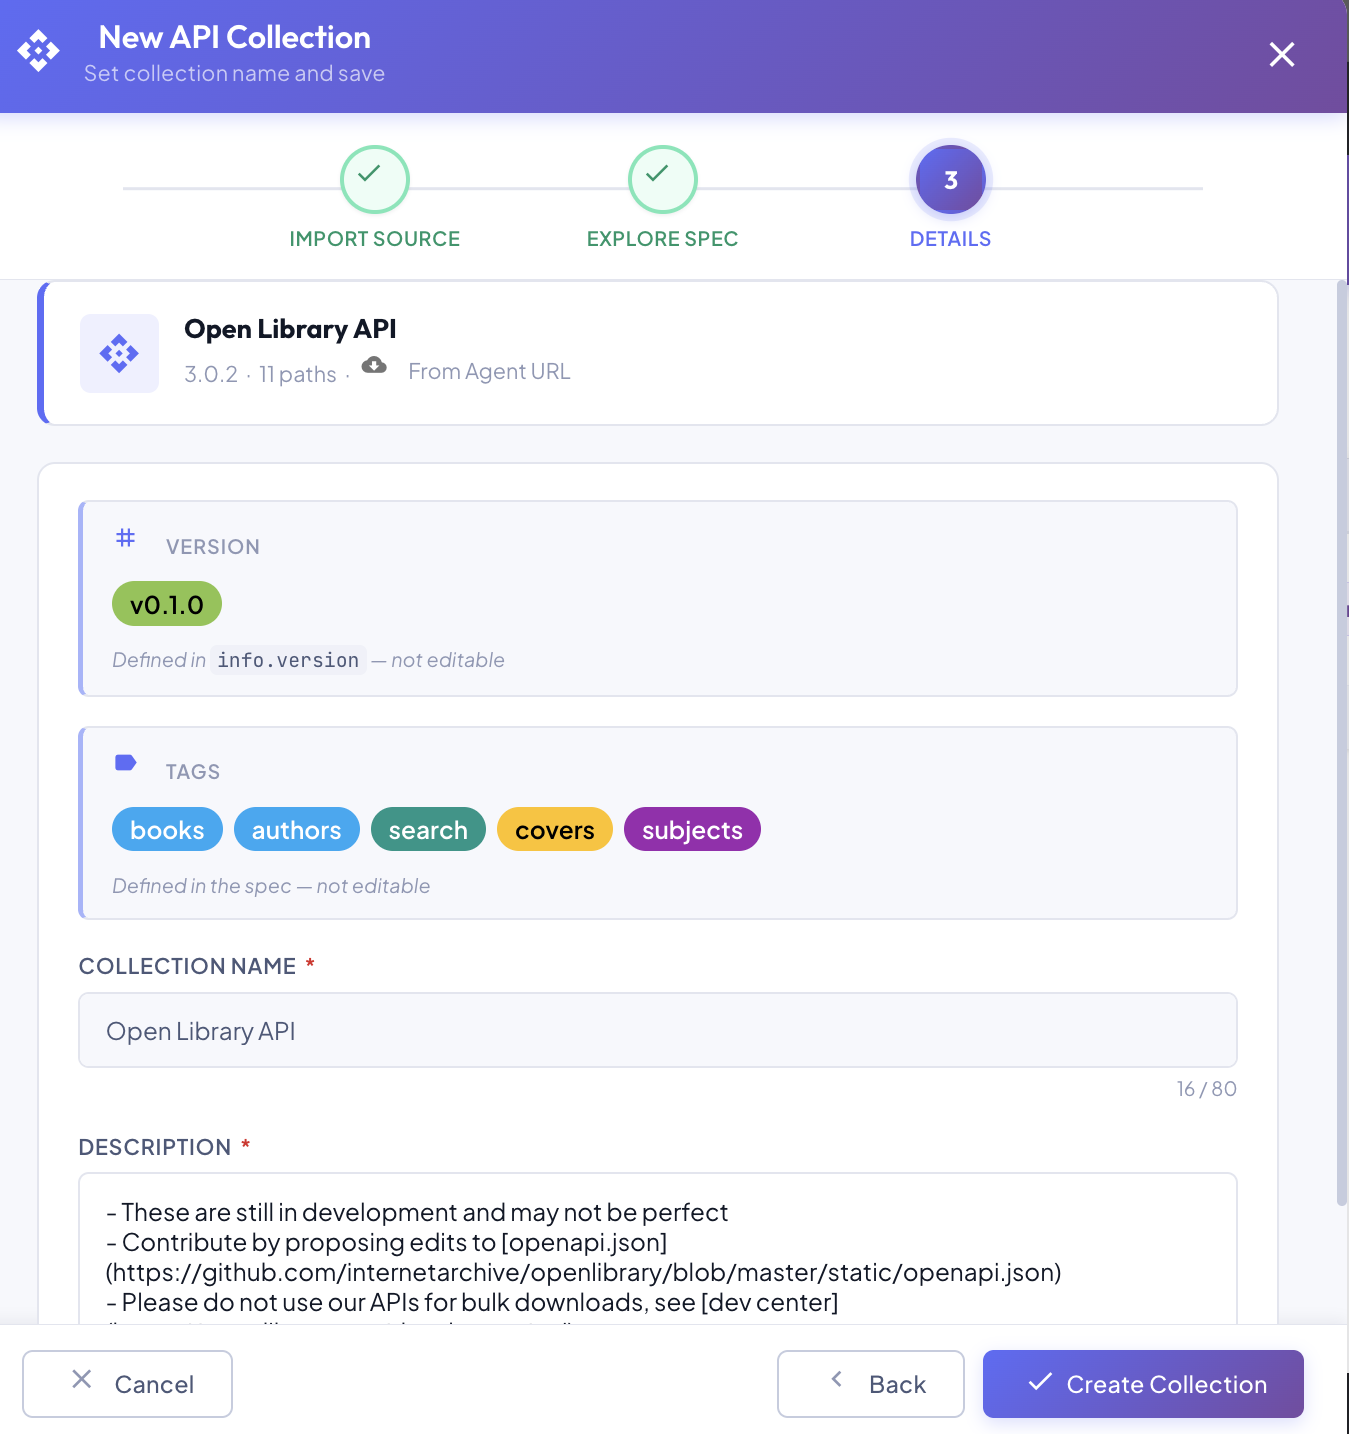
A summary card at the top confirms what was imported:
API name · version · N paths · From Agent URL
Below it, two read-only fields and two editable fields:
| Field | Editable | Description |
|---|---|---|
| Version | ❌ | Extracted from info.version in the spec. Not editable — defined by the spec itself. |
| Tags | ❌ | Tag groups defined in the spec. Not editable — extracted automatically. |
| Collection Name | ✅ | Display name for this collection in BizMetry (max 80 characters). Pre-filled from the spec's info.title. |
| Description | ✅ | Free-text description of this collection's purpose. Pre-filled from the spec's info.description. |
Click ✓ Create Collection to save the collection in DRAFT state. Click Back to return to Step 2. Click Cancel to discard.
✅ After Creation
The collection is created in DRAFT state and appears in the API Collections Summary. From there you can:
- Edit the name and description (while in DRAFT).
- Submit it for review when it is ready.
- Proceed through the full lifecycle to publish it and make it available for Biz Event mappings.